Video player in Angular applications ⚡ AMP
Learn how to integrate smooth video playback into your Angular apps using the HTML5 <video> tag, Video.js, and adaptive streaming. Optimize delivery with best practices.
This tutorial walks through embedding videos using the HTML5 <video> tag, customizing playback with Video.js, and implementing Adaptive Bitrate Streaming (ABS). We’ll also explore video optimization techniques with ImageKit, covering transformations, resizing, and format selection to enhance performance across different devices and networks.
Whether you're adding basic video playback or optimizing for a scalable, high-quality streaming experience, this guide provides practical implementations to help you get there.
Embed videos with the HTML5 tag
The HTML5 <video> tag provides a straightforward way to embed videos directly into web pages. Here is a basic example:
<video src="your-video.mp4" width="640" height="360" controls>
  This text will be rendered if browser does not support the video tag.
</video>
In a <video> tag, the src attribute specifies the location of the video file, which can be a relative HTTP path within your website or a full HTTP URL. The width and height attributes define the dimensions of the video player. The controls attribute adds the default browser controls, such as play, pause, and volume.
Learn more about the <video> tag and its attributes: HTML Video Element.
Define multiple video sources using tag
To ensure maximum compatibility across different browsers, it's a good idea to provide video sources in multiple formats. You can do so by using the <source> tag within the <video> element to provide video sources in multiple formats. This allows the browser to select a compatible format.
The order in which you list the <source> tags is crucial. The browser starts from the top and uses the first format it supports. Here is how you can do it:
<video width="640" height="360" controls>
  <source src="your-video.webm" type="video/webm">
  <source src="your-video.mp4" type="video/mp4">
</video>
In a <source> tag, the src attribute specifies the URL of the video file, and the type attribute specifies the MIME type of the video file.
Basic video player in Angular application
Let's start by creating an Angular app from scratch.
First, you need to install Angular CLI:
npm install -g @angular/cliNext, create a new Angular project:
ng new my-video-appNavigate to the project directory:
cd my-video-appNow, let's create a reusable Angular component for embedding videos using the <video> tag. Run the following command to generate the component
ng generate component video-player --style none --skip-tests true --inline-templateThis command will create a file at src/app/video-player/video-player.component.ts. Open this file and replace its content with the code below:
import { Component, Input } from "@angular/core";
import { NgFor } from "@angular/common";

@Component({
  selector: "app-video-player",
  imports: [NgFor],
  template: `
    <video
      [attr.src]="videoSourceList.length ? null : src"
      [attr.width]="width ?? 'auto'"
      [attr.height]="height ?? 'auto'"
      [attr.poster]="poster"
      [attr.controls]="controls"
      [attr.autoplay]="autoplay"
      [attr.playsInline]="autoplay"
    >
      <source
        *ngFor="let v of videoSourceList"
        [src]="v.src"
        [type]="v.mimeType"
      />
      Your browser does not support the video tag...
    </video>
  `,
})
export class VideoPlayerComponent {
  @Input() videoSourceList: { src: string; mimeType?: string }[] = [];
  @Input() src?: string;
  @Input() width?: number;
  @Input() height?: number;
  @Input() poster?: string;
  @Input() controls?: boolean;
  @Input() autoplay?: boolean;
}
Following are some additional HTML5 <video> tag attributes we used in our component:
posterSpecifies an image to be displayed before the video starts playing.controlsAdds video controls like play, pause, and volume.autoplayThe video automatically starts playing when the page loads.playsinlineEnsures the video plays within the playback area. This is useful for Safari browser on mobile devices so video can play without moving to fullscreen playback mode. (Note: In Angularplaysinlineis mapped toplaysInlinein camelCase)
Now we can use this component in our Angular application. Check the examples below.
Adjust the video player’s width and height
<app-video-player
  src="https://ik.imagekit.io/ikmedia/example_video.mp4"
  [autoplay]="true"
  [width]="640"
  [height]="480"
></app-video-player>
The video player by default sets its dimensions to the video’s resolution. This can cause layout shifts in your web application as the video loads. To avoid layout shifts, we must define the width and height of the video player. In this case, we set it to 640X480.
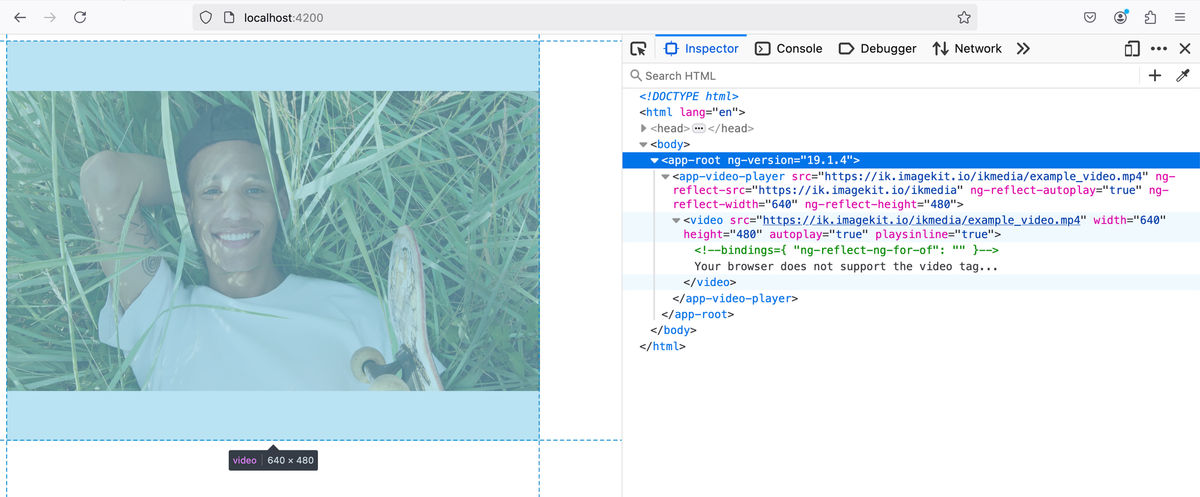
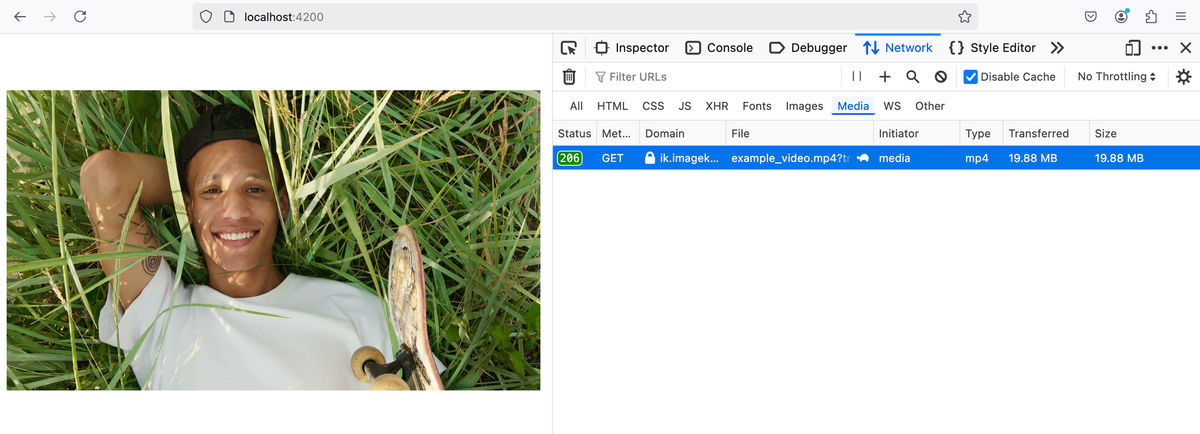
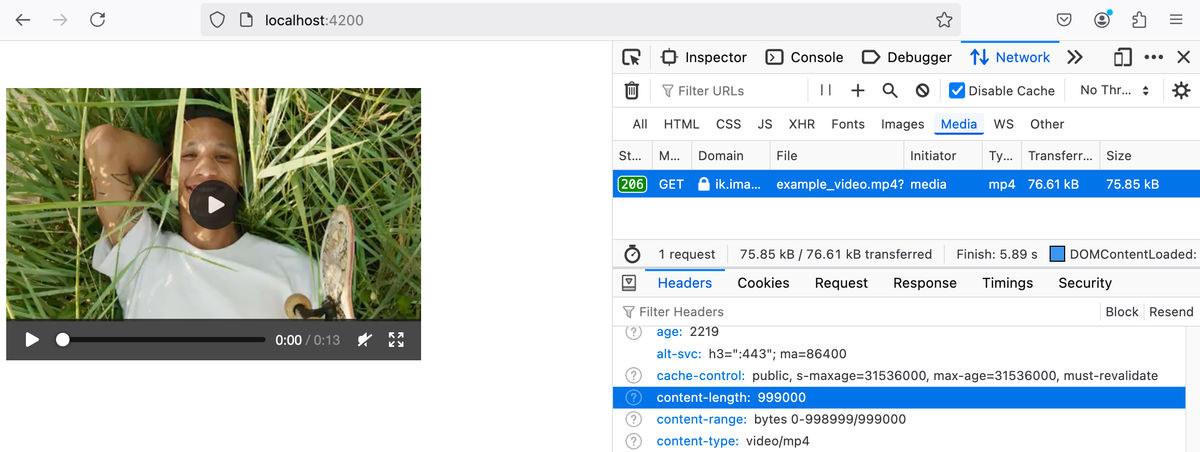
The width and height attributes of the video tag only control the dimension of the video player’s playback area. While the source video (https://ik.imagekit.io/ikmedia/example_video.mp4) has a very high resolution of 3840x2160 (4K). This is much larger than our playback area of 640x480. By resizing the video to match the playback area, we can significantly reduce the file size and minimize buffering, leading to a smoother viewing experience. To resize videos you can use media encoding tools like ffmpeg or cloud-based services like Imagekit.io.
Video player with a poster image and controls for playback
<app-video-player
  src="https://ik.imagekit.io/ikmedia/example_video.mp4"
  poster="https://ik.imagekit.io/ikmedia/example_video.mp4/ik-thumbnail.jpg"
  [controls]="true"
  [height]="360"
></app-video-player>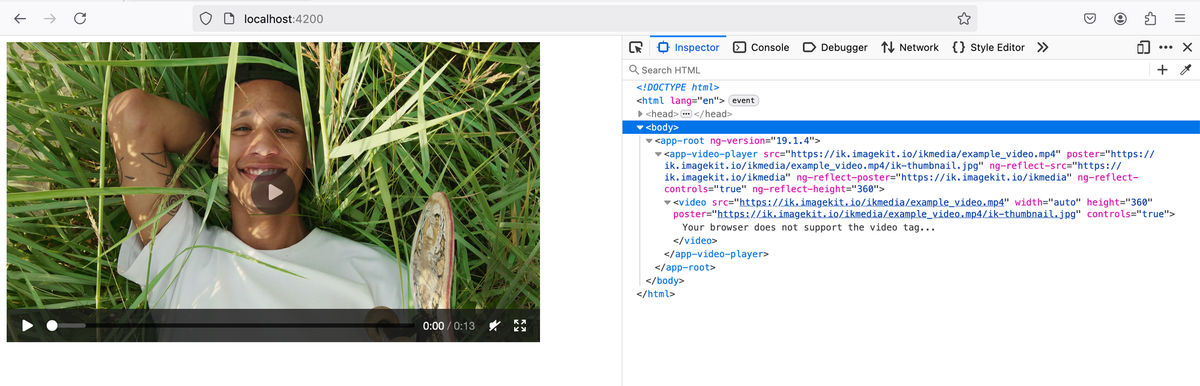
Video player with multiple sources for the browser to choose from
<app-video-player
  [videoSourceList]="[
    {
      src: 'https://ik.imagekit.io/ikmedia/example_video.mov?tr=f-webm',
      mimeType: 'video/webm',
    },
    {
      src: 'https://ik.imagekit.io/ikmedia/example_video.mov?tr=f-mp4',
      mimeType: 'video/mp4',
    },
  ]"
  [controls]="true"
  [width]="640"
  [height]="480"
></app-video-player>
In this example, we have defined multiple video sources within the videoSourceList attribute of the VideoPlayerComponent.
In the browser, it will render the following HTML:
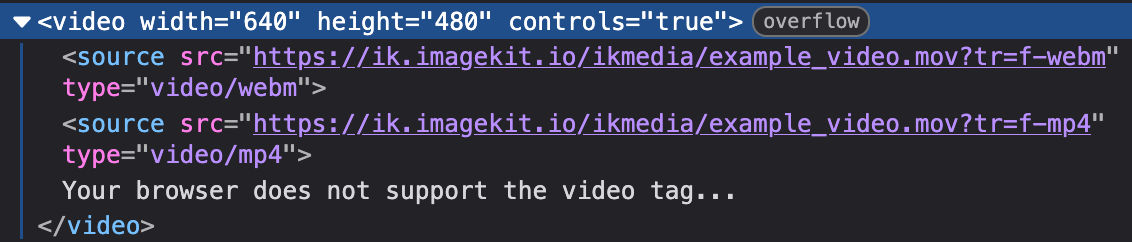
Crucially, browsers choose the first supported format they encounter in the source list.
To balance file size and browser compatibility, we provide the video in both WebM (15.4MB) and MP4 (20.5MB) formats. WebM offers superior compression, resulting in smaller file sizes, but it's not universally supported. By listing WebM first, we allow compatible browsers to use the smaller file, saving bandwidth. MP4 serves as a fallback, ensuring playback for browsers that don't support WebM.
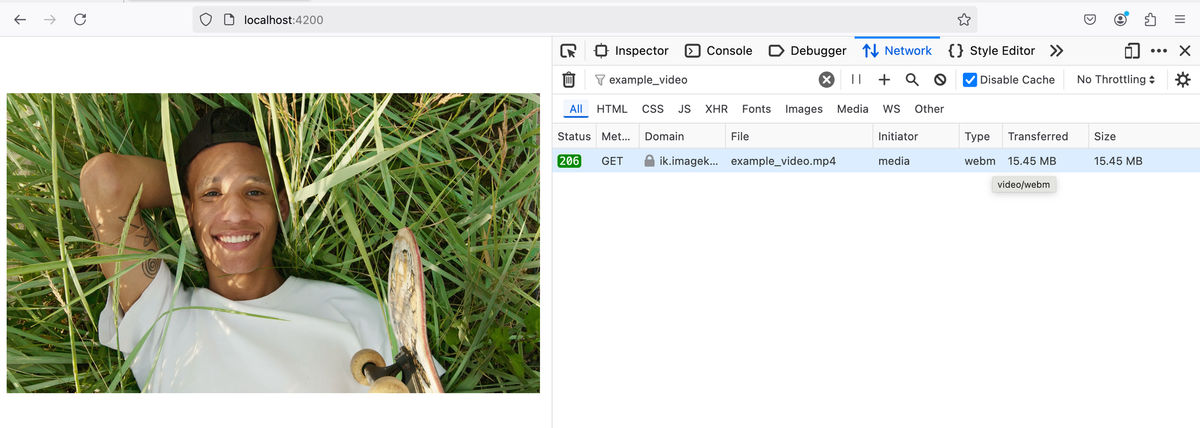
We can test how this arrangement works on the Firefox browser, by enabling and disabling WebM. (navigate about:config, search for media.webm.enabled and toggle the boolean field)
When WebM is enabled, the browser loads the WebM source to play in the video player:

When WebM is disabled, the browser loads the MP4 source to play in the video player:

ImageKit allows you to transform videos on the fly using URL queries. In this example, we use the tr=f-webm query to re-encode the video into WebM format and the tr=f-mp4 query to re-encode the video into MP4 format.
Advanced video playback using Video.js in Angular application
Video.js is a popular open-source HTML5 video player that offers a consistent UI across browsers and supports a variety of plugins for extended functionality.
In this section, we’ll explore how to integrate Video.js into an Angular application. We’ll also cover the fundamentals of adaptive bitrate streaming (ABS) and how to implement it using Video.js.
Setting up Video.js
First, let's set up Video.js in your Angular application.
Install Video.js:
npm install video.jsInstall TypeScript Definitions for Video.js:
npm install --save-dev @types/video.jsGenerate a new Angular component for the video player:
ng generate component video-js-player --style none --skip-tests true --inline-templateOpen the generated component file at src/app/video-js-player/video-js-player.component.ts and replace its content with the code below:
import { Component, ElementRef, Input, OnDestroy, OnInit, ViewChild, ViewEncapsulation } from '@angular/core';
import videojs from "video.js";

@Component({
  selector: "app-video-js-player",
  template: `
    <video
      #target
      class="video-js vjs-default-skin"
      controls
      preload="auto"
      [attr.width]="width"
      [attr.height]="height"
      [poster]="poster"
    ></video>
  `,
  standalone: true,
  encapsulation: ViewEncapsulation.None,
  styleUrls: ["../../../node_modules/video.js/dist/video-js.css"],
})
export class VideoJsPlayerComponent implements OnInit, OnDestroy {
  private player: any;

  @ViewChild("target", { static: true }) target!: ElementRef;
  @Input() src!: string;
  @Input() width?: number;
  @Input() height?: number;
  @Input() poster?: string;
  @Input() fluid: boolean = false;

  ngOnInit() {
    // Initialize the Video.js player
    this.player = videojs(this.target.nativeElement, {
      sources: [{ src: this.src }],
      width: this.width,
      height: this.height,
      poster: this.poster,
      fluid: this.fluid,
    });
  }

  ngOnDestroy() {
    // Clean up the Video.js player to avoid  memory leaks
    if (this.player) {
      this.player.dispose();
    }
  }
}
Now we can use this component in our Angular application. Here's an example with a poster and an MP4 source:
<app-video-js-player
  src="https://ik.imagekit.io/ikmedia/example_video.mp4"
  poster="https://ik.imagekit.io/ikmedia/example_video.mp4/ik-thumbnail.jpg"
  [width]="640"
  [height]="360"
></app-video-js-player>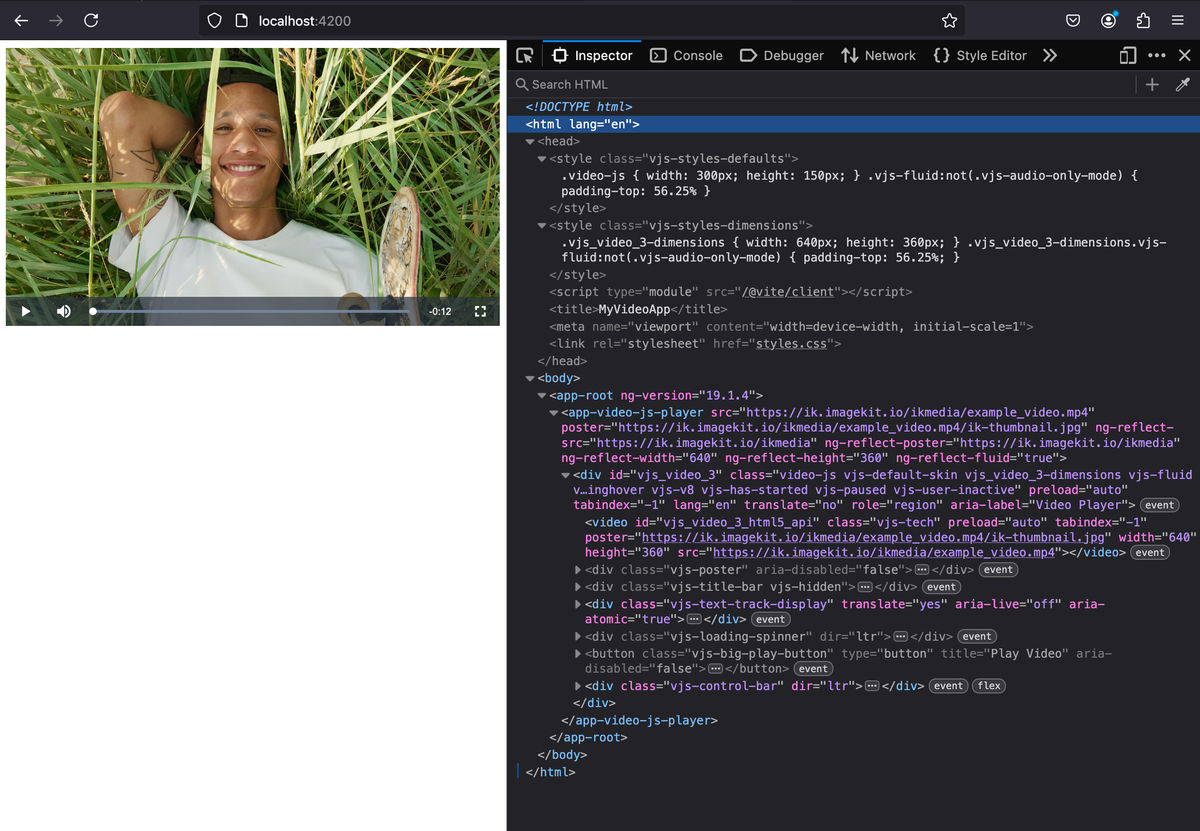
Player for Adaptive Bitrate Streaming (ABS)
Adaptive Bitrate Streaming (ABS) is a technique used to improve video playback experience by dynamically adjusting between higher and lower quality video streams based on the user's network conditions. This ensures a smooth viewing experience with minimal buffering.
Understanding ABS Playlists
To implement ABS, we need an ABS playlist. This playlist contains a manifest file and video segments in multiple bitrates. The manifest files contain locations and directives to fetch the video segments, each segment corresponding to a specific duration and bitrate. During playback, the video player dynamically selects the appropriate segment based on the viewer's network conditions, device capabilities, and resolution preferences.
MPEG-DASH and HLS (HTTP Live Streaming) are the 2 most popular ABS protocols.
To generate an ABS playlist manually, you can follow this article on MDN. However, this process can be complicated and not scalable. Later in this article, we'll discuss an efficient and easy way to generate ABS playlists using Imagekit.
Implementing ABS in Angular with Video.js
ABS playlists don’t have native support in most browsers. Video.js allows us to implement ABS on all popular browsers, with ease.
All you need to do is set the video source to the playlist’s manifest file. Here is an example:
<app-video-js-player
  src="https://ik.imagekit.io/demo/sample-video.mp4/ik-master.mpd?tr=sr-240_360_480_720_1080"
  [fluid]="true"
></app-video-js-player>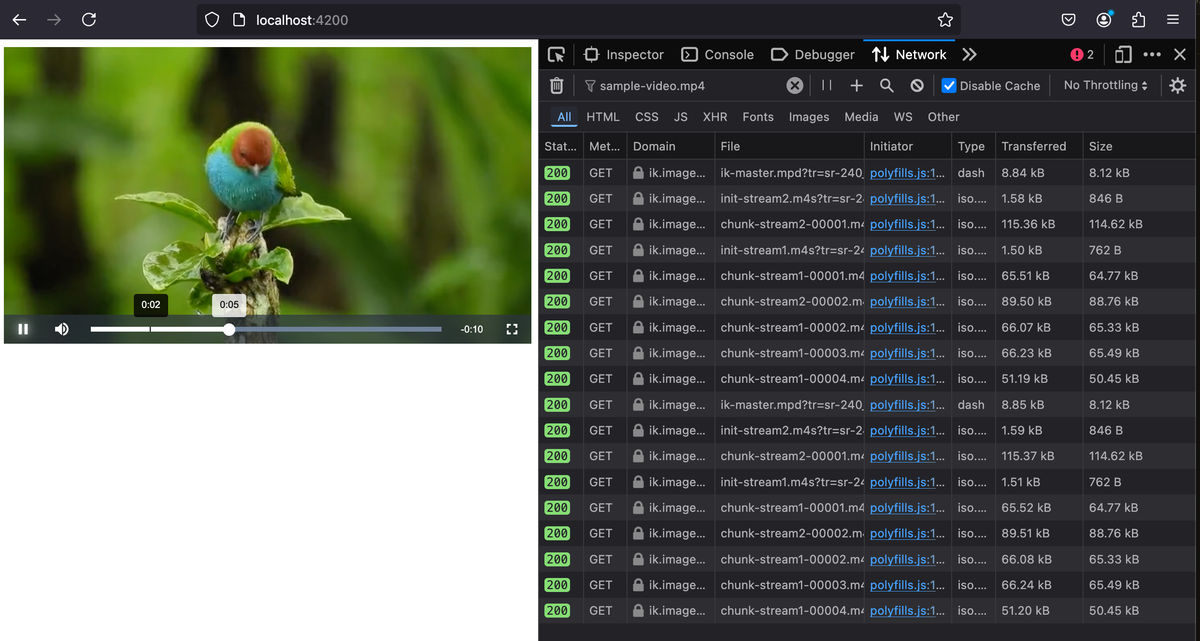
If you are using Video.js version 7 or later, you do not need to install additional plugins for DASH or HLS support. However, if you are using an older version of Video.js, you might need to install videojs-contrib-dash and videojs-contrib-hls plugins to enable DASH and HLS playback.
Imagekit.io for effortless video delivery
What is Imagekit.io?
Imagekit.io is a powerful platform that offers real-time image and video optimization tools. It is an end-to-end solution for media management, optimization, and delivery. It provides features such as transformations, resizing, cropping, format conversion, quality adjustment, and more for media files.
Imagekit's Video API offers a comprehensive toolset engineered to equip you with everything necessary to deliver your users a first-class video playback experience. This service allows you to perform transformations and optimize videos dynamically. It also offers features like thumbnail generation and gif-to-video conversion.
Common use cases of Imagekit.io video API
Manually managing various video formats, resolutions, and encoding parameters can demand significant technical expertise and infrastructure. ImageKit's Video API steps in to handle the heavy lifting and simplifies the often complex world of video transformation, optimization, and delivery.
Resizing Videos to Appropriate Dimensions
When embedding videos in web applications, selecting an optimal resolution ensures that important details remain intact while reducing file size for efficient streaming across different platforms.
Let’s understand this with the example below:
<video
  width=400
  height=300
  src="https://ik.imagekit.io/ikmedia/example_video.mp4?tr=f-mp4"
>Here we have used f-mp4 to ensure the delivered video is in mp4 format for clear comparision between video at different resolutions.
The video at the original resolution of 3840x2160 https://ik.imagekit.io/ikmedia/example_video.mp4?tr=f-mp4 is of size about 20.5MB (too large).
Let’s try downscaling the video to a smaller resolution while preserving their original essence and minimizing any noticeable loss of detail.
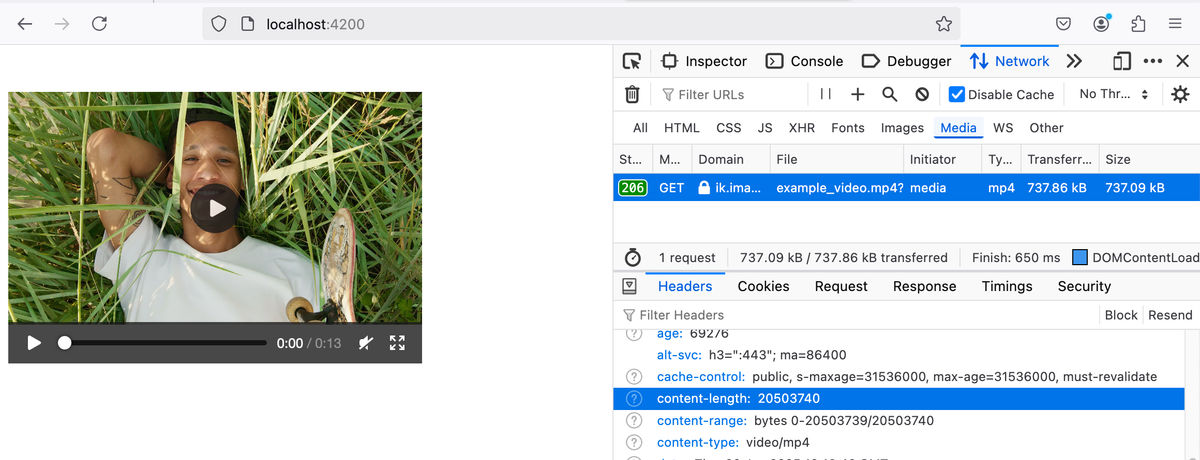
ImageKit's video API lets you seamlessly transform videos. To resize the video, we add a transformation query tr=f-mp4,w-400,h-300,c-at_least. This will resize the video to at least 400x300 dimensions, potentially using a larger resolution if necessary to avoid any significant loss of detail and also maintain the original aspect ratio.
Let’s use the transformed video https://ik.imagekit.io/ikmedia/example_video.mp4?tr=f-mp4,w-400,h-300,c-at_least in our example:
<video
  width=400
  height=300
  src="https://ik.imagekit.io/ikmedia/example_video.mp4?tr=f-mp4,w-400,h-300,c-at_least"
>
The video on https://ik.imagekit.io/ikmedia/example_video.mp4?tr=f-mp4,w-400,h-300,c-at_max is of size just 1MB. Despite a remarkable 95% reduction in file size, the downscaled video maintains virtually indistinguishable visual quality from the original.
Imagekit offers a variety of resizing & cropping strategies. Learn more: https://docs.imagekit.io/features/video-transformation/resize-crop-and-other-common-video-transformations
Deliver the most suitable video format
In the HTML <video> tag, we can provide multiple source URLs for loading the video, the browser will automatically choose the format it supports.
For example:
<video>
  <source
    src="https://ik.imagekit.io/ikmedia/example_video.mp4?tr=f-webm"
    type="video/webm"
  />
  <source
    src="https://ik.imagekit.io/ikmedia/example_video.mp4?tr=f-mp4"
    type="video/mp4"
  />
</video>
When specifying multiple sources, it is essential to arrange them in order of file size optimization, from smallest to largest. The browser prioritizes the first supported format, so strategically placing the most efficient source ensures that the most optimized video will be used. 😵💫
But when using imagekit.io, you don't need to worry about format selection or adding multiple sources. Using the same URL, ImageKit automatically detects the viewer’s device compatibility and delivers the most optimized format, ensuring seamless playback without additional configuration. 😎
So with imagekit.io, the above example will look like this:
<video src="https://ik.imagekit.io/ikmedia/example_video.mp4?tr=f-auto" />
So easy!
Add overlays over videos
You can add text, subtitles, images, or even video overlays directly to your videos using ImageKit's transformation parameters.
Here is an example to add text overlay:
https://ik.imagekit.io/ikmedia/example_video.mp4?tr=l-text,i-Skateboards%20makes%20me%20happy,fs-100,co-blue,bg-white,pa-50,l-end
Here, the text "Skateboards make me happy" on the video with a font size of 100, blue text color, white background, and 50px padding at the end position
For more information, refer to Imagekit's video overlay doc.
Generate thumbnail with Imagekit.io
Video-thumbnail feature can be used to generate poster images or thumbnails for a good video-playback experience.
To generate a video thumbnail, use ik-thumbnail.jpg suffix in the URL path.
Example: https://ik.imagekit.io/ikmedia/example_video.mp4/ik-thumbnail.jpg

You can further customize the thumbnail and apply transformations using the transformation (tr) query to resize, crop, add overlays, etc.
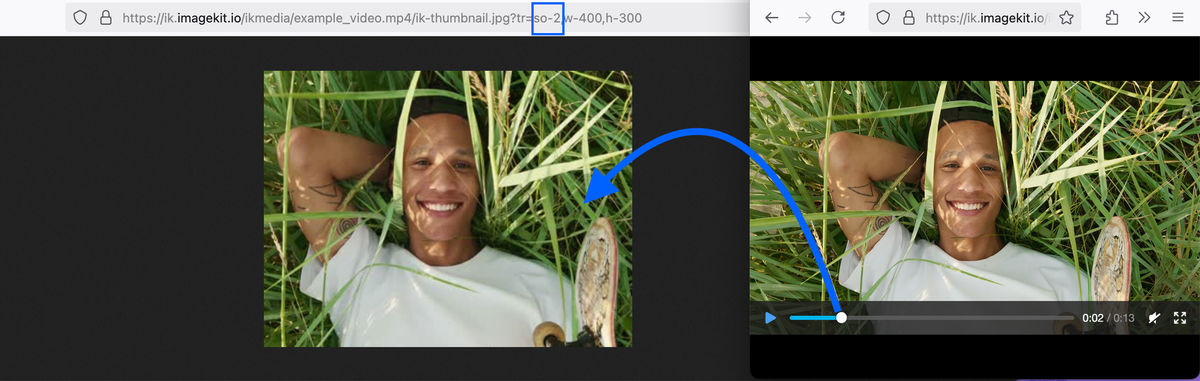
In the transformation query, you can use the so (start-offset) parameter to pick the thumbnail from a specific timestamp of the video. By default, the first frame of the video (so=0) is used.
Example: https://ik.imagekit.io/ikmedia/example_video.mp4/ik-thumbnail.jpg?tr=so-2,w-400,h-300
Here, the thumbnail is cropped to 400x300 pixels from the 2-second mark of the video.
Generate thumbnails or posters for your videos using AI
ImageKit’s Generative AI transformations allow you to generate a images from text prompt. This feature allows you to generate attention grabbing poster and thumbnail images for your videos.
You can generate an image based on a text prompt by simply describing what you want in the URL. Apply the following syntax:
https://ik.imagekit.io/your_account/ik-genimg-prompt-{description}/image.jpgReplace {description} with a short phrase describing the image.
For example, to create a unique thumbnail featuring a skateboard on grass, we will use the following URL:
https://ik.imagekit.io/ikmedia/ik-genimg-prompt-A skateboard on grass/skateboard.jpg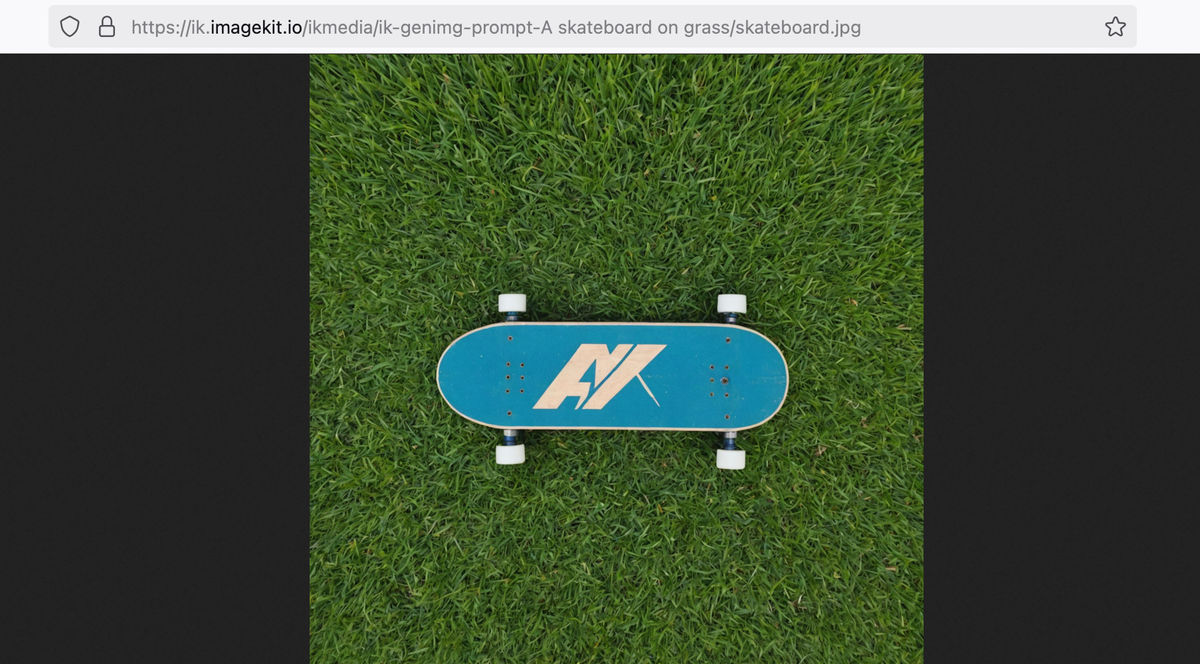
Adaptive bitrate streaming with Imagekit.io
In previous sections, we have already discussed what ABS is, what are ABS playlists and how can we implement them in Angular applications using Video.js. But the elephant in the room remains: how can we generate these ABS playlists efficiently and scalably without any hassles?
The good news is that you can easily create an ABS playlist of your videos using ImageKit’s video API. ImageKit can generate and deliver all necessary variants and manifest files from a single source video that is accessible through your ImageKit account.
To generate an ABS playlist using ImageKit, you need to append the following keywords to your video URL path:
For a DASH playlist, append /ik-master.mpd to your video URL. Example: https://ik.imagekit.io/demo/sample-video.mp4/ik-master.mpd?tr=sr-240_360_480_720_1080
For an HLS playlist, append /ik-master.m3u8 to your video URL. Example: https://ik.imagekit.io/demo/sample-video.mp4/ik-master.m3u8?tr=sr-240_360_480_720_1080
The tr=sr-<representations> transformation query specifies the video renditions to include in the playlist. For example, tr=sr-240_360_480_720_1080 creates profiles of 240p, 360p, 480p, 720p, and 1080p. Consult the ImageKit documentation for more details on supported representations: Adaptive Bitrate Streaming
How ImageKit helps with ABS
Essentially, ImageKit's video API empowers you to effortlessly implement ABS, freeing you from the intricacies of manual setup and management. Here's how ImageKit streamlines the process:
- Automatic Playlist Generation: Forget the hassle of manually creating and managing ABS playlists. ImageKit automatically generates both DASH and HLS playlists from your source video, saving you time and effort.
- Effortless Integration: Integrating ABS with ImageKit is as simple as adding a few characters to your video URLs. Append
/ik-master.mpdfor DASH or/ik-master.m3u8for HLS, and you're ready to stream. - Apply transformations: Apply trimming, add image overlays, text overlays, subtitle overlays, and border, etc. Note, you can not resize or crop the base video in ABS, please refer to ABS docs for more information.
- Customizable Renditions: Tailor your ABS playlists to perfection with ImageKit's transformation queries. ImageKit allows you to specify the video renditions to include in the ABS playlist using the
tr=sr-<representations>transformation query. Example:tr=sr-240_360_480_720_1080creates profiles of 240p, 360p, 480p, 720p, and 1080p.
You can do all this in combination with all other video API features like thumbnail generation.
Conclusion
This guide walked through adding video playback to an Angular application, starting with the HTML5 <video> tag and supporting multiple formats for better browser compatibility.
We built a reusable Angular component for a basic HTML5 video player using the default customizations provided by most browsers. Then we built another Angular component for a more advanced video player using Video.js, enabling better controls, consistent UI across browsers and Adaptive Bitrate Streaming (ABS).
We also discussed how Imagekit equips you with tools and capabilities for an outstanding video playback experience:
- In addition to resize, optimise and transform your video. Imagekit also delivers videos in the most optimal format that is compatible with your end user's platform automatically.
- You also add text, subtitles, images, and even video overlays to your videos.
- You can extract thumbnails from video frames using ImageKit's video thumbnail feature.
- You can use ImageKit's AI to generate images from text prompts for attention-grabbing posters, thumbnails, and banners.
- We explored how ImageKit automates ABS playlist generation, ensuring seamless streaming across different devices and network conditions.