Adding video player in React Native ⚡ AMP
This blog will help you build a React Native app from scratch and integrate a video player. We will delve into the video player's various functionality, including advanced features such as Adaptive Bitrate Streaming (ABS).
Introduction
This blog post will guide you through adding a video player to your React Native app. We will cover basics of React Native, how to build an Android app, and how to integrate a video player. Additionally, we will explore the benefits of Adaptive Bitrate Streaming (ABS) protocols such as HLS and DASH.
What you will learn
- Intro & Core Concepts – A quick look at React Native’s benefits and setup.
- Your First RN App – From creating a project to getting it running on Android.
- Choosing a Video Library – Why we’re using react-native-video-player.
- Video Integration 101 – Resizing, custom controls, autoplay, and looping.
- Adaptive Bitrate Streaming – Smooth playback with HLS and DASH.
- Optimizing Delivery – Using ImageKit for transformations and ABS manifests.
- Wrap-Up – Final thoughts and next steps for your video-powered app.
What is React Native?
React Native lets you create native apps for Android, iOS, and more using React.
Why developers choose React Native?
- Cross-Platform Speed: Write code once in JavaScript/React, ship to Android and iOS with minimal tweaks.
- Native-Like Performance: Renders via actual native components, so apps feel fast and responsive.
- Vibrant Ecosystem: Backed by Meta, widely adopted by major companies (e.g., Instagram), and bolstered by an active open-source community.
- Easy to Learn: If you know React for web, transitioning to mobile is straightforward.
- Future-Proof: Regular updates, flexible native module support, and proven large-scale production apps make it a stable, long-term solution.
Now let’s learn how to create video experiences in a React Native app.
Creating a React Native App
Prerequisite
In this blog, we will create an Android app that plays videos with custom controls. To follow along with the line-by-line coding, you need to set up a React Native environment.
Depending on your operating system, you can follow the instructions provided here for Android development.
This would install the following if they aren’t already present:
Node: For this tutorial, a stable Node version of 18.20.6 or above is needed.
Watchman: Version as mentioned.
Java Development Kit (JDK): Version as mentioned.
Android Studio: Version as mentioned.
Running Android Emulator
- Create a new project named SampleVideoPlayer with No Activity or Empty Activity.

2. Click on the Device Manager located inside the Tools window.

3. The device manager dialog box opens on the right side of Android Studio. Click on Create virtual device to create a new virtual device.

Once the virtual device is created, verify it in the terminal by the following command:
adb devices
It would list a device you created.

Running React Native App
To create a project, run the following command in the terminal of a text editor of your choice.
It will install a specific version of React Native that is compatible with the Node version mentioned above.
npx @react-native-community/cli@15.0.1 init sampleVideoPlayer --version 0.77.0
Choose yes to install @react-native-community/cli at a specific version.
When prompted to install CocoaPods, select No. This is required for Xcode in iOS development, but this blog focuses on Android development.
Navigate to the project directory.
cd sampleVideoPlayer/We will find the boilerplate code below:

Start the Metro server by running the command in the terminal.
npm run startTo run the app on the Android simulator, run the below command in another terminal.
npm run android
After successfully running the command, the React Native App will be seen on the Android virtual device.

If you encounter the following error Error: SDK location not found. Define location with sdk.dir in the local.properties file or with an ANDROID_HOME environment variable.
Create a file local.properties file under the android directory in the text editor and add your Android SDK path as explained here.
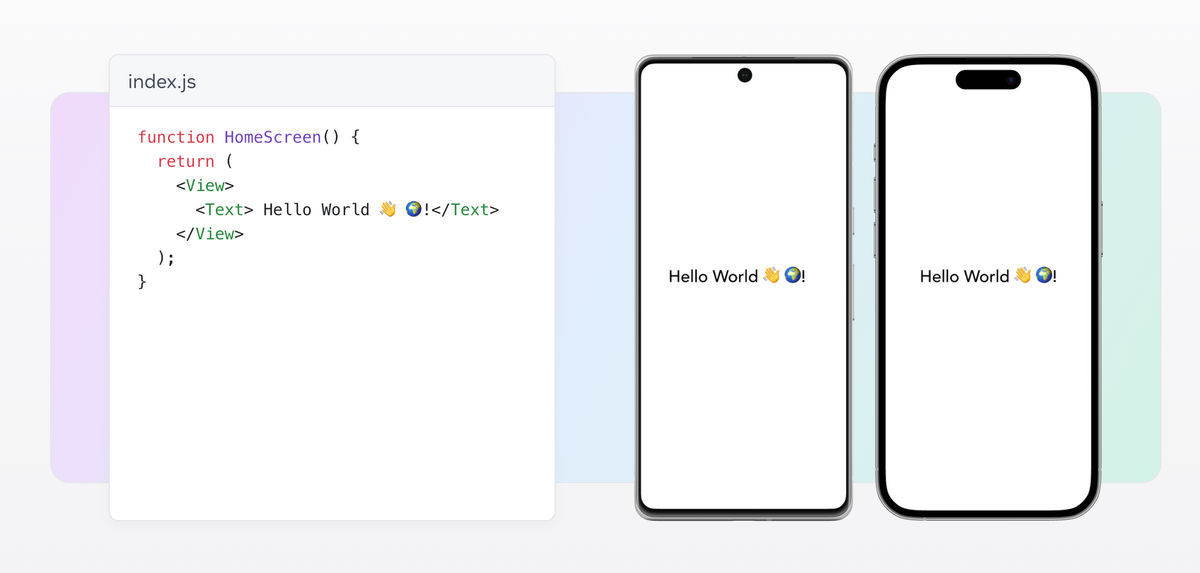
Change the code in App.tsx with the basic Hello World code. The app will update itself by hot reloading.
import React from 'react';
import { SafeAreaView, Text, StyleSheet } from 'react-native';

const App = () => {
  return (
    <SafeAreaView style={styles.container}>
      <Text style={styles.text}>Our First React Native App</Text>
      <Text style={styles.text}>Hello World</Text>
    </SafeAreaView>
  );
};

const styles = StyleSheet.create({
  container: {
    flex: 1,
    justifyContent: 'center',
    alignItems: 'center',
  },
  text: {
    fontSize: 20,
  },
});

export default App;

Picking the right video player library for React Native
Before implementing the video player, we must choose the correct library tailored to our use case. There are many video libraries, but we will use react-native-video-player, a wrapper with better Controls UI over a hugely popular video library react-native-video. The same group maintains both libraries.
Since react-native-video-player is built on top of react-native-video, it accepts all properties and methods of the react-native-video library. It also emits all the react-native-video events**,** along with some additional properties as mentioned here.
Better Controls UI
The react-native-video-player has a better UI for controls than react-native-video and exposes basic properties like mute, loop, and autoplay in a straightforward manner.Open-source and feature-rich
The react-native-video-player is an open-source library built on react-native-video. It enhances the video playback functionality in React Native and offers a streamlined and user-friendly API for incorporating video playback into iOS and Android apps. This library supports various video formats and includes features like playback control, track selection, volume adjustment, and fullscreen viewing options.Advanced Features
All advanced features from react-native-video, such as subtitle support, DRM support, and Picture-in-Picture,are naturally extend to react-native-video-player.ABS Support
The library supports Adaptive Bitrate Streaming(ABS) out-of-box, making implementation straightforward and hassle-free.
Integrating video player
First, we need to install both the video player and its type declarations.
npm install --save react-native-video-player react-native-videonpm install --save-dev @types/react-native-video-playerReplace the code in App.tsx with the following code to initialize the video player.
import React, { useState } from 'react';
import { SafeAreaView, StyleSheet, TouchableOpacity } from 'react-native';
import VideoPlayer, { type VideoPlayerRef } from 'react-native-video-player';
const App = () => {
// State to store video duration
const [duration, setDuration] = useState(0);
// Reference to the VideoPlayer component
const videoRef = React.useRef<VideoPlayerRef>(null);
// Reference to track current playback time
const progressRef = React.useRef<number>(0);
return (
// Safe area container for proper layout on devices
<SafeAreaView style={styles.container}>
{/* VideoPlayer component with source and event handlers */}
<VideoPlayer
ref={videoRef} // Reference to access VideoPlayer methods
source={{ uri: 'https://ik.imagekit.io/ikmedia/example_video.mp4' }} // Video URL
onError={(error) => console.error('Video Error:', error)} // Handle playback errors
onLoad={(data) => {
console.log('Video Loaded:', data); // Log load data
setDuration(data?.duration); // Set video duration state
}}
onBuffer={(data) => console.log('Buffering:', data)} // Log buffering status
onProgress={(data) => {
console.log('Video Progress:', data); // Log progress data
progressRef.current = data.currentTime; // Update current playback time
}}
>
</VideoPlayer>
</SafeAreaView>
);
};
const styles = StyleSheet.create({
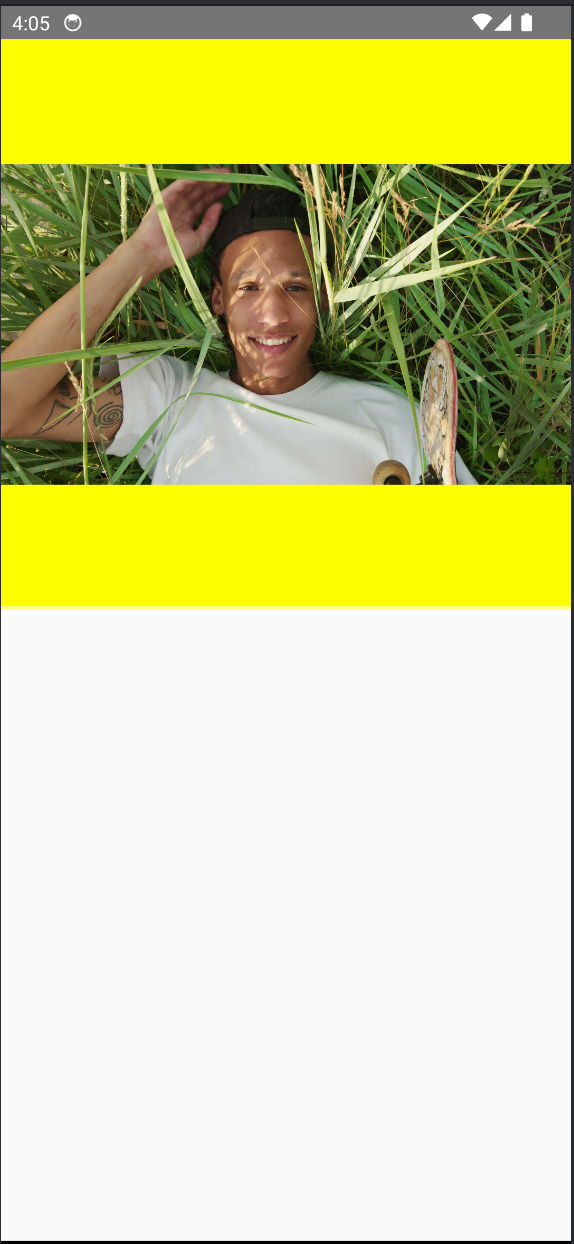
container: {
backgroundColor: 'yellow', // Set background color to yellow
},
});
export default App;

If you run into some sort of RCTVideo error, re-build the app by running npm run android.
Resizing video
The video player exposes three different properties to control the resizing of the video.
resizeMode - It can take four different values: none, cover, stretch, and contain, as explained here.
videoHeight - Used along with
videoWidthto calculate the new aspect ratio.videoWidth - Used along with
videoHeightto calculate the new aspect ratio.
The original video has an aspect ratio of 16:9 and dimensions 3840 * 2160; resizing it to 200 * 200 results in an aspect ratio of 1:1 with the below results with different resize modes.


However, this resizing is just for display purposes, and the video player still needs to download the original large video despite reducing its dimensions, which wastes bandwidth. Later, we will see how to use Imagekit to reduce the video size significantly by server-side encoding.
To resize it into cover mode. Add the following code in App.tsx.
.....
import { ResizeMode } from 'react-native-video'; // import ResizeMode enum
.....
<VideoPlayer
ref={videoRef} // Reference to access VideoPlayer methods
source={{ uri: 'https://ik.imagekit.io/ikmedia/example_video.mp4' }} // Video URL
resizeMode={ResizeMode.COVER} // Video resize mode
videoHeight={200} // Video height
videoWidth={200} // Video width
onError={(error) => console.error('Video Error:', error)} // Handle playback errors
onLoad={(data) => {
console.log('Video Loaded:', data); // Log load data
setDuration(data?.duration); // Set video duration state
}}
onBuffer={(data) => console.log('Buffering:', data)} // Log buffering status
onProgress={(data) => {
console.log('Video Progress:', data); // Log progress data
progressRef.current = data.currentTime; // Update current playback time
}}
>
</VideoPlayer>
...
Custom Controls
To show the duration currently being played, set the property showDuration to true.
There is no such flag indicating fast-forward or rewind options. Therefore, we will implement these features using the event handlers from react-native-video and react-native-video-player.
First, we need to install react-native-vector-icons to use the required icons.
npm i --save react-native-vector-iconsnpm i --save-dev @types/react-native-vector-iconsTo use the icon library, you need to edit android/app/build.gradle file and add apply from: file("../../node_modules/react-native-vector-icons/fonts.gradle")
After this, rebuild the app by running npm run android.
Update the code in App.tsx as below:
import React, { useState } from 'react';
import { SafeAreaView, StyleSheet, TouchableOpacity } from 'react-native';
import { ResizeMode } from 'react-native-video'; // import ResizeMode enum
import VideoPlayer, { type VideoPlayerRef } from 'react-native-video-player';
import AntDesign from 'react-native-vector-icons/AntDesign';
const App = () => {
// State to store video duration
const [duration, setDuration] = useState(0);
// state to store control visibility
const [isControlVisible, setIsControlVisible] = useState(false);
// Reference to the VideoPlayer component
const videoRef = React.useRef<VideoPlayerRef>(null);
// Reference to track current playback time
const progressRef = React.useRef<number>(0);
return (
// Safe area container for proper layout on devices
<SafeAreaView style={styles.container}>
{/* VideoPlayer component with source and event handlers */}
<VideoPlayer
ref={videoRef} // Reference to access VideoPlayer methods
source={{ uri: 'https://ik.imagekit.io/ikmedia/example_video.mp4' }} // Video URL
resizeMode={ResizeMode.COVER} // Video resize mode
videoHeight={200} // Video height
videoWidth={200} // Video width
showDuration={true} // Show video duration
onError={(error) => console.error('Video Error:', error)} // Handle playback errors
onLoad={(data) => {
console.log('Video Loaded:', data); // Log load data
setDuration(data?.duration); // Set video duration state
}}
onBuffer={(data) => console.log('Buffering:', data)} // Log buffering status
onProgress={(data) => {
console.log('Video Progress:', data); // Log progress data
progressRef.current = data.currentTime; // Update current playback time
}}
onSeek={async (data) => { // Handle seek event
console.log('Seek:', data, videoRef?.current)
await videoRef?.current?.resume()
}}
onShowControls={() => { // Handle control visibility
setIsControlVisible(true)
}}
onHideControls={() => { // Handle control visibility
setIsControlVisible(false)
}}
>
</VideoPlayer>
{isControlVisible && (
<>
<TouchableOpacity style={styles.forwardIcon} onPress={async () => {
try {
videoRef?.current?.seek(Math.min(progressRef.current + 5, duration))
} catch (error) {
console.error('Error:', error)
}
}}
>
<AntDesign name={'fastforward'} size={30} color="#fff" />
</TouchableOpacity>
<TouchableOpacity style={styles.backwardIcon} onPress={async () => {
try {
videoRef?.current?.seek(Math.max(progressRef.current - 5, 0))
} catch (error) {
console.error('Error:', error)
}
}}
>
<AntDesign name={'fastbackward'} size={30} color="#fff" />
</TouchableOpacity>
</>
)}
</SafeAreaView>
);
};
const styles = StyleSheet.create({
container: {
backgroundColor: 'yellow', // Set background color to yellow
},
forwardIcon: {
position: 'absolute',
top: '50%',
left: '33%',
},
backwardIcon: {
position: 'absolute',
top: '50%',
right: '33%',
},
});
export default App;
Autoplay, Loop, and Mute
To autoplay the video, set the autoplay property to true. It is recommended to mute the video to ensure autoplay works on every platform smoothly. To mute the video, set the defaultMuted property to true.
To repeat the video, set the repeat property to true.
The VideoPlayer code would look like this:
<VideoPlayer
ref={videoRef} // Reference to access VideoPlayer methods
source={{ uri: 'https://ik.imagekit.io/ikmedia/example_video.mp4' }} // Video URL
resizeMode={ResizeMode.COVER} // Video resize mode
videoHeight={200} // Video height
videoWidth={200} // Video width
showDuration={true} // Show video duration
autoplay={true} // Auto play video
defaultMuted={true} // muted state
repeat={true} // Repeat video
onError={(error) => console.error('Video Error:', error)} // Handle playback errors
onLoad={(data) => {
console.log('Video Loaded:', data); // Log load data
setDuration(data?.duration); // Set video duration state
}}
onBuffer={(data) => console.log('Buffering:', data)} // Log buffering status
onProgress={(data) => {
console.log('Video Progress:', data); // Log progress data
progressRef.current = data.currentTime; // Update current playback time
}}
onSeek={async (data) => { // Handle seek event
console.log('Seek:', data, videoRef?.current)
await videoRef?.current?.resume()
}}
onShowControls={() => { // Handle control visibility
setIsControlVisible(true)
}}
onHideControls={() => { // Handle control visibility
setIsControlVisible(false)
}}
>
</VideoPlayer>Adaptive Bitrate Streaming
Before proceeding further, let's understand ABS a bit. ABS dynamically adjusts the quality of video content based on the viewer’s network conditions. The video is encoded at different bitrates, resulting in different qualities and file sizes.
Subsequently, a manifest file, similar to a text file, is prepared. This file contains information about segments of the video at varying bit rates. During playback, the video player loads the manifest file and chooses an appropriate segment, usually starting from the lowest bit rate stream to speed up initial playback. If network throughput is greater than the bit rate of the downloaded segment, it requests a higher bit rate segment. Hence, video player continues to adapt to changes in network throughput to ensure a smooth playback experience. This process is known as Adaptive Bitrate Streaming (ABS).
Currently, there are two major protocols for ABS, which lead to two different types of manifest files.
- HTTP Live Streaming (HLS) - The manifest file is denoted with m3u8 extension.
- Dynamic Adaptive Streaming over HTTP (MPEG-DASH) - The manifest file is denoted with mpd extension.
Creating these manifest files yourself can be tricky. To streamline this, you can utilize a video API platform like ImageKit. ImageKit offers a straightforward URL-based parameter for generating a manifest file in the protocol of your choice.
Support in react-native-video-player
The video library offers out-of-the-box support for the ABS. We simply need to provide the ABS URL, and it will play the required video quality based on the available bandwidth.
To play the HLS stream, we would use the following URL:
https://ik.imagekit.io/ikmedia/sample-video.mp4/ik-master.m3u8?tr=sr-240_360_480_720If you're wondering, the above URL to a manifest file contains pointers to multiple video streams, each corresponding to a bitrate, as described in the query parameter. So, in this case, we have a single source video file that is converted into multiple video files based on the required bitrates, i.e. 240p, 360p, 480p, 720p, and 1080p, and stored in an encoded manifest.
Later in this tutorial, we'll be talking about how we can use ImageKit's Video API to generate such .m3u8 or .mpd manifests.
...
<VideoPlayer
ref={videoRef} // Reference to access VideoPlayer methods
source={{ uri: 'https://ik.imagekit.io/ikmedia/sample-video.mp4/ik-master.m3u8?tr=sr-240_360_480_720' }} // Video URL
....
>
</VideoPlayer>
...
ImageKit.io for Video Transformations and Optimisation
Video files, when transferred over a network to a user's device, can significantly impact user experience if not optimized. Implementing best practices for transformation and optimisation before delivery, hence, becomes vital. The techniques include, but are not limited to:
- Resizing to proper dimensions with server-side encoding.
- Encoding to next-generation formats with improved compression while ensuring compatibility.
- Creating multiple bitrate versions for Adaptive Bitrate Streaming (ABS) for users on slower networks.
Media delivery and management for high-growth teams | ImageKit.io is a powerful platform that offers real-time image and video optimization. It serves as a comprehensive solution for end-to-end media management, optimization, and delivery while supporting various transformations such as resizing, cropping, format conversion, quality adjustment, and many more. The platform also offers a generous free tier to get you started.
Let’s look at some use cases in which ImageKit’s Video API can help deliver better video playback experiences for your users, optimize your video delivery, and save on your network costs.
Resizing the video
In the resizing approaches we’ve seen earlier in this tutorial, we have been resizing the player’s container dimensions. Although this works well to fit the player well within the UI, is the video size optimized? The answer is no, and here’s why.
When you’re using a 4k raw video file with dimensions 3840x2160 and trying to load it over the network to fit the video inside a player of dimensions 200x200, there’s a huge unnecessary network overhead for your system. And a network overhead comes with a cost - in this case, both in terms of money and user experience.
So, how do you solve this problem? A straightforward approach is creating multiple raw video files with different dimensions and calling for the most compatible one based on the player’s container size. And here, you introduce overhead storage costs and a good amount of complexity in your code.
With ImageKit’s Video Transformations, you can transform your raw video file into an appropriate size on the go while loading it within your player’s container with just a query parameter. Imagekit encodes the video on the server side, resulting in smaller size and faster downloads.

The original video file is ~ 37.7 MB
If we use the raw video file, we would transfer ~37.7 MB over the network. To resize the video file for a 200x200 container, we need to add a query parameter tr with the values w-200 and h-200.
Updated URL: https://ik.imagekit.io/ikmedia/example_video.mp4?tr=w-200,h-200

After resizing, we have reduced the network overhead to ~0.41 MB (a steep 98.9% reduction).
Let’s update our code to make use of this. In App.tsx.
...
<VideoPlayer
ref={videoRef} // Reference to access VideoPlayer methods
source={{ uri: 'https://ik.imagekit.io/ikmedia/example_video.mp4?tr=w-200,h-200' }} // Video URL
....
>
</VideoPlayer>
...To learn more about video resizing, you can check out the documentation here: Resize, crop, and other common video transformations | ImageKit.io Docs
Adaptive Bitrate Streaming (ABS)
With ImageKit Video API, generating ABS manifest is simple. Both DASH and HLS protocol are supported.
If you're new to Adaptive Bitrate Streaming (ABS), this article will help you learn more about it. It discusses ABS in depth and compares both protocols to help you choose the one that best suits you.
MPEG-DASH
To create an MPEG-DASH ABS playlist, you need to suffix the URL path with ik-master.mpd and use the tr query parameter with the sr value to specify the resolutions. Here’s an example:
https://ik.imagekit.io/ikmedia/example_video.mp4/ik-master.mpd?tr=sr-240_360_480_720_1080
HLS
To create an HLS ABS playlist, you need to suffix the URL path with ik-master.m3u8 and use the tr query parameter with the sr value to specify the resolutions. Here’s an example:
https://ik.imagekit.io/ikmedia/example_video.mp4/ik-master.m3u8?tr=sr-240_360_480_720_1080
Conclusion
The article begins by setting up a barebones Android app on a Virtual device with React Native. Then, we explored different video players in React Native and implemented the appropriate player according to our needs.
Later, we explored the various options the video player provides and implemented custom controls using its event handlers.
We also learned how the ImageKit video API can simplify various use cases, such as video resizing or generating ABS manifest files on the fly, which video players can use to stream video smoothly.