In this blog post, you will learn step-by-step how to handle file uploads in an Angular application.
You can see the working app here and get the entire source code from https://github.com/imagekit-samples/tutorials/tree/angular-file-upload.
The final result will look like this:
This guide walks you through the following topics:
- Setting up an angular application
- Creating a customized file upload interface
- Setting up the backend
- Implementing a progress bar
- Adding basic validation
- What's wrong with this approach?
- Uploading files to ImageKit directly from the browser
Setting up an angular application
In this tutorial, we'll be using:
- Node version 20.
- Angular version 17.
We'll start by creating a new project using Angular's ng CLI.
Here are the steps:
-
Run the following command to create a new Angular project:
ng new imagekit-angular-app --strict=falseIt will prompt a few questions. In this tutorial, we will make the following choices as shown below.
- Which stylesheet format would you like to use? CSS
- Do you want to enable Server-Side Rendering (SSR) and Static Site Generation (SSG/Prerendering)? No
-
Navigate to the newly created project directory:
cd imagekit-angular-app/ -
Install libraries (if not already):
npm install -
Start the application by running:
npm start
npm start gives you any issues, you can run our Angular app using the command ng serve --port 4200 --host 127.0.0.1.Open your web browser and go to http://localhost:4200/ to see a dummy app created by the Angular CLI.
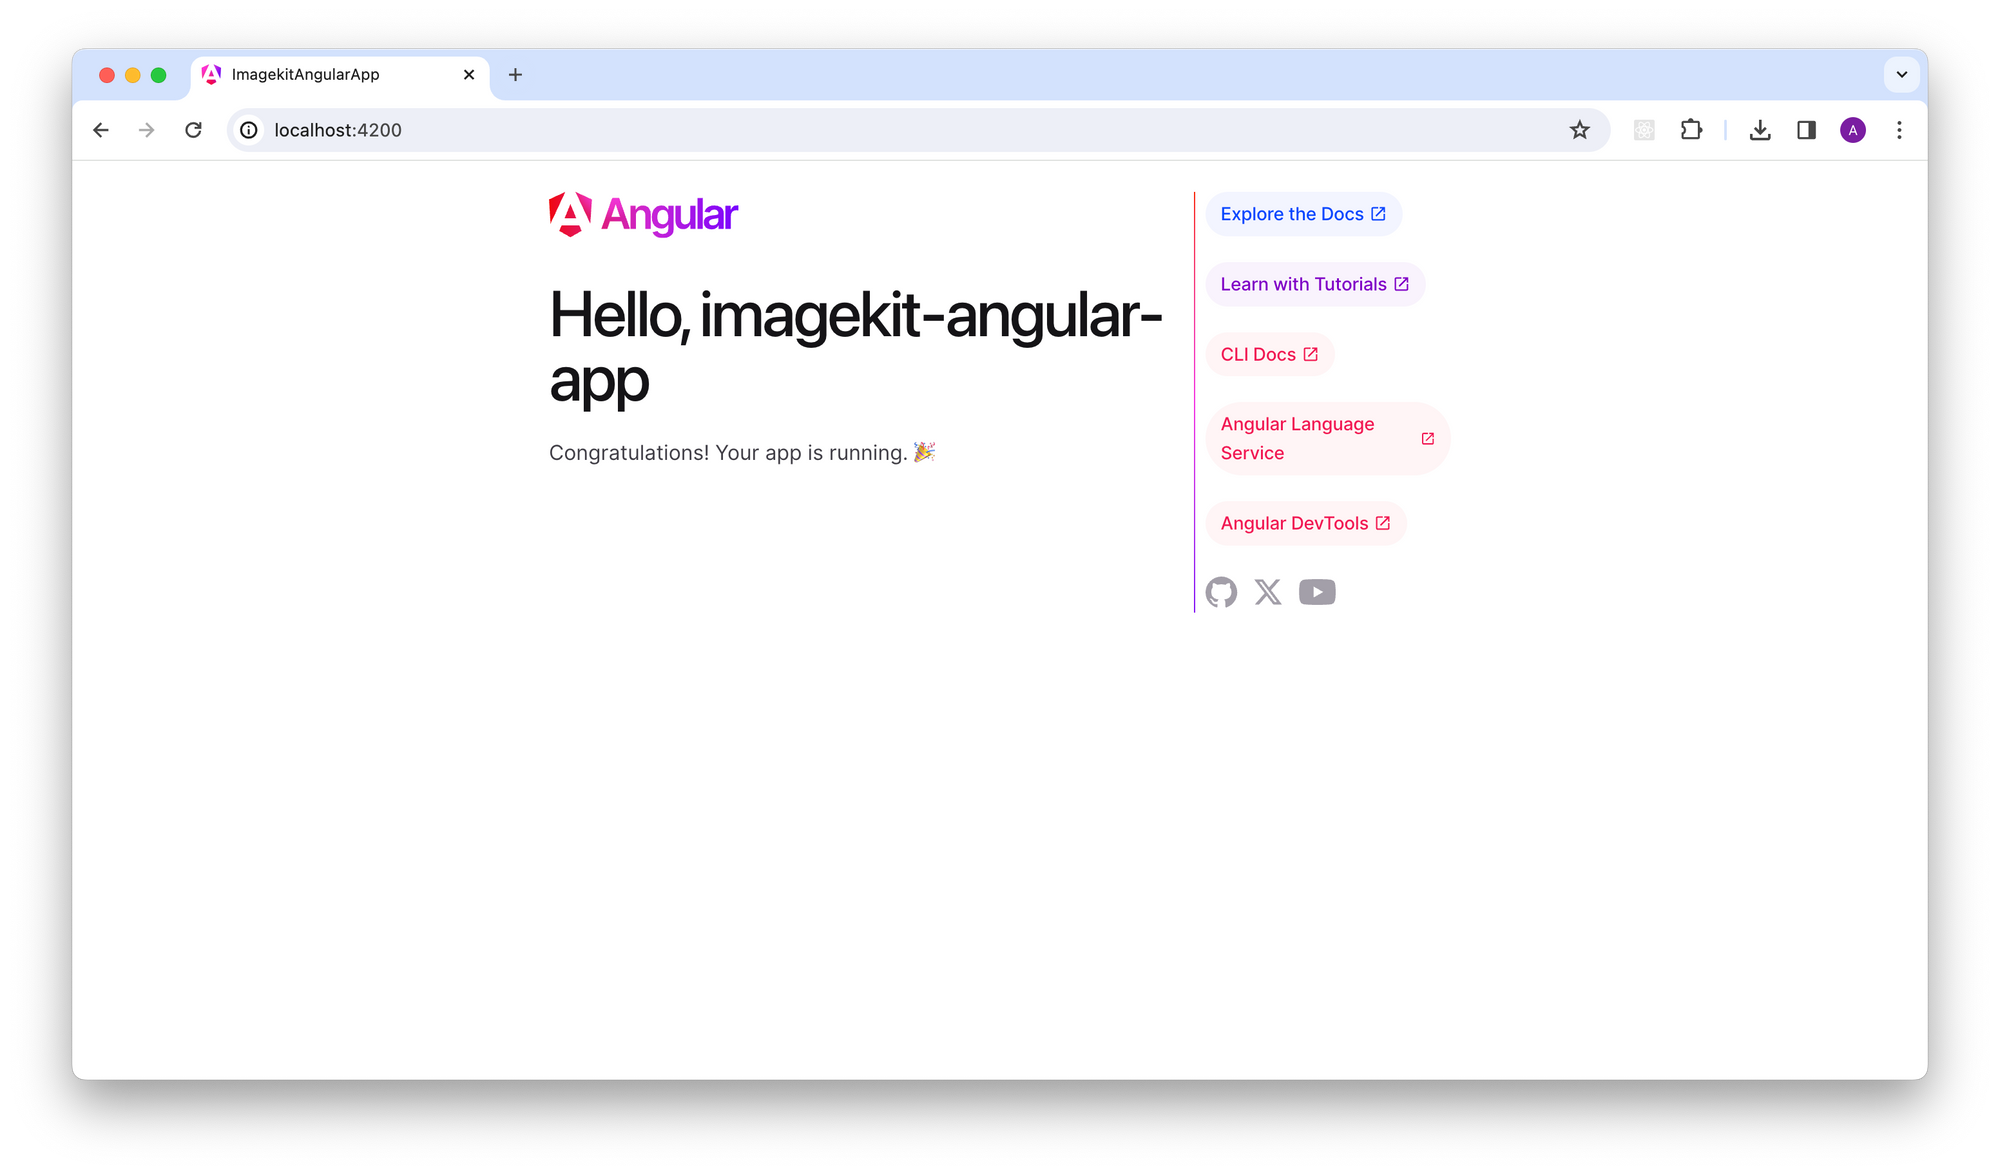
Let's remove everything from src/app/app.component.html so we can start fresh. Begin by adding the basic <input/> element to pick files. Use this code in src/app/app.component.html:
<h1>Angular image & video upload</h1>
<input type="file" name="file" />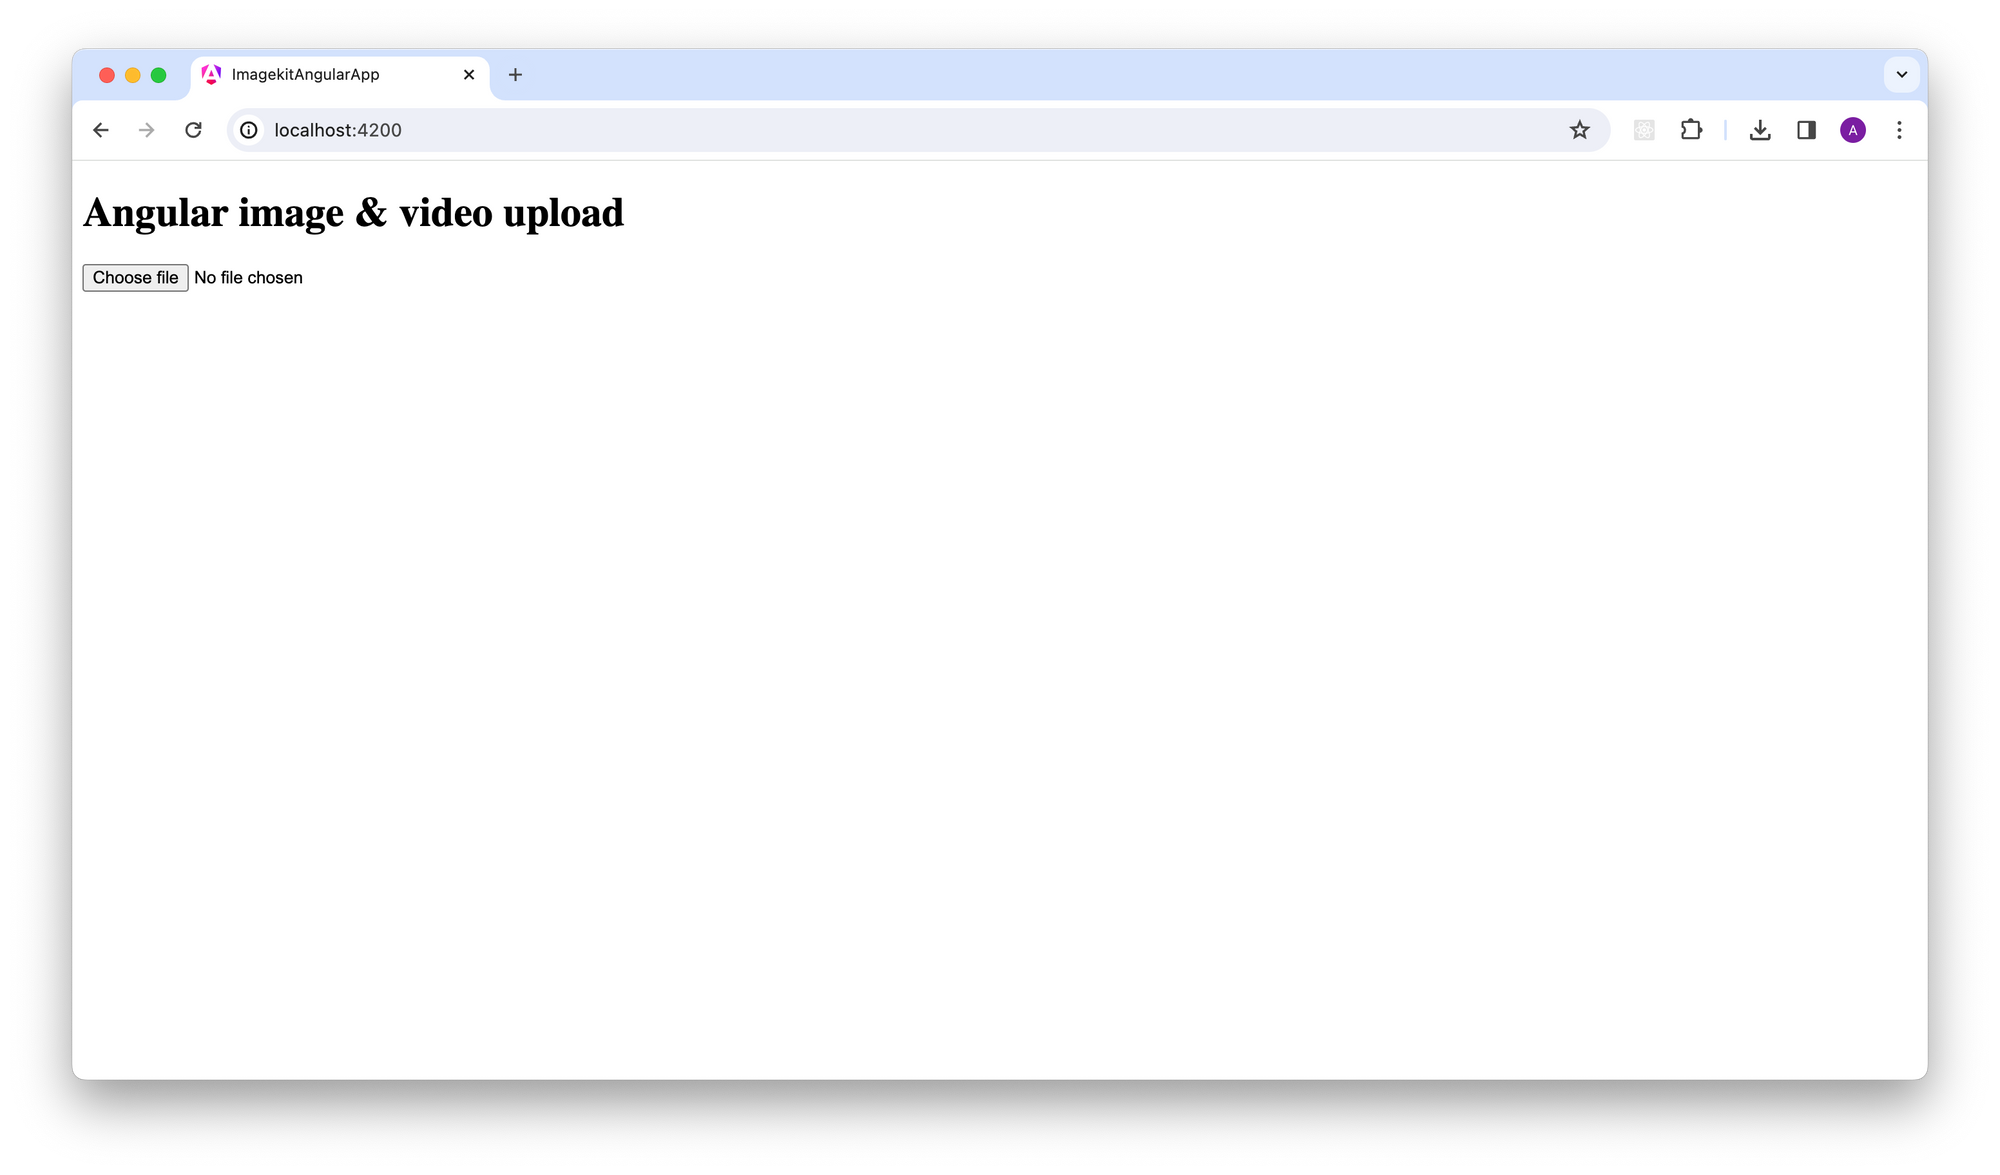
This upload button is very simple. It just opens a file picker dialog. We will instead use a custom file picker component and remove the default file picker input.
Custom file upload interface
Let's make a new component called upload-form using the ng generate command provided by the Angular CLI.
ng generate component upload-form
Now, let's make changes to our upload-form component. First, open the upload-form/upload-form.component.html file and add this code:
<h1>Angular image & video upload</h1>
<form class="upload-form">
  <h1>Upload File</h1>

  <label
    for="file"
    (dragover)="handleDragOver($event)"
    (drop)="handleDrop($event)"
  >
    <i class="ph ph-upload"></i>

    <span>
      Drag & drop or
      <span>browse</span>
      your files
    </span>
  </label>

  <input
    id="file"
    type="file"
    name="file"
    (change)="onFileSelected($event, null)"
  />

  <div class="result" [style.display]="outputBoxVisible ? 'flex' : 'none'">
    <i class="ph ph-file"></i>
    <div class="file-details">
      <span class="file-name">{{ fileName }}</span>
      <ng-container *ngIf="uploadStatus === 200 || uploadStatus === undefined">
        <span class="file-size">{{ fileSize }}</span>
      </ng-container>
    </div>

    <div class="upload-result" [style.display]="uploadStatus ? 'flex' : 'none'">
      <span>{{ uploadResult }}</span>
      <ng-container *ngIf="uploadStatus === 200; else error">
        <i class="ph ph-check-circle"></i>
      </ng-container>
      <ng-template #error>
        <i class="ph ph-x-circle"></i>
      </ng-template>
    </div>
  </div>
</form>
Next, we'll give our component some style by adding CSS to the upload-form/upload-form.component.css file. Add the CSS code from the provided file.
To integrate icons, insert the provided script tag into the index.html file. We're utilising phosphor-icons for this purpose.
<script src="https://unpkg.com/@phosphor-icons/web"></script>Now, let's include our upload-form component in our src/app/app.component.ts file.
import { Component } from '@angular/core';
import { UploadFormComponent } from './upload-form/upload-form.component';
@Component({
  selector: 'app-root',
  standalone: true,
  imports: [UploadFormComponent],
  templateUrl: './app.component.html',
  styleUrl: './app.component.css',
})
export class AppComponent {
  title = 'imagekit-angular-app';
}
Let's also update src/app/app.component.html.
<app-upload-form />We've built our UI, but it won't function properly until we create the functions onFileSelected and handleDrop, which we referenced earlier in our UI.
Let's update the upload-form/upload-form.component.ts file.
import { Component } from '@angular/core';
import { CommonModule } from '@angular/common';

@Component({
  selector: 'app-upload-form',
  standalone: true,
  imports: [CommonModule],
  templateUrl: './upload-form.component.html',
  styleUrl: './upload-form.component.css',
})
export class UploadFormComponent {
  outputBoxVisible = false;
  progress = `0%`;
  uploadResult = '';
  fileName = '';
  fileSize = '';
  uploadStatus: number | undefined;

  constructor() {}

  onFileSelected(event: any, inputFile: File | null) {
    this.outputBoxVisible = false;
    this.progress = `0%`;
    this.uploadResult = '';
    this.fileName = '';
    this.fileSize = '';
    this.uploadStatus = undefined;
    const file: File = inputFile || event.target.files[0];

    if (file) {
      this.fileName = file.name;
      this.fileSize = `${(file.size / 1024).toFixed(2)} KB`;
      this.outputBoxVisible = true;

      const formData = new FormData();
      formData.append('file', file);

      const xhr = new XMLHttpRequest();
      xhr.open('POST', 'http://localhost:4000/upload', true);

      xhr.onreadystatechange = () => {
        if (xhr.readyState === XMLHttpRequest.DONE) {
          if (xhr.status === 200) {
            this.uploadResult = 'Uploaded';
          } else if (xhr.status === 400) {
            this.uploadResult = JSON.parse(xhr.response)!.message;
          } else {
            this.uploadResult = 'File upload failed!';
          }
          this.uploadStatus = xhr.status;
        }
      };

      xhr.send(formData);
    }
  }

  handleDragOver(event: DragEvent) {
    event.preventDefault();
    event.stopPropagation();
  }

  handleDrop(event: DragEvent) {
    event.preventDefault();
    if (event.dataTransfer) {
      const file: File = event.dataTransfer.files[0];
      this.onFileSelected(event, event.dataTransfer.files[0]);
    }
  }
}
In the upload-form-component.ts file:
- We obtain files using a file picker through the change event or directly through the drop event when a file is dropped into the file input UI. In both cases, we utilize the
onFileSelectedmethod which accepts an event as input. - The
onFileSelectedmethod retrieves the file from the event based on its type. When triggered by the inputchangeevent, the file is obtained asHTMLInputElement.files, which is essentially a fileList. We select a single file by accessingevent.target.files[0]. - In the case of a drop event, the file is obtained from the dataTransfer property of the event, which contains a list of files. We access a single file using
event.dataTransfer.files[0]. - This method extracts the file name and size, appends the file as form data, and then initiates an
XMLHttpRequestto/api/upload. - After sending the request, it updates the result based on the status received from the API.
handleDropfunction is invoked when a file is dragged and dropped into the file input container, triggering adropevent. It then passes the event to theonFileSelectedmethod.handleDragOverfunction is invoked when thedragoverevent occurs. It's essential to executepreventDefault()andstopPropagation()duringdragoverto ensure the proper functionality of thedropoperation.
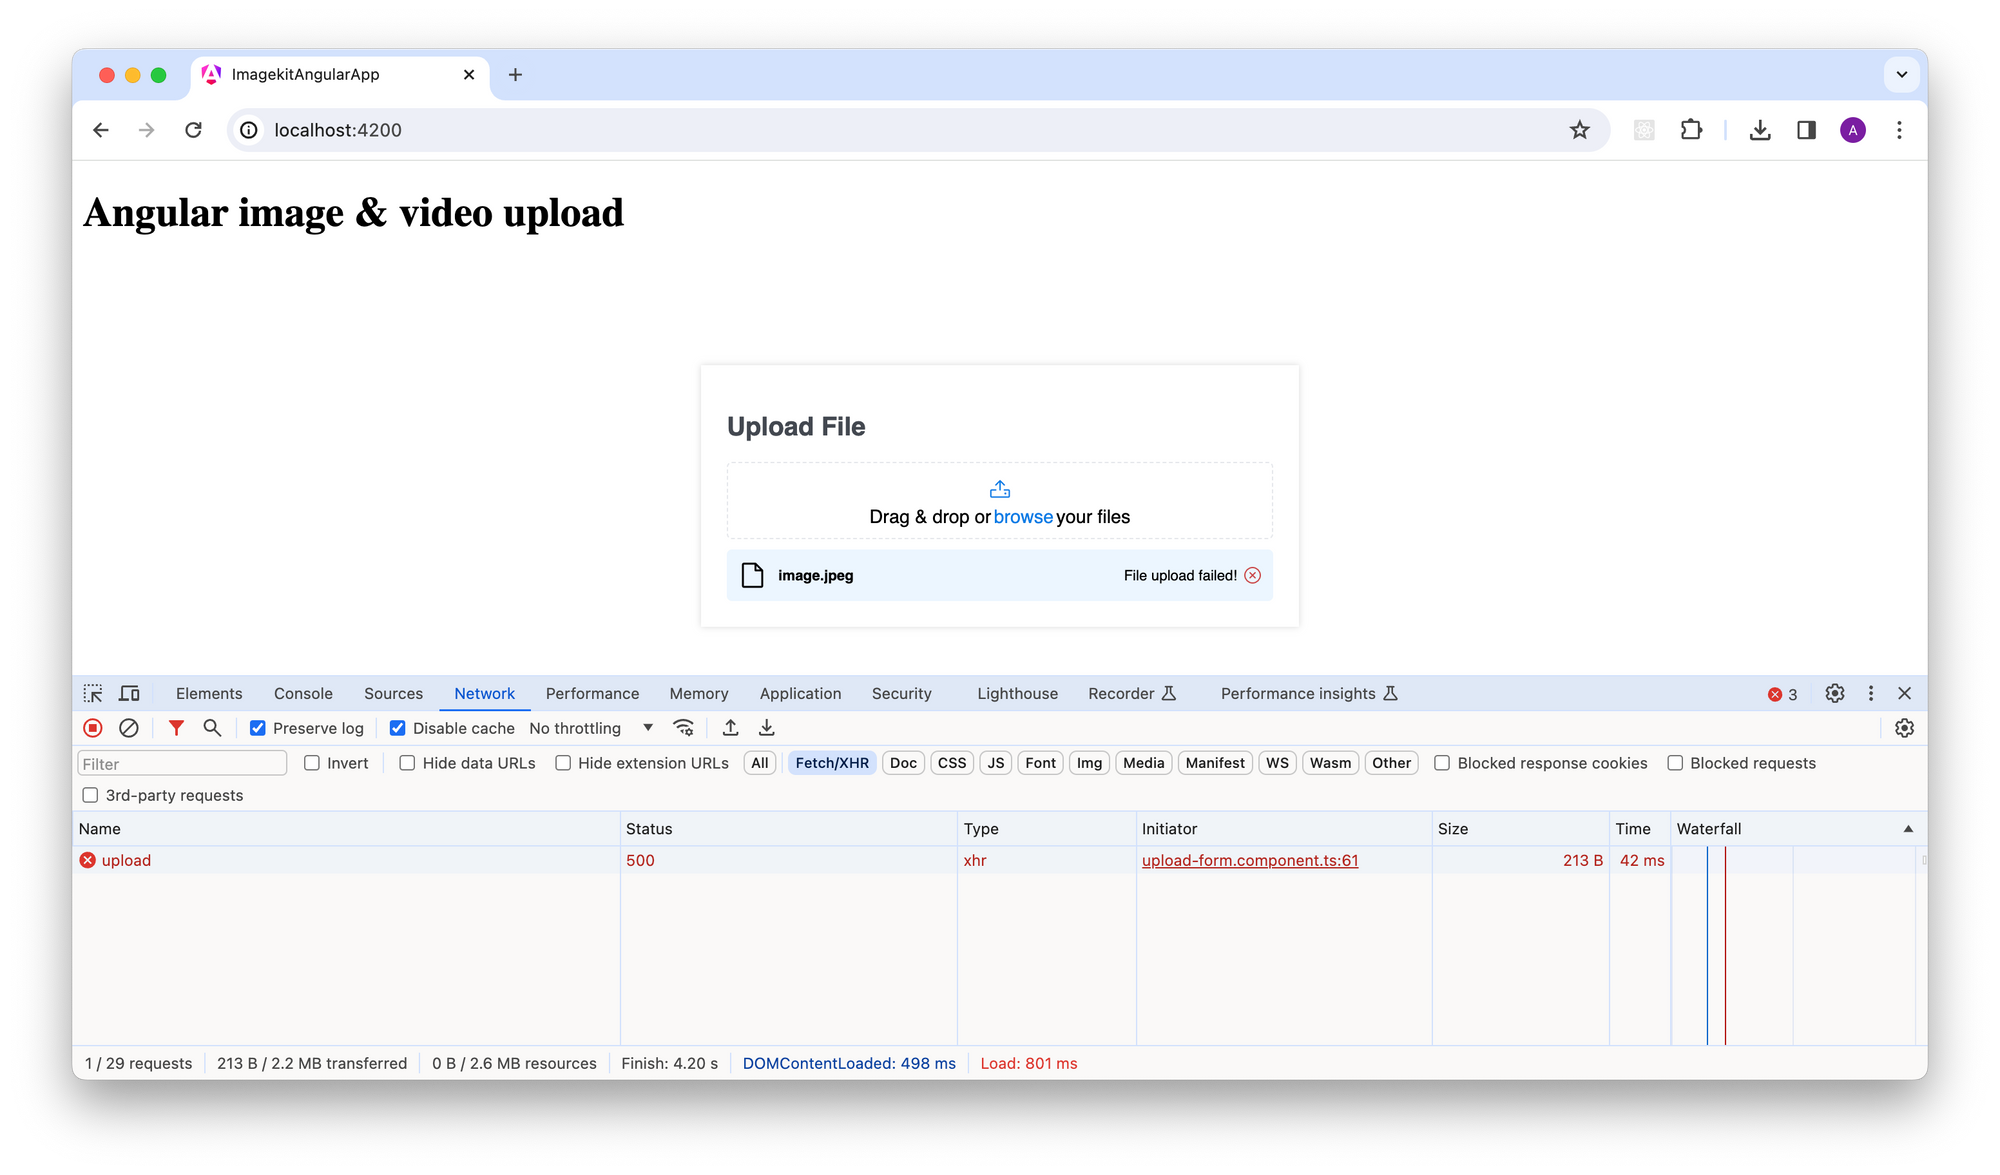
Here's how our application will look now. If we attempt to upload a file, it'll fail because we still need to set up a backend service. Let's create a backend service to provide an endpoint at http://localhost:4000/upload.
Setting up the backend
Now we will create a Node.js application to accept a file and store it locally. Run the below commands to create a node application.
mkdir server
cd server
npm init -y
npm install express multer cors nodemon
Create a server.js file and add the code below to it.
const express = require("express");
const multer = require("multer");
const path = require("path");
const cors = require("cors");

const app = express();
const PORT = 4000;

app.use(cors());

app.use((req, _, next) => {
  console.log("Request received at:", req.path);
  next();
});

const storage = multer.diskStorage({
  destination: function (req, file, cb) {
    cb(null, "uploads/");
  },
  filename: function (req, file, cb) {
    cb(
      null,
      file.fieldname + "-" + Date.now() + path.extname(file.originalname)
    );
  },
});

const upload = multer({
  storage: storage
});

app.post("/upload", upload.single("file"), (req, res) => {
  if (!req.file) {
    return res.status(400).json({ message: "No file uploaded" });
  }
  res.status(200).json({
    message: "File uploaded successfully",
    filename: req.file.filename,
  });
});

app.use("/uploads", express.static("uploads"));

app.listen(PORT, () => {
  console.log(`Server is running on http://localhost:${PORT}`);
});
In the server.js file, we're configuring a Node.js server with Express to manage file uploads, and it's set to listen on port 4000.
- We are using the
corsmiddleware to enable Cross-Origin Resource Sharing, which permits the server to specify origins from which browsers can safely load resources. This is necessary because our Angular application is running on http://localhost:4200, while our server is running on http://localhost:4000. Since they are not running on the same origin, the browser would block the requests without CORS headers. - We have defined a POST route ("/upload") where files can be uploaded. It uses the multer library to handle file uploads.
- Multer is used as a middleware to manage
multipart/form-data. We've configured it to save files in theuploadsdirectory and to change the file name when uploading.
Let’s create a directory server/uploads to store files uploaded. Additionally, we need to update the server/package.json file. Refer to the code below:
{
  "name": "server",
  ...
  "scripts": {
    ...
    "start": "nodemon server.js"
  },
  ...
}
To run the backend service, run the following command inside the server directory.
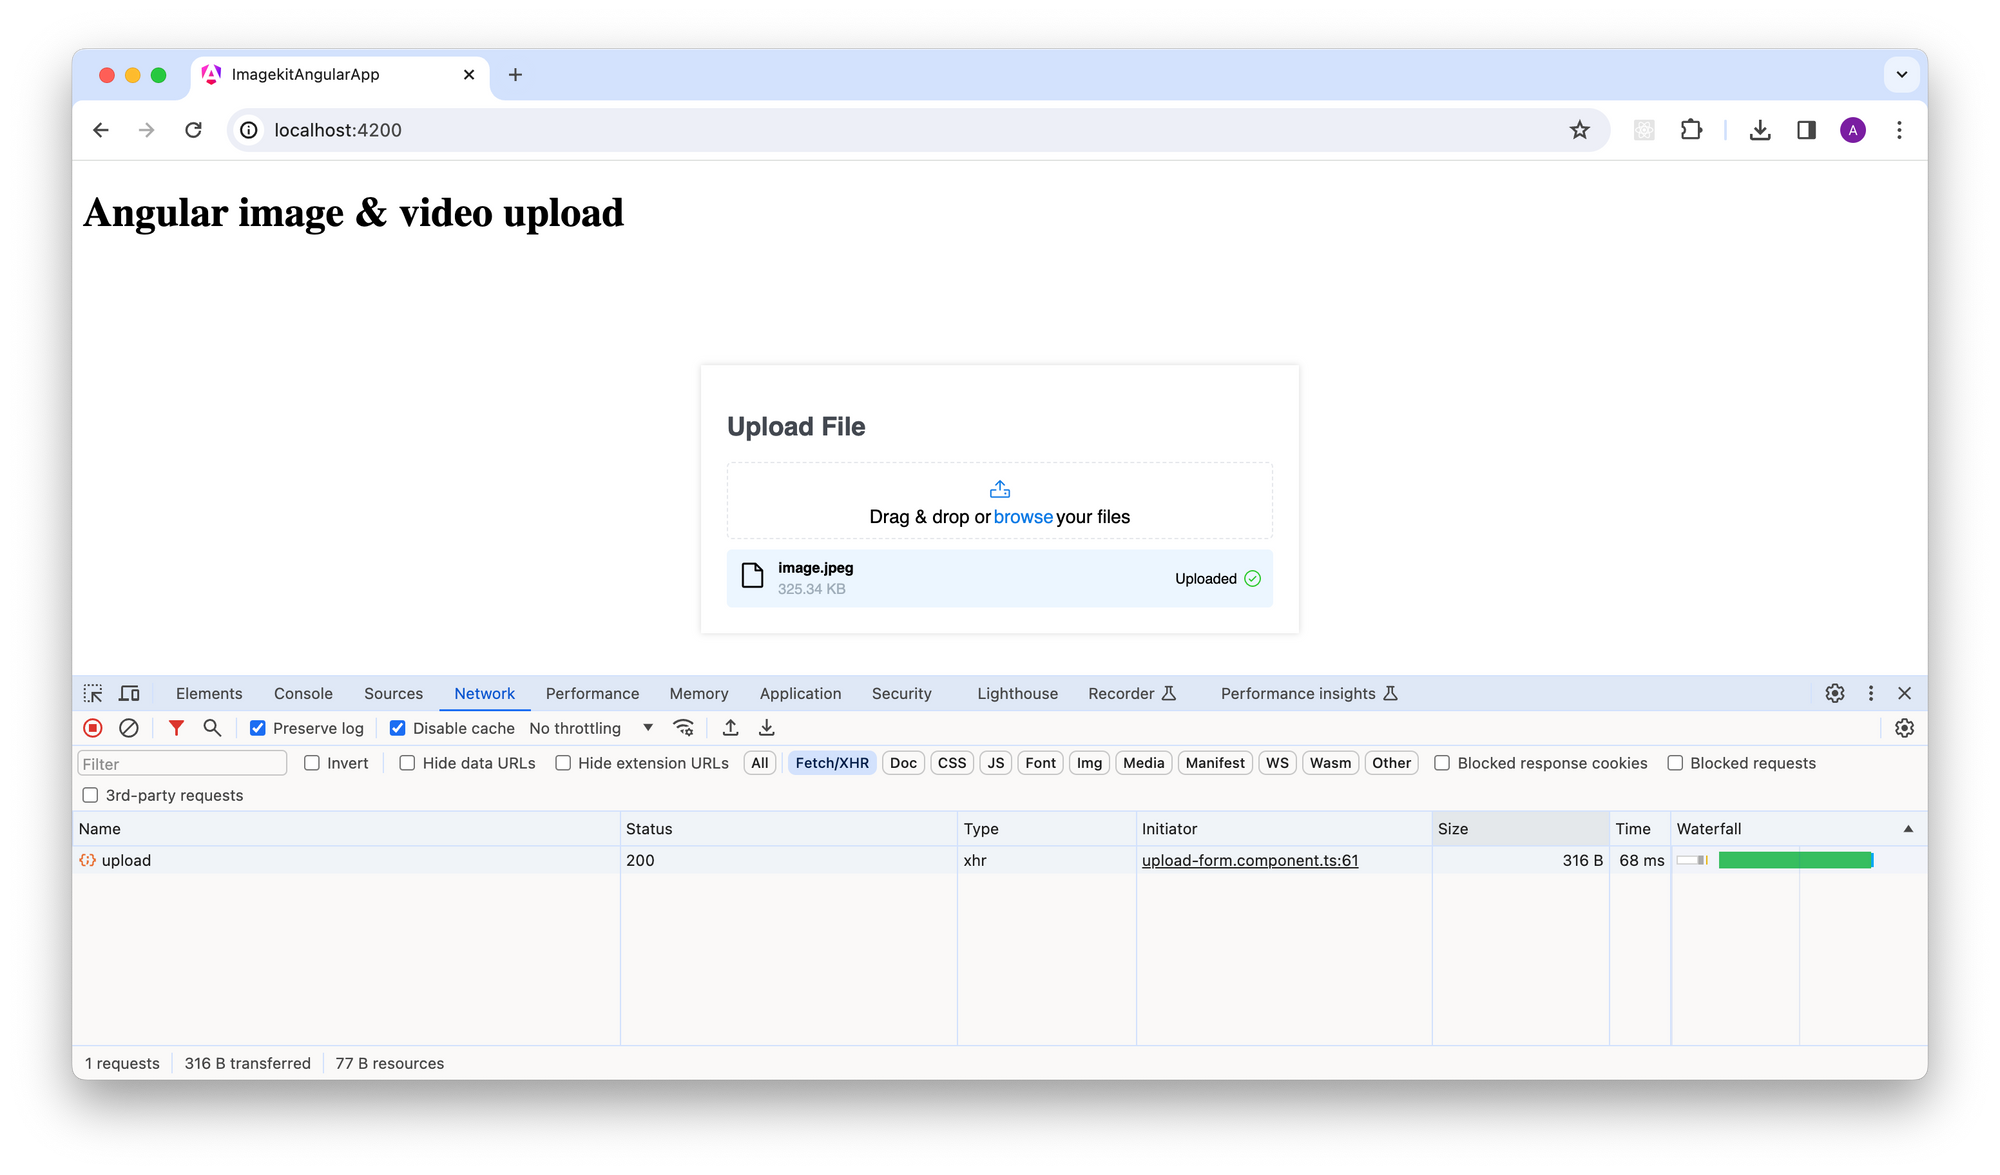
npm startNow, when we run our application and select a file, it'll be uploaded successfully. We can verify this by checking the uploads directory, where we'll find the uploaded file.
With the current setup, we have to execute two different commands to run our backend and frontend separately. We can simplify this by using the concurrently package.
npm i --save-dev concurrentlyNow, let's update the scripts section in the package.json file.
"scripts": {
    "ng": "ng",
    "start": "concurrently \"npm run start:server\" \"npm run start:frontend\"",
    "start:server": "cd server && npm start",
    "start:frontend": "ng serve",
    "build": "ng build",
    "watch": "ng build --watch --configuration development",
    "test": "ng test"
},
Now, we can start both our Angular app and backend by running the command:
npm start
To simplify our API requests, we can configure a proxy.
Create a file named proxy.conf.json in the src directory and add the following code to it:
{
  "/api/**": {
    "target": "http://localhost:4000",
    "secure": false,
    "changeOrigin": true,
    "pathRewrite": {
      "^/api": ""
    }
  }
}
Now, update the angular.json file. Inside the projects/imagekit-angular-app/architect/serve section, add the following code:
"options": {
    "proxyConfig": "src/proxy.conf.json"
},
Progress bar
Let's incorporate a progress bar into our component to track the file upload progress. Let's start with a progress bar UI.
Add this code to the upload-form/upload-form.component.html file.
<div class="file-details">
  <span class="file-name">{{ fileName }}</span>
  <ng-container *ngIf="uploadStatus === 200 || uploadStatus === undefined">
    <div class="progress-bar">
      <div class="progress" [style.width]="progress"></div>
    </div>
    <span class="file-size">{{ fileSize }}</span>
  </ng-container>
</div>
Next, let's capture the upload progress using the xhr.upload.onprogress function and display it in our UI. Add the following code to upload-form/upload-form.component.ts file at the end of the onFileSelected function.
xhr.upload.onprogress = (progressEvent) => {
    if (progressEvent.lengthComputable) {
      const progress = (progressEvent.loaded / progressEvent.total) * 100;
      this.progress = `${Math.round(progress)}%`;
    }
};
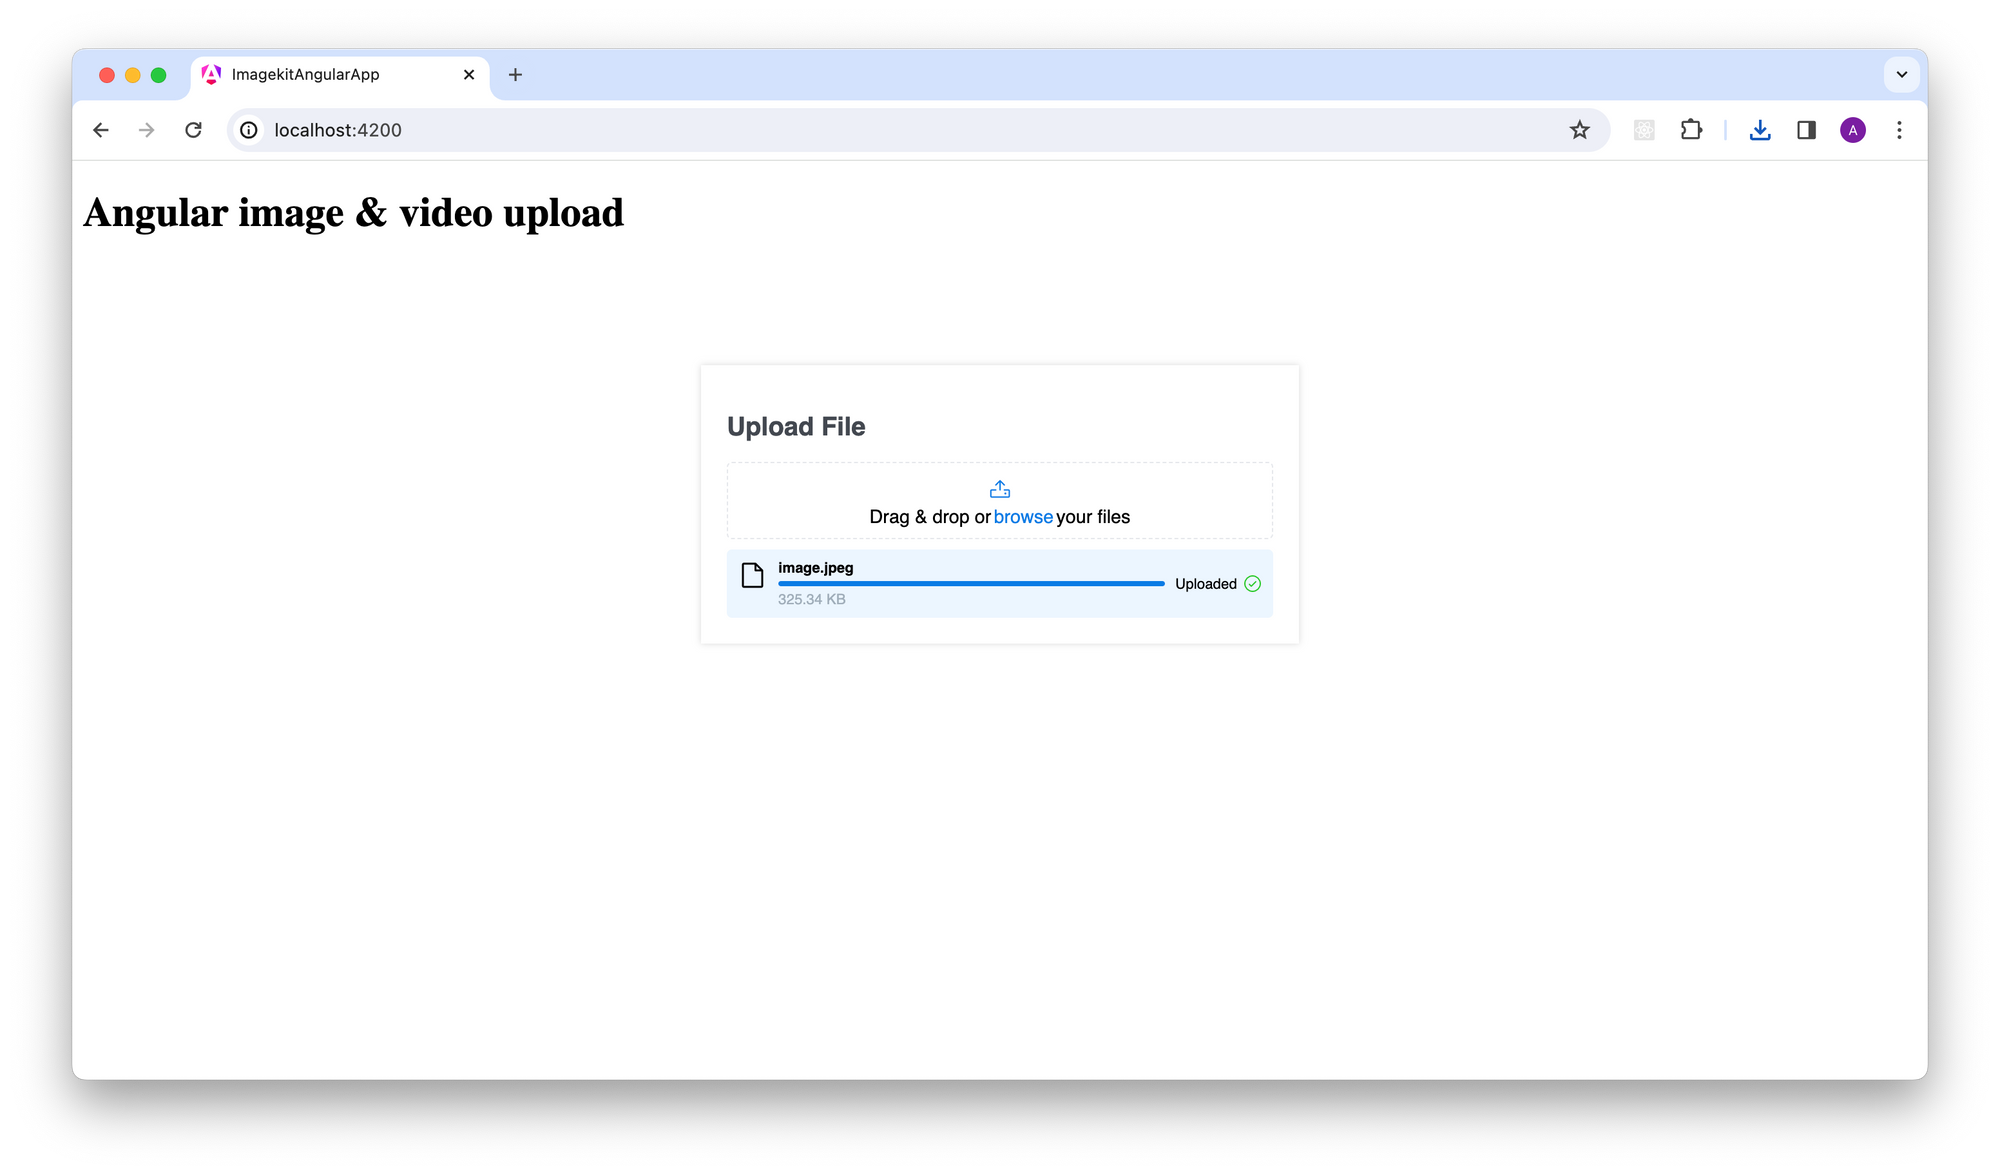
Now our custom upload component will look like this.
Adding basic validation
Let's implement some simple checks regarding file size and file type on the Node.js backend.
We'll update the server.js file to only accept images and videos with a size less than 2MB. We'll restrict the file size using the multer limits property and add a fileFilter function to validate files based on MIME type.
We will also add an error handling middleware to send errors in the API response received from multer. Use the following code:
const express = require("express");
const multer = require("multer");
const path = require("path");
const cors = require("cors");

const app = express();
const PORT = 4000;

app.use(cors());

app.use((req, _, next) => {
  console.log("Request received at:", req.path);
  next();
});

const storage = multer.diskStorage({
  destination: function (req, file, cb) {
    cb(null, "uploads/");
  },
  filename: function (req, file, cb) {
    cb(
      null,
      file.fieldname + "-" + Date.now() + path.extname(file.originalname)
    );
  },
});
const fileFilter = (req, file, cb) => {
  // Check if file is an image or video
  if (
    file.mimetype.startsWith("image/") ||
    file.mimetype.startsWith("video/")
  ) {
    cb(null, true);
  } else {
    cb(new Error("Only image and video files are allowed"));
  }
};

const upload = multer({
  storage: storage,
  fileFilter: fileFilter,
  limits: { fileSize: 2000000 },
});

app.post("/upload", upload.single("file"), (req, res) => {
  if (!req.file) {
    return res.status(400).json({ message: "No file uploaded" });
  }
  res.status(200).json({
    message: "File uploaded successfully",
    filename: req.file.filename,
  });
});

app.use("/uploads", express.static("uploads"));

// Error handling middleware
app.use((err, req, res, next) => {
  if (err instanceof multer.MulterError) {
    // Multer error occurred (e.g., file size exceeded)
    return res.status(400).json({ message: err.message });
  } else if (err) {
    // Other errors (e.g., unsupported file type)
    return res.status(400).json({ message: err.message });
  }
  next();
});

app.listen(PORT, () => {
  console.log(`Server is running on http://localhost:${PORT}`);
});
We can observe our validation in action based on file size and type here:
That's it. We have a beautiful file upload component ready.
What's wrong with this approach?
We are currently storing files locally, but this won't work if our application becomes popular. We need a solution that can handle millions of files, terabytes of data, and hundreds of requests per second. The problem is even bigger with videos since they are large files and take a long time to upload. If our users are from different parts of the world, we need to run our backend in multiple regions to ensure a good user experience.
While a DIY approach is good for learning, it isn't practical for real-world applications. This is where ImageKit comes in. It is a third-party service that can manage all your file upload and storage needs. It is highly scalable and easily handles billions of files, terabytes of data, and hundreds of requests per second. Additionally, ImageKit provides features like image resizing, cropping, watermarking, file format conversion, video streaming, and much more.
Let's look at some common problems and possible solutions to make sure our upload system is robust and easy to use.
Limited File Storage on Servers
- Files are stored on a file system, and they have limited disk space. Scaling up requires increasingly larger disks.
- Local disks can only be attached to one server, preventing multiple application instances.
- ImageKit handles globally distributed uploads. Manages billions of files, terabytes of data, and hundreds of requests per second.
High Latency with Large File Uploads
- Large files like videos take longer to upload.
- Users in different regions may experience high latencies when uploading to a single region.
- We can deploy and run the backend in multiple regions to solve this.
- ImageKit offers a global upload API endpoint. Routes upload requests to the nearest of six strategically located regions to minimize latency.
Security Concerns
- File uploads can be entry points for hackers to inject malicious files. This could compromise the entire cloud infrastructure.
- Offload file handling to an external service to protect servers from attacks.
File Delivery
- After uploading, delivering files to users requires another application layer.
- ImageKit provides a robust delivery API and supports high request rates. It offers features such as intelligent image optimization, resizing, cropping, watermarking, file format conversion, video optimization, and streaming.
Uploading files to ImageKit directly from the browser
Let's do everything again, but this time using ImageKit with a few lines of code. The overall functionality will remain the same. To ease the development, we will use ImageKit Angular SDK. In this case, we will upload files to ImageKit directly from the browser.
We would be performing the following steps
- Setup ImageKit Angular SDK
- Setup routes and add a landing page
- Generate authentication parameters on the backend
- File picker component
- Create a progress bar
- Validation
- Abort Upload
Setup ImageKit Angular SDK
Install the ImageKit Angular SDK:npm install --save imagekitio-angular
Initializing the Angular SDK:
Before using the SDK, let's learn how to obtain the necessary initialization parameters:
urlEndpointis a required parameter. This can be obtained from the URL-endpoint section or the developer section on your ImageKit dashboard.publicKeyandauthenticatorparameters are needed for client-side file upload.publicKeycan be obtained from the Developer section on your ImageKit dashboard.authenticatorexpects an asynchronous function that resolves with an object containing the necessary security parameters i.esignature,token, andexpire.
Create src/app/app.module.ts and add this code:
import { NgModule } from '@angular/core';
import { BrowserModule } from '@angular/platform-browser';
import { AppComponent } from './app.component';
import { ImagekitioAngularModule } from 'imagekitio-angular';

@NgModule({
  declarations: [
    AppComponent,
  ],
  imports: [
    BrowserModule,
    ImagekitioAngularModule.forRoot({
      urlEndpoint: "your_endpoint",
      publicKey: "your_public_key",
    })
  ],
  providers: [],
  bootstrap: [AppComponent]
})
export class AppModule { }
Update src/main.ts with the code below.
import { platformBrowserDynamic } from '@angular/platform-browser-dynamic';

import { AppModule } from './app/app.module';

platformBrowserDynamic()
  .bootstrapModule(AppModule)
  .catch((err) => console.log(err));
Setup routes and add a landing page
We'll use the component we created earlier. First, let's create a new component called landing-page. This will allow us to navigate to both native file upload and file upload using ImageKit. Use the command below to generate the component.
ng generate component landing-pageNow, update src/app/landing-page/landing-page.component.ts with code below.
import { Component } from '@angular/core';
import { Router } from '@angular/router';

@Component({
  selector: 'app-landing-page',
  standalone: true,
  imports: [],
  templateUrl: './landing-page.component.html',
  styleUrl: './landing-page.component.css'
})
export class LandingPageComponent {
  constructor(private router: Router) {}
  navigateToNative() {
    this.router.navigate(['/native']);
  }
  navigateToImagekit(){
    this.router.navigate(['/imagekit']);
  }
}
In the file above, we created two functions: navigateToNative and navigateToImagekit. When called, these functions will navigate to /native and /imagekit, respectively.
Let's update its UI. Open src/app/landing-page/landing-page.component.html and add the code below. This will add two buttons which, on clicked, will call the navigateToNative and navigateToImagekit functions we created earlier.
<div class="container1">
  <div class="container2">
    <h1>Angular image & video upload</h1>
    <button (click)="navigateToNative()">Native Angular Upload</button>
    <button (click)="navigateToImagekit()">Imagekit Angular Upload</button>
  </div>
</div>
Next, we'll give our component some style by adding CSS to the src/app/landing-page/landing-page.component.css file. You can find the CSS code in this GitHub repository:
Now, we need to set up the routes for native and imagekit where we want our upload forms to render. Create src/app/app-routing.module.ts and add the following code.
import { NgModule } from '@angular/core';
import { RouterModule, Routes } from '@angular/router';
import { UploadFormComponent } from './upload-form/upload-form.component';
import { LandingPageComponent } from './landing-page/landing-page.component';

const routes: Routes = [
  { path: '', component: LandingPageComponent },
  { path: 'native', component: UploadFormComponent },
];

@NgModule({
  imports: [RouterModule.forRoot(routes)],
  exports: [RouterModule],
})
export class AppRoutingModule {}
We have configured our routes. Let’s add AppRoutingModule inside imports in src/app/app.module.ts.
...
import { AppRoutingModule } from './app-routing.module';

@NgModule({
  ...
  imports: [
    ...
    AppRoutingModule,
    ...
  ],
  ...
})
export class AppModule { }
Now, we will update src/app/app.component.html to render our routes, as shown below.
<router-outlet></router-outlet>Let’s update app.component.ts with the below code:
import { Component } from '@angular/core';
@Component({
  selector: 'app-root',
  templateUrl: './app.component.html',
  styleUrl: './app.component.css',
})
export class AppComponent {
  title = 'imagekit-angular-app';
}
Now, if we navigate to http://localhost:4200/, it will look like this. You will notice that clicking the Native button takes us to the /native route and displays our previous upload form. However, when we click the ImageKit button, nothing happens because we haven't configured it yet.
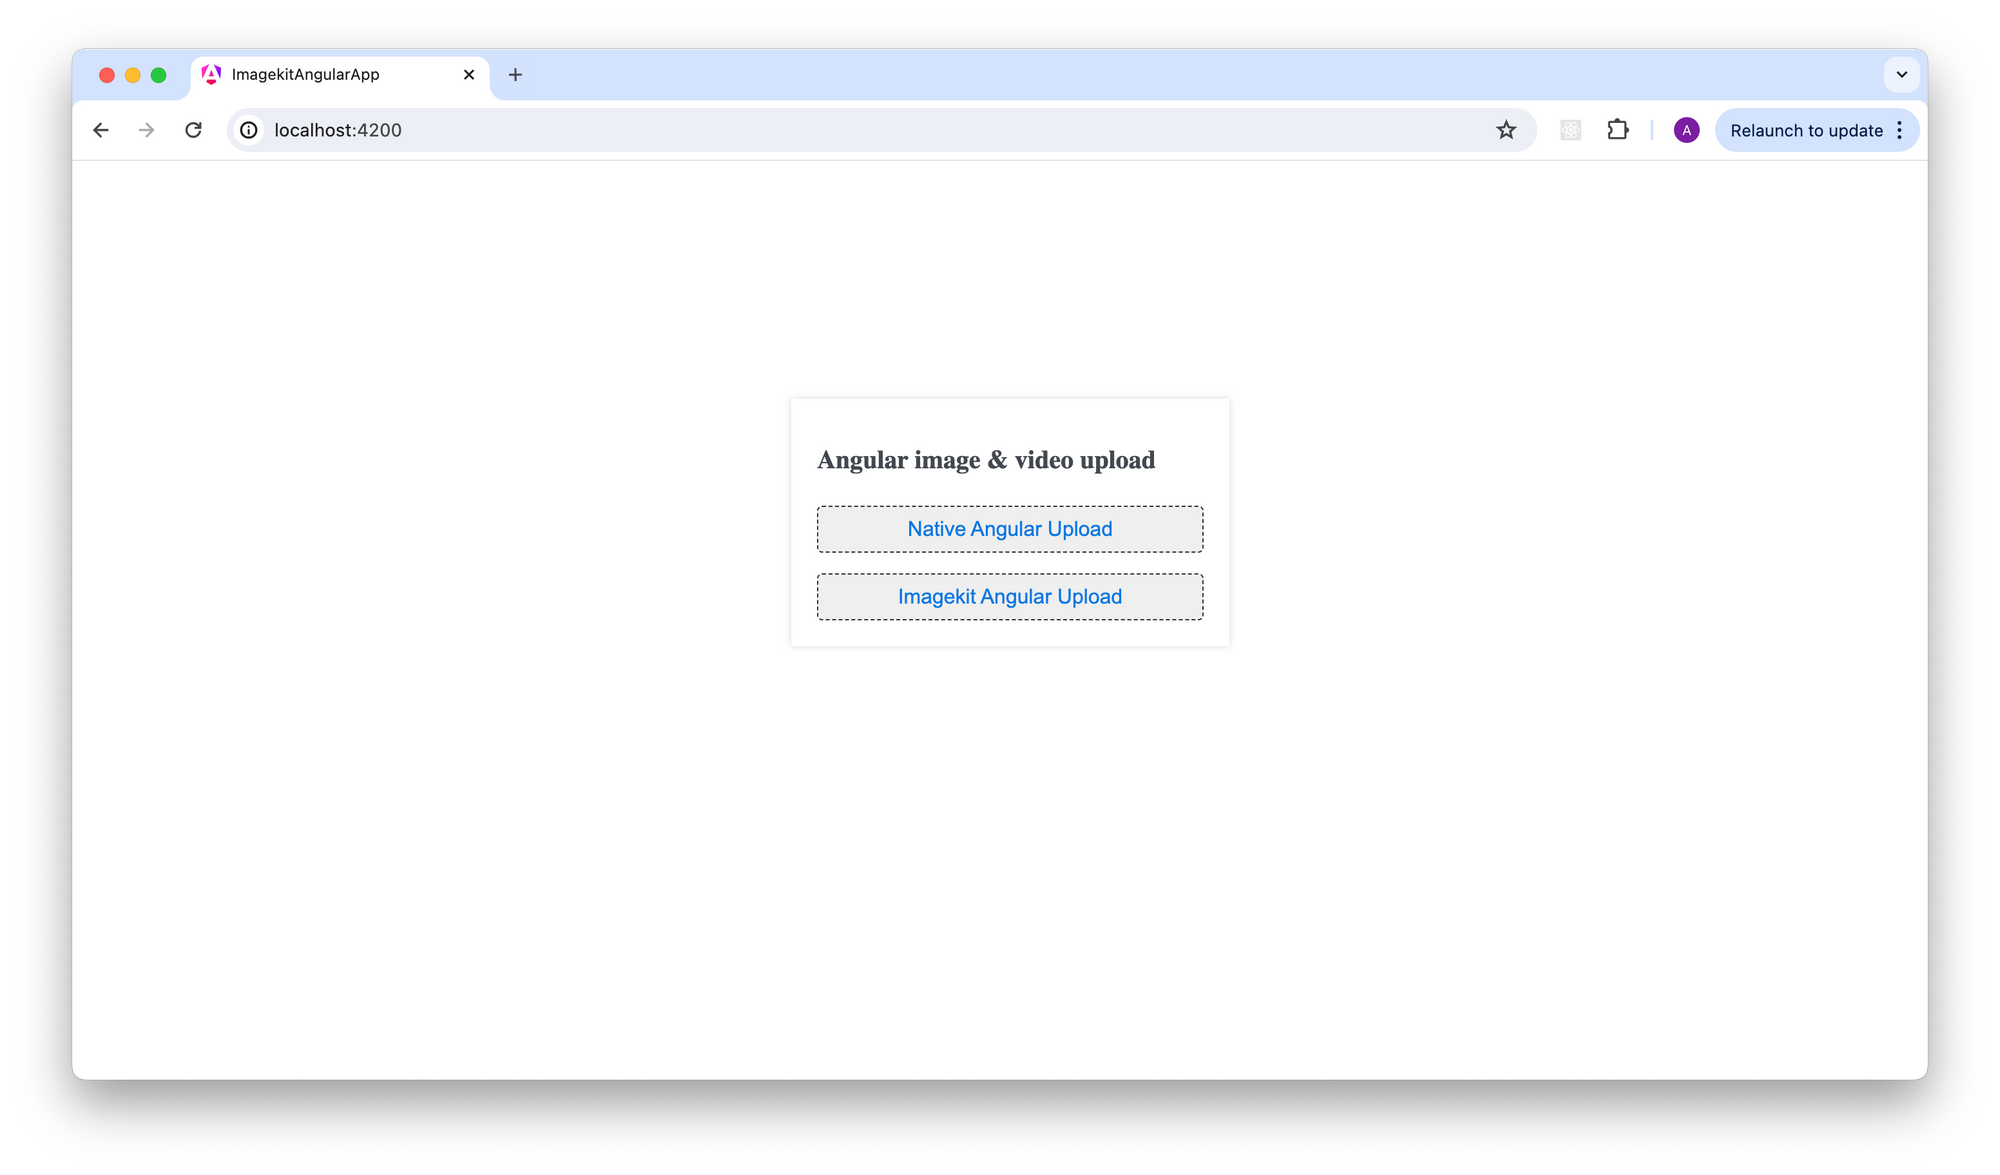
Our landing page is ready.
Generate authentication parameters on the backend
To ensure security, the upload API requires authentication parameters so that no one else can upload files to your account. ImageKit uses a private key to generate these authentication parameters, ensuring secure uploads.
First, let's install the necessary packages.
cd server
npm install dotenv
Next, we'll add the /auth endpoint to our backend. Open server/server.js and update it with the following code.
...
const dotenv = require('dotenv');

dotenv.config();

const crypto = require("crypto");

const privateKey = process.env.PRIVATE_KEY;

...

app.get("/auth", function(req, res) {
  var token = req.query.token || crypto.randomUUID();
  var expire = req.query.expire || parseInt(Date.now()/1000)+2400;
  var privateAPIKey = `${privateKey}`;
  var signature = crypto.createHmac('sha1', privateAPIKey).update(token+expire).digest('hex');
  res.status(200);
  res.send({
      token : token,
      expire : expire,
      signature : signature
  });
});

...
We'll also need a .env file to specify the value for PRIVATE_KEY. You can find this key on the settings page of your ImageKit account, where you can also find the PUBLIC_KEY. A sample .env file should look like this:
PRIVATE_KEY=<your-private-key>Let's run the backend server.
cd server
npm run start
You should see a log saying that the app is “Live on port 4000”.
If you GET http://localhost:4000/auth, you should see a JSON response like this. Actual values will vary.
{
    token: "5dd0e211-8d67-452e-9acd-954c0bd53a1f",
    expire: 1601047259,
    signature: "dcb8e72e2b6e98186ec56c62c9e62886f40eaa96"
}
File Picker Component
Next, we will create another component called imagekit-upload-form for uploading files using ImageKit. Use the command below to create the component.
ng generate component imagekit-upload-formLet's create the UI for it. We will use the ik-upload component and authenticator function as well as a buttonRef property to use our custom upload form. Update src/app/imagekit-upload-form/imagekit-upload-form.component.html with the following code.
<div className="App">
  <h1>ImageKit Angular file upload</h1>
  <ik-upload [buttonRef]="myBtn" [authenticator]="authenticator">
  </ik-upload>
  <form class="upload-form">
    <h1>Upload File</h1>
    <button type="button" #myBtn>
      <i class="ph ph-upload"></i>
      <span>
        <span>Browse</span>
        your files
      </span>
    </button>
  </form>
</div>
Next, we'll give our component some style by adding CSS to the src/app/imagekit-upload-form/imagekit-upload-form.component.css file. You can find the CSS code in this GitHub repository:
Now, let's update src/app/imagekit-upload-form/imagekit-upload-form.component.ts. Here, we will create an authenticator function that fetches the authentication parameters required for the upload from /api/auth.
import { Component } from '@angular/core';

@Component({
  selector: 'app-imagekit-upload-form',
  templateUrl: './imagekit-upload-form.component.html',
  styleUrl: './imagekit-upload-form.component.css',
})
export class ImagekitUploadFormComponent {
  constructor() {}
  title = 'app';

  authenticator = async () => {
    try {
      // You can pass headers as well and later validate the request source in the backend, or you can use headers for any other use case.
      const response = await fetch('/api/auth');
      if (!response.ok) {
        const errorText = await response.text();
        throw new Error(
          `Request failed with status ${response.status}: ${errorText}`
        );
      }
      const data = await response.json();
      const { signature, expire, token } = data;
      return { signature, expire, token };
    } catch (error: any) {
      throw new Error(`Authentication request failed: ${error.message}`);
    }
  };
}
Let's now configure the /imagekit route and render the imagekit-upload-form component on it.
Add the following inside the routes array in src/app/app-routing.module.ts:
{ path: 'imagekit', component: ImagekitUploadFormComponent }We will also add the ImagekitUploadFormComponent to src/app/app.module.ts, as shown below.
...
import { ImagekitUploadFormComponent } from './imagekit-upload-form/imagekit-upload-form.component';

@NgModule({
  declarations: [
    AppComponent,
    ImagekitUploadFormComponent,
  ],

  ...

})
export class AppModule { }
If we navigate to http://localhost:4200/imagekit, we can see our file upload in action.
ImageKit handles the entire backend for us. Remember how we had to create an upload endpoint using multer earlier? ImageKit provides secure file uploads without the need for additional backend setup.
Create a Progress bar
Our file uploads are working properly. But that's not all ImageKit offers. We can use several event handlers like onError for upload errors and onSuccess for successful uploads events.
Let's create a progress bar to see these event handlers in action. Add the UI for progress bar update in src/app/imagekit-upload-form/imagekit-upload-form.component.html.
<div className="App">
  <h1>ImageKit Angular file upload</h1>
  <ik-upload
    (onSuccess)="handleUploadSuccess($event)"
    (onError)="handleUploadError($event)"
    [buttonRef]="myBtn"
    [authenticator]="authenticator"
    [onUploadStart]="onUploadStartFunction"
    [onUploadProgress]="onUploadProgressFunction"
  >
  </ik-upload>
  <form class="upload-form">
    <h1>Upload File</h1>

    <button type="button" #myBtn>
      <i class="ph ph-upload"></i>
      <span>
        <span>Browse</span>
        your files
      </span>
    </button>
    <div class="result" [style.display]="outputBoxVisible ? 'flex' : 'none'">
      <i class="ph ph-file"></i>
      <div class="file-details">
        <span class="file-name">{{ fileName }}</span>
        <ng-container
          *ngIf="uploadStatus === 200 || uploadStatus === undefined"
        >
          <div class="progress-bar">
            <div class="progress" [style.width]="progress"></div>
          </div>
          <span class="file-size">{{ fileSize }}</span>
        </ng-container>
      </div>

      <div
        class="upload-result"
        [style.display]="uploadStatus ? 'flex' : 'none'"
      >
        <span>{{ uploadResult }}</span>
        <ng-container *ngIf="uploadStatus === 200; else error">
          <i class="ph ph-check-circle"></i>
        </ng-container>
        <ng-template #error>
          <i class="ph ph-x-circle"></i>
        </ng-template>
      </div>
    </div>
  </form>
</div>
We can track the progress using onUploadStart and onUploadProgress events. Update src/app/imagekit-upload-form/imagekit-upload-form.component.ts with the code below:
...
import { HTMLInputEvent } from 'imagekitio-angular/lib/utility/ik-type-def-collection';

...

export class ImagekitUploadFormComponent {
  outputBoxVisible = false;
  progress = `0%`;
  uploadResult = '';
  fileName = '';
  fileSize = '';
  uploadStatus: number | undefined;

  ...

  uploadErrorMessage = '';

  ...

  onUploadStartFunction = (event: HTMLInputEvent) => {
    this.outputBoxVisible = false;
    this.progress = `0%`;
    this.uploadResult = '';
    this.fileName = '';
    this.fileSize = '';
    this.uploadStatus = undefined;
    if (event.target?.files?.length) {
      const file: File = event.target?.files[0];
      this.fileName = file.name;
      this.fileSize = `${(file.size / 1024).toFixed(2)} KB`;
      this.outputBoxVisible = true;
    }
    console.log('onUploadStart');
  };

  onUploadProgressFunction = (event: ProgressEvent): void => {
    const progress = (event.loaded / event.total) * 100;
    this.progress = `${Math.round(progress)}%`;
    console.log('progressing', { progress: this.progress });
  };

  handleUploadSuccess = (res) => {
    console.log('File upload success with response: ', res);

    if (res.$ResponseMetadata.statusCode === 200) {
      this.uploadResult = 'Uploaded';
      this.outputBoxVisible = true;
    }
    this.uploadStatus = res.$ResponseMetadata.statusCode;
  };

  handleUploadError = (err) => {
    console.log('There was an error in upload: ', err);
    this.uploadErrorMessage = 'File upload failed.';
    this.uploadResult = 'File upload failed!';
  };
}
It should look like this:
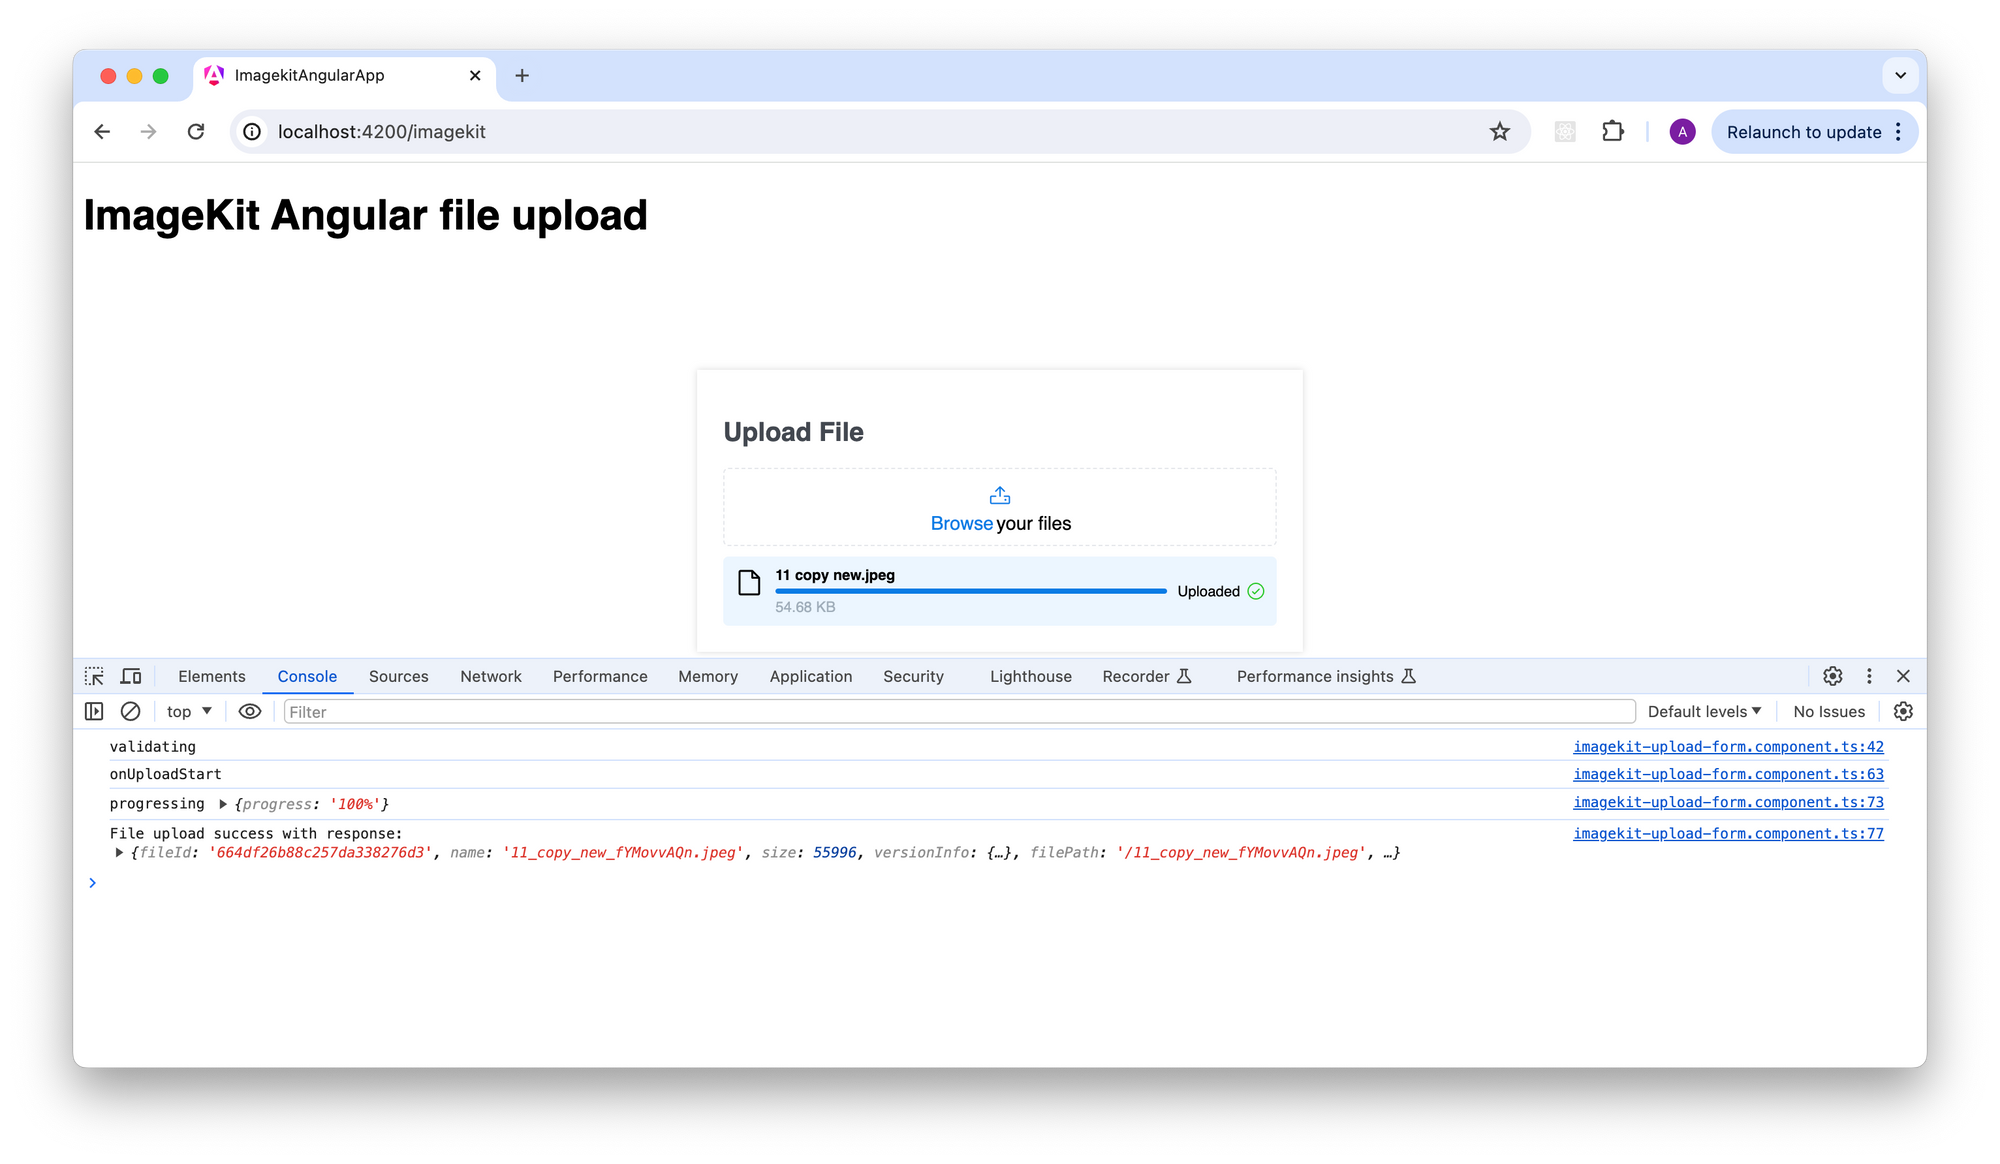
All the parameters supported by the ImageKit Upload API can be passed as shown above (e.g. extensions, webhookUrl, customMetadata etc).
Validation
To add validation, we will use the validateFile property of ik-upload. Let’s add the code below to src/app/imagekit-upload-form/imagekit-upload-form.component.html in the ik-upload component.
[validateFile]="validateFileFunction"Now add the code below to src/app/imagekit-upload-form/imagekit-upload-form.component.ts. Here, we have created the validateFileFunction, which validates a file based on size and file type.
validateFileFunction = (file: File): boolean => {
  console.log('validating', file);
  if (file.size > 2000000) {
    // Less than 2mb
    this.fileName = file.name;
    this.outputBoxVisible = true;
    this.uploadStatus = 413;
    this.uploadResult = 'File size should be less than 2mb';
    return false;
  }
  if (!(file.type.startsWith('image/') || file.type.startsWith('video/'))) {
    this.fileName = file.name;
    this.outputBoxVisible = true;
    this.uploadStatus = 403;
    this.uploadResult = 'Only image and video files are allowed';
    return false;
  }
  return true;
};
This is how our validation works.
Abort Upload
Let’s see how we can abort the file upload after it is initiated. Add the code below to src/app/imagekit-upload-form/imagekit-upload-form.component.ts.
...
import { IkUploadComponent } from 'imagekitio-angular';

...

@ViewChild('upload') uploadComponent: IkUploadComponent | undefined;

...

onAbortFunction = () => {
  this.uploadComponent && this.uploadComponent.abort();
};
...
Now, we will add an abort button in the UI. It will be visible only once the upload has started and will disappear once it is done. Add this code to src/app/imagekit-upload-form/imagekit-upload-form.component.html
<div className="App">
  <h1>ImageKit Angular file upload</h1>
  <ik-upload
    #upload
    ...
  >
  </ik-upload>

  ...

    <ng-container *ngIf="outputBoxVisible && uploadStatus === undefined">
      <div class="result-container">
        <button (click)="onAbortFunction()" type="button">Abort</button>
      </div>
    </ng-container>
  </form>
</div>
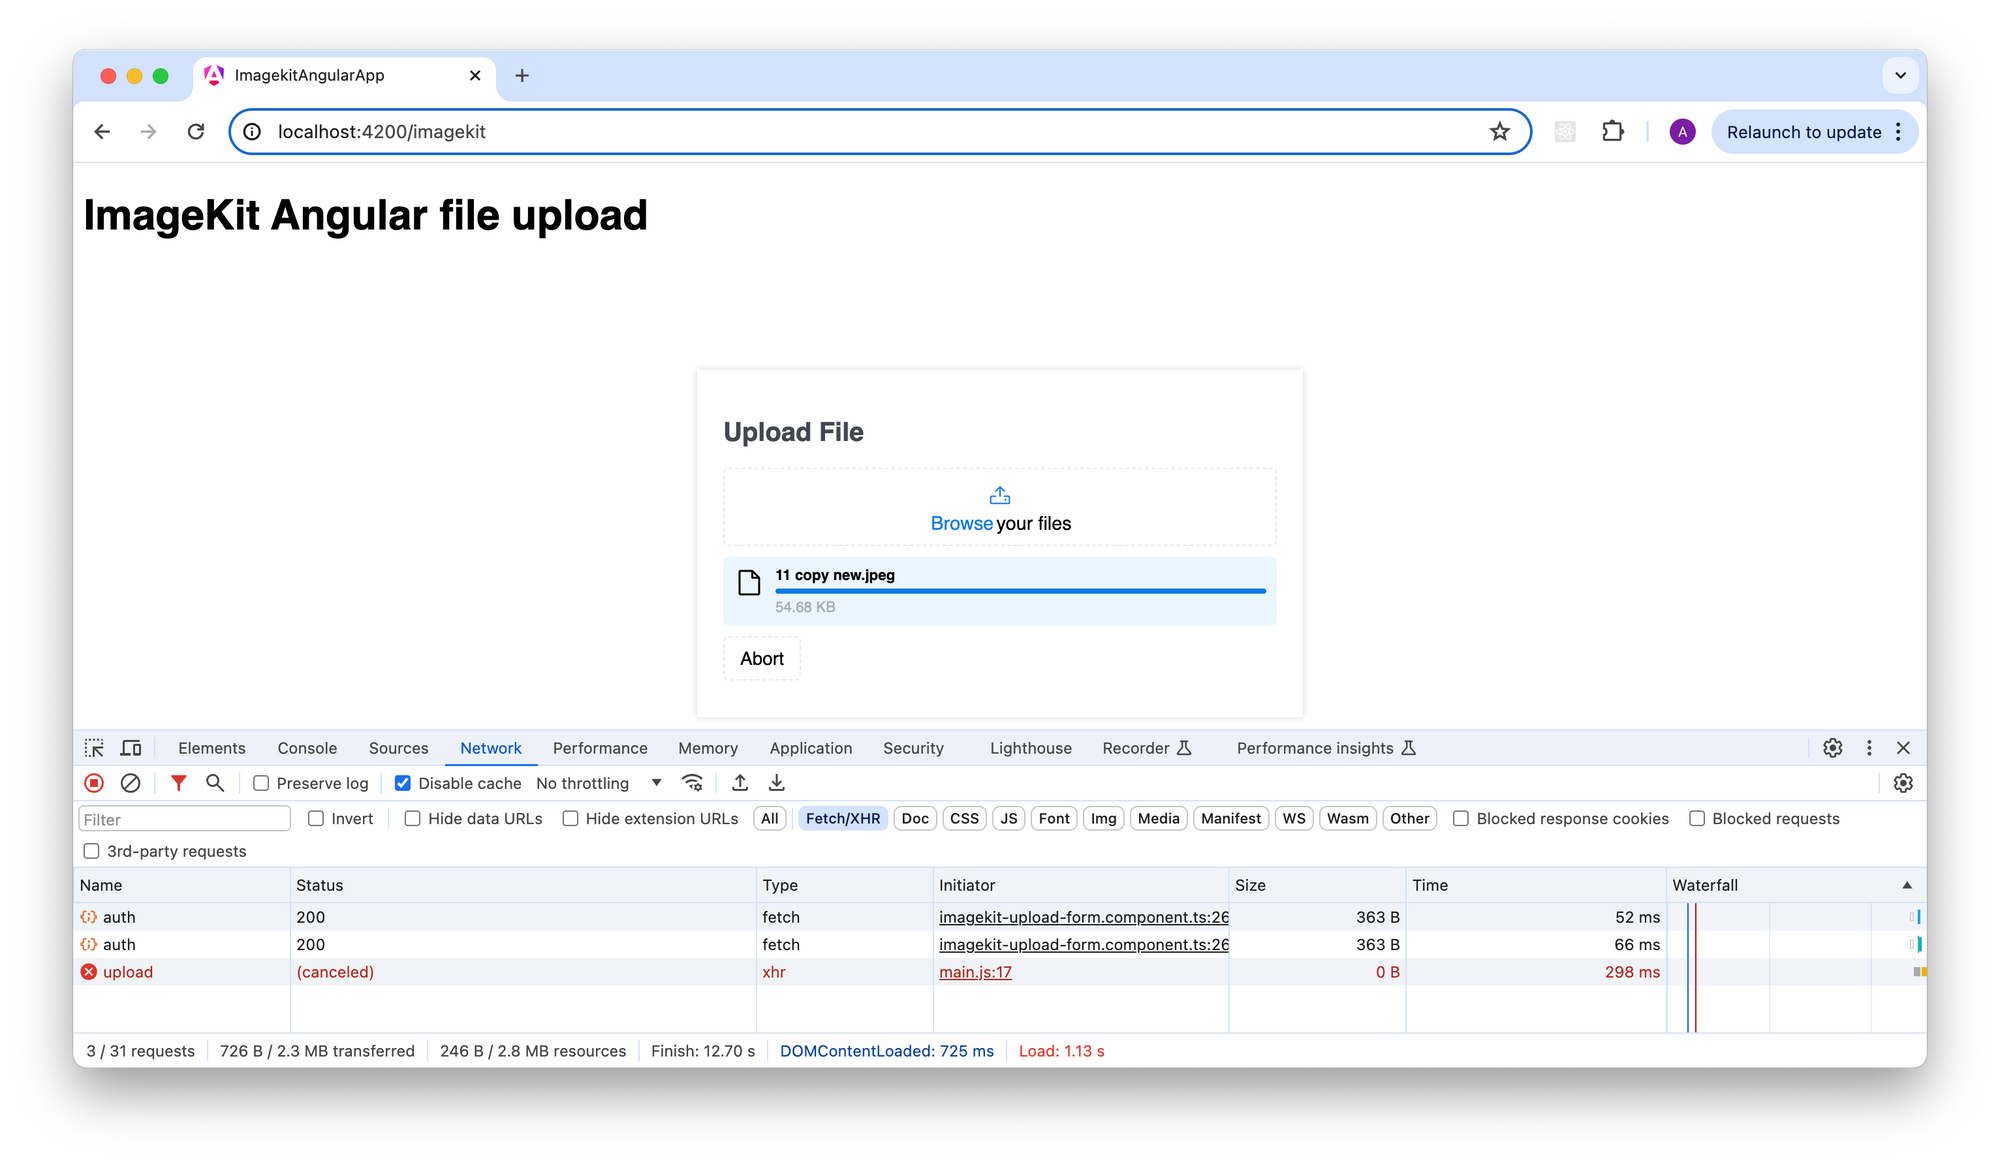
We can see below that clicking on the abort button has stopped the upload.
That's it. We have a beautiful file upload component ready.
Bonus
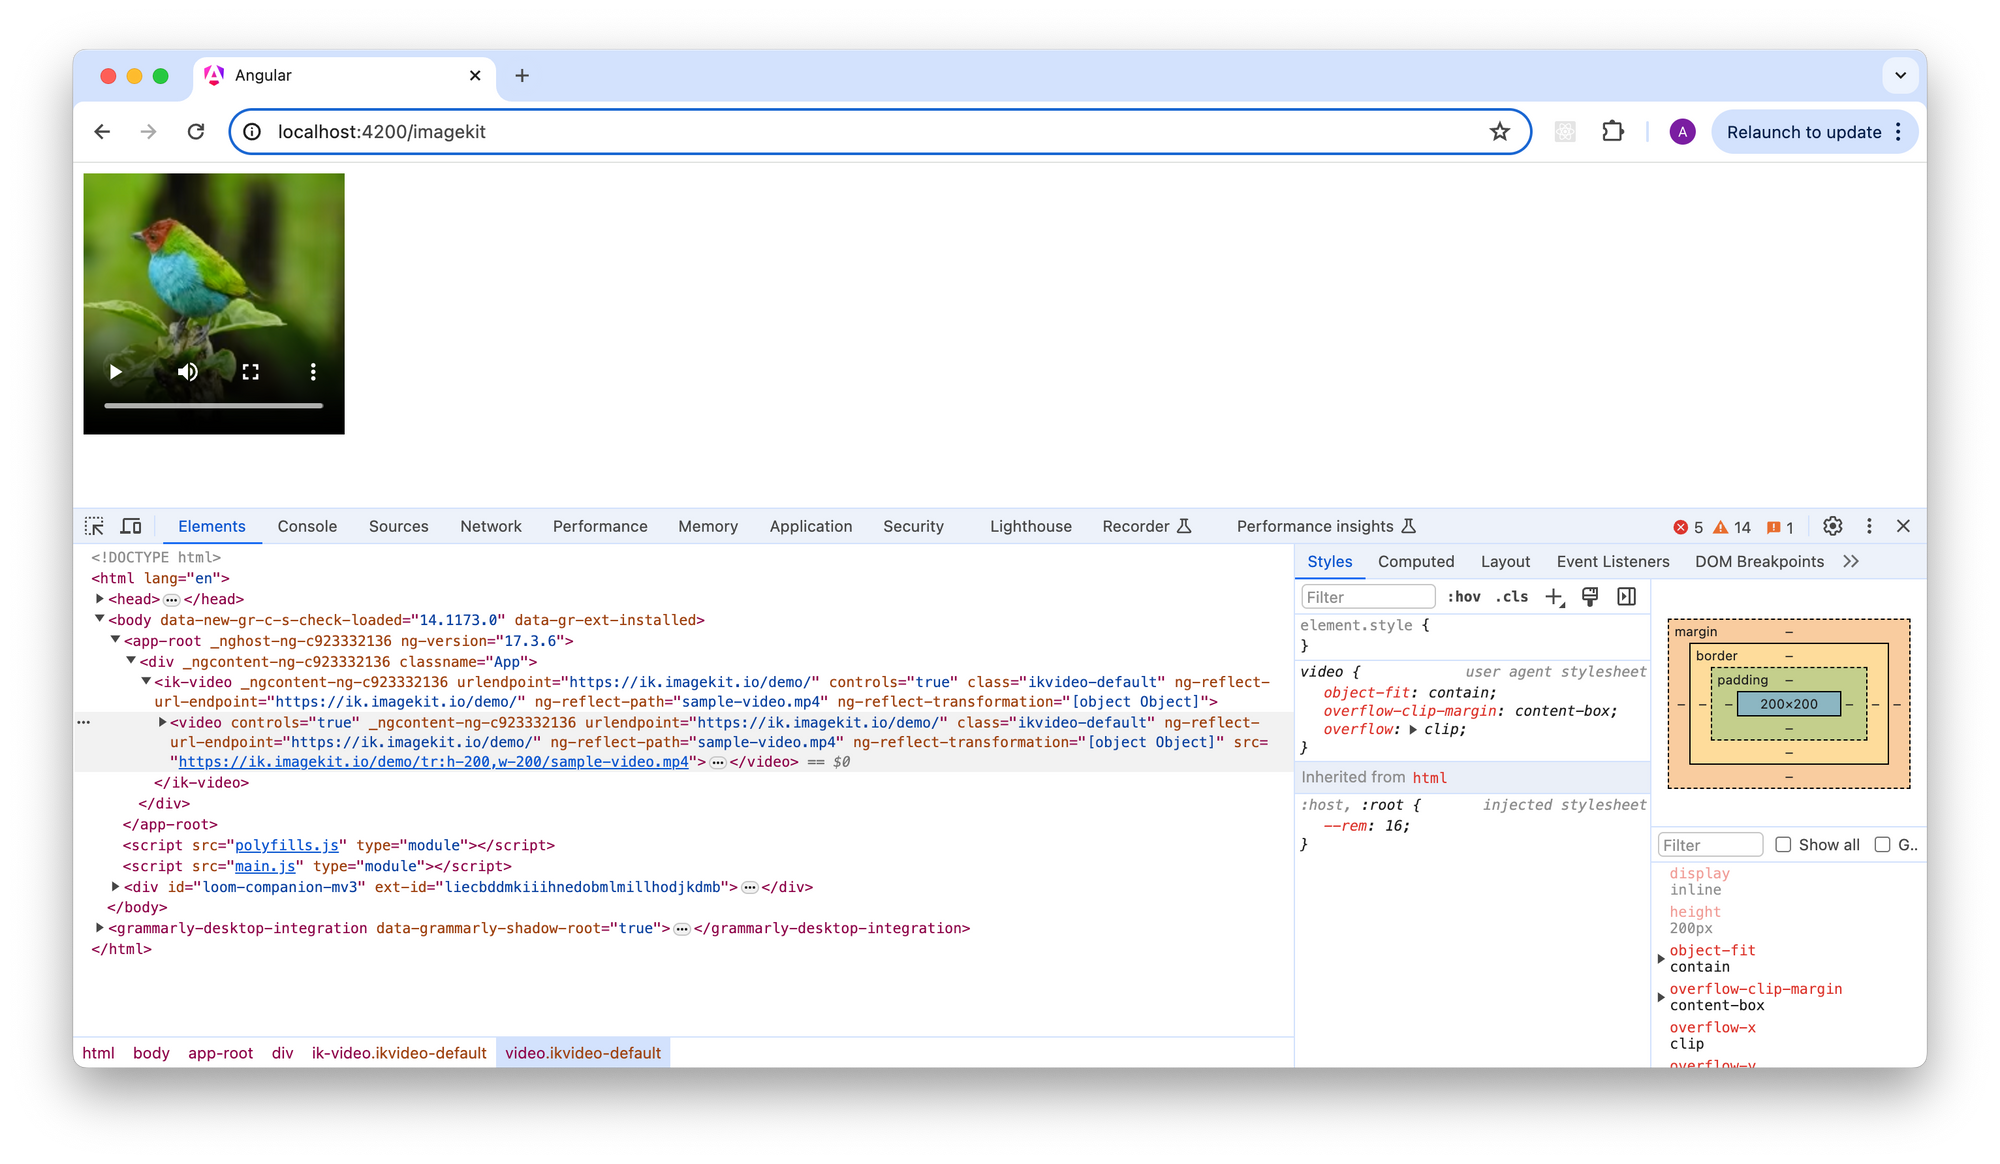
As we saw, the ImageKit ik-upload component made file uploads much easier. Similarly, the ImageKit Angular SDK provides other useful components like ik-image for rendering images and ik-video for video playback.
Let's see how ImageKit makes video playback simpler. Check out the code below. It will render a video from the specified video path for a particular account. For more details on ImageKit Angular features, check out our imagekit angular guide.
  <ik-video
    urlEndpoint="url-endpoint"
    class="ikvideo-default"
    [path]="video-path"
    [transformation]="transformation"
    controls="true"
  >
  </ik-video>
We have defined a transformation as shown below.
transformation: Array<Transformation> = [
  {
    height: '200',
    width: '200',
  },
];
Here's how it will look: the ik-video component renders a video tag with the applied transformations.
Conclusion
In this tutorial, we learned how to create a beautiful file upload component in Angular and how to use ImageKit's free upload API and Angular SDK to do everything with just a few lines of code.
- You can see the working app here.
- The whole application is hosted on the Github repository at https://github.com/imagekit-samples/tutorials/tree/angular-file-upload.


