Google Cloud Storage is Google's object storage service: virtually infinite space, integrated with the rest of GCP, and a natural home for video assets if your stack is already on Google Cloud.
What it doesn't do on its own is stream those videos the way YouTube or Netflix do. Out of the box you get progressive MP4 delivery from a bucket URL, which is fine for short internal clips but not enough for a real video experience.
In this post we'll look at how to stream videos from GCS in 2026, why Google's Transcoder API is more to set up than most teams need, and how to get progressive streaming optimization, adaptive bitrate streaming, format optimization, and real-time transformations by attaching ImageKit to your existing bucket.
Using Google Cloud Storage for video hosting and streaming
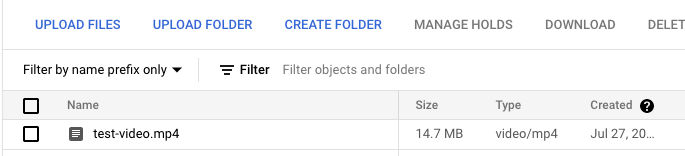
For this demonstration, we have uploaded a 14.7 MB sample MP4 video test-video.mp4 to a GCS bucket.
You can upload via the Cloud Console or programmatically through the JSON or XML APIs. Once the object is in the bucket and accessible, you can drop the URL straight into a <video> tag:
<video controls>
<source src="https://storage.googleapis.com/bucketname/test-video.mp4" type="video/mp4" />
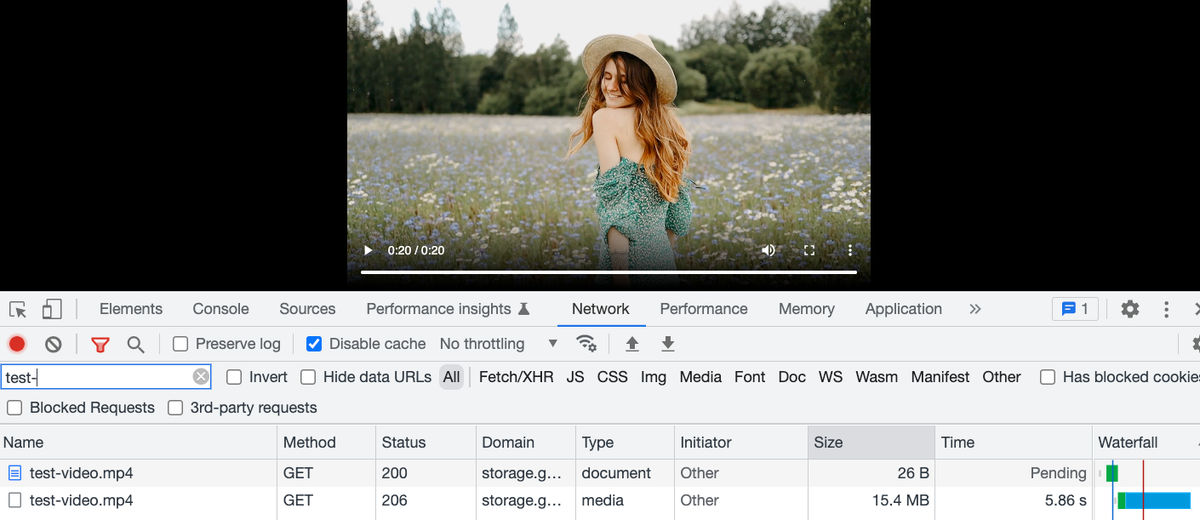
</video>When you load this URL on an HTML page, the browser issues multiple range requests to access the file in smaller chunks. The response status code for each request is 206, indicating a partial response from the server that matches the browser's requested segment.
Making an object publicly readable like this is convenient for examples and rarely the right call in production. Pairing GCS with Cloud CDN keeps the bucket private and reduces latency for distant viewers, but it does not solve the streaming problems below: the same 14.7 MB MP4 is now just delivered from an edge instead of the bucket's region.
Direct GCS delivery gives you progressive MP4 playback via HTTP range requests, which works as a baseline. It is not, however, what services like YouTube and Netflix do. Those use adaptive bitrate streaming, where a larger video file is broken into smaller chunks encoded at different bitrates. A manifest file describes the available chunks. A video player then decides which chunk to load and at what resolution based on the viewer's device and network conditions. That's the adjustment in quality you've probably seen on YouTube when your connection slows down.
Without adaptive bitrate, viewers on slow networks see buffering. Viewers on fast networks see a single quality regardless of their device. Progressive MP4 delivery can be acceptable for small clips, but it gives every viewer the same encoded file. That means slower networks may buffer, mobile users may receive more data than needed, and you do not get automatic quality switching. GCS will happily serve that progressive stream, but it does nothing to improve it: there is no format or bitrate optimization, no resizing to a lower resolution for mobile, no thumbnail generation, and no way to adapt the file per device. For anything beyond simple internal clips, you need a real streaming pipeline on top of GCS.
Why Google's Transcoder API is more to set up than most teams need
Google's recommended path for VOD streaming is the Transcoder API. You store the original video in one bucket, configure a transcoding job, point it at an output bucket, and the API produces HLS or DASH manifests and segments. Deliver through Cloud CDN, hand the manifest URL to a player, and you have adaptive bitrate streaming.
The Transcoder API is actively developed. Recent additions include HDR support, DRM, batch mode, auto-generated subtitles, and standalone audio outputs. For media companies with broadcast-grade requirements, it earns its complexity. For everyone else, the configuration is the catch. A single Transcoder API job for HLS and DASH at two resolutions is dozens of lines of JSON:
{
  "config": {
    "inputs": [{ "key": "input0", "uri": "gs://BUCKET/INPUT.mp4" }],
    "elementaryStreams": [
      { "key": "video-sd", "videoStream": { "h264": { "heightPixels": 360, "widthPixels": 640, "bitrateBps": 500000, "frameRate": 30 } } },
      { "key": "video-hd", "videoStream": { "h264": { "heightPixels": 720, "widthPixels": 1280, "bitrateBps": 3200000, "frameRate": 30 } } },
      { "key": "audio", "audioStream": { "codec": "aac", "bitrateBps": 64000, "sampleRateHertz": 48000 } }
    ],
    "muxStreams": [
      { "key": "video-sd", "container": "fmp4", "elementaryStreams": ["video-sd"] },
      { "key": "video-hd", "container": "fmp4", "elementaryStreams": ["video-hd"] },
      { "key": "audio", "container": "fmp4", "elementaryStreams": ["audio"] }
    ],
    "manifests": [
      { "fileName": "manifest.m3u8", "type": "HLS", "muxStreams": ["video-sd", "video-hd", "audio"] },
      { "fileName": "manifest.mpd", "type": "DASH", "muxStreams": ["video-sd", "video-hd", "audio"] }
    ],
    "output": { "uri": "gs://BUCKET/OUTPUT/" }
  }
}
What you take on beyond the job config itself:
- Job orchestration: submitting jobs, polling for completion or wiring Pub/Sub for completion events
- An ABR ladder design (which resolutions to encode at, at what bitrates, with what frame rates)
- A second GCS bucket for outputs and lifecycle policies for cleanup
- Cloud CDN configuration to deliver the manifests and segments
- A player integration (Video.js + hls.js, Shaka, or a paid player vendor)
- Re-running jobs across your entire back catalog whenever delivery requirements change
Pricing is per-minute of output and scales with resolution. As of 2026: SD at $0.015 per minute, HD at $0.030, and UHD at $0.060, multiplied by every output stream in the job. A 30-minute video transcoded to SD + HD + 1080p + 4K outputs costs $4.05 per pass. If you re-encode a thousand-video back catalog because you added a new aspect ratio, that bill stacks up fast.
There's also the Google Cloud console itself to work through. Wiring this together means moving between the Transcoder API, Cloud Storage, Cloud CDN, IAM, and Pub/Sub, each with its own screens and terminology, which is a lot to hold in your head before a single video plays. The Transcoder API exposes real depth here (per-codec settings, custom ABR ladders, HDR and DRM controls), and that control matters when video is your core product. But most teams aren't building the next Netflix and don't need that surface area exposed to them. They need sensible defaults, a video that plays well across devices and networks, and the freedom to get back to the rest of their roadmap.
Easy video streaming from GCS with ImageKit
There's another option: attach your existing GCS bucket to ImageKit and let ImageKit's URL-based video API handle the streaming pipeline. Your videos stay where they are and the setup takes about fifteen minutes.
ImageKit is a real-time media optimization, transformation, and management platform that natively integrates with popular cloud storage including Google Cloud Storage, whether the bucket is private or public. Once attached, ImageKit becomes an optimization, streaming, and delivery layer in front of your bucket.
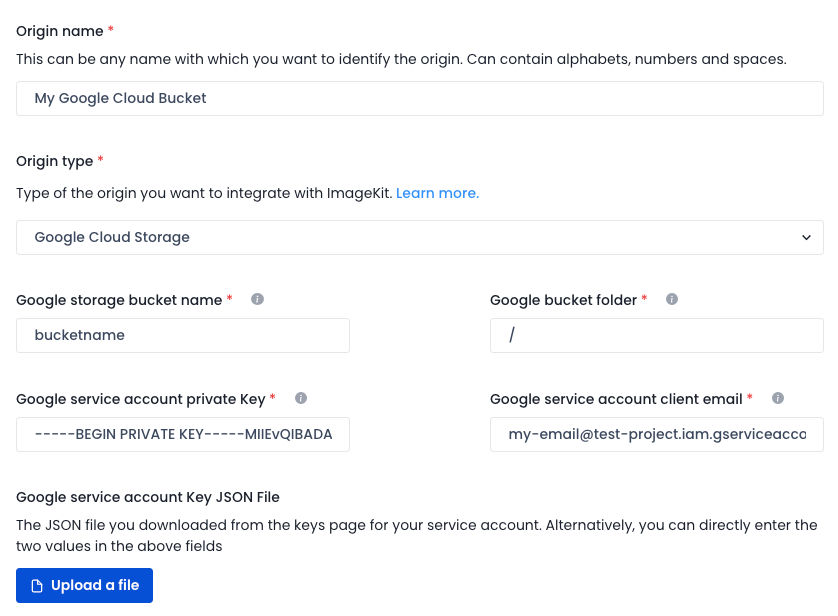
Connecting Google Cloud Storage to ImageKit
ImageKit needs read-only access to your bucket. This is typically granted through a dedicated Google Cloud service account scoped to just that bucket (for example, with the Storage Object Viewer role), whose JSON key you provide during origin configuration. The exact roles and steps can change over time, so follow the current instructions in the Google Cloud Storage integration docs. Keep the access scoped to exactly the bucket that holds your videos.
ImageKit does not move or copy any content from your GCS bucket. The integration provides on-demand access to the original file when a request comes in. The first request triggers any required encoding or transformation, and the result is cached at the CDN edge for subsequent requests.
Streaming optimized video with ImageKit and Google Cloud Storage
With our bucket attached to ImageKit, we can access our video at:
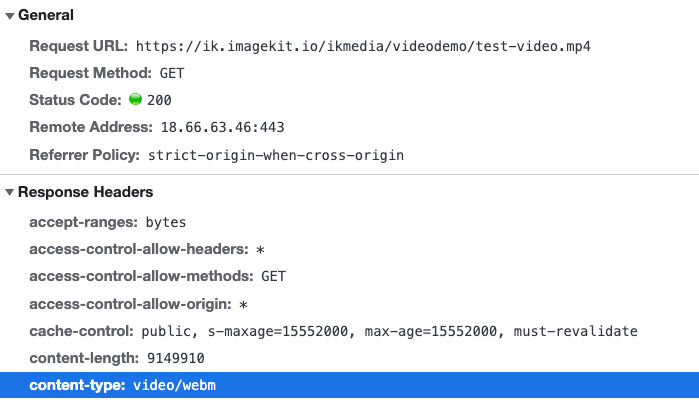
https://ik.imagekit.io/ikmedia/videodemo/test-video.mp4When you load a video using this URL, ImageKit automatically identifies the requesting device and its video format support to deliver the video in WebM (VP9 or AV1 codecs) or MP4 (H264), the two most widely used web-safe video formats. ImageKit also compresses the video in near real time without significantly degrading its visual quality.
These optimizations are dashboard settings, not code. Turn them on once and ImageKit handles the rest when you deliver video through its URL.
When we deliver our 14.7 MB sample video through ImageKit, it goes from 14.7 MB to 9.1 MB when compressed and delivered as WebM in Chrome. Exact savings depend on the source content and the requesting browser, but no encoding job runs, no manifest is generated, and there is no setup beyond the bucket attachment.
ImageKit delivers through its own global CDN out of the box, so you don't have to stand up and maintain Cloud CDN (cache policies, signed URLs, invalidation) in front of your bucket. Serving from edge locations close to your viewers is handled for you, with nothing to configure.
Transforming videos for different use cases
ImageKit offers a URL-based real-time video transformation API, making it easy to adapt videos to different devices and placements. You can resize, crop, watermark, generate snippets, or generate thumbnails in real time. These transformations help you deliver a complete video experience on the client device without external products or custom code.
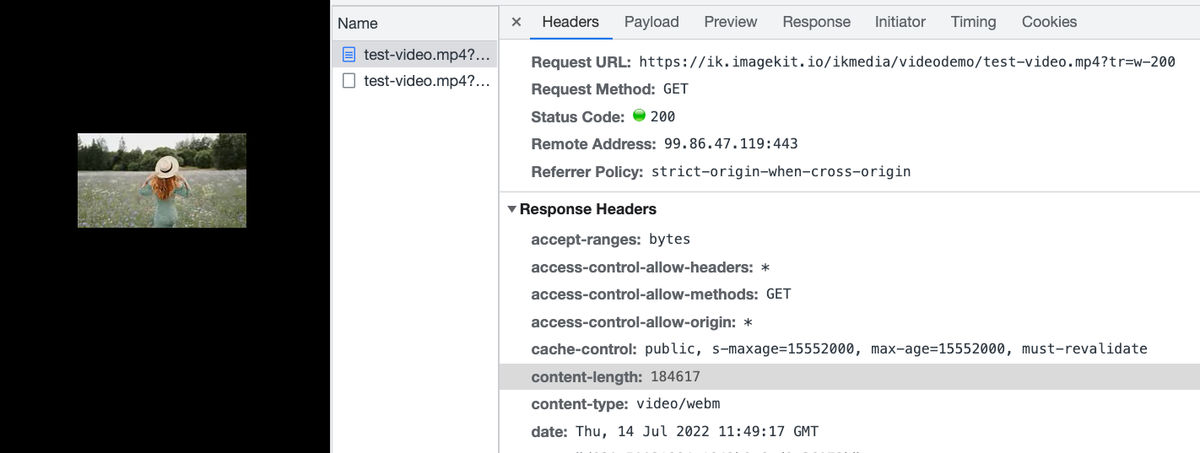
To scale our video to 200 px width, add the transformation parameter tr=w-200 to the URL:
https://ik.imagekit.io/ikmedia/videodemo/test-video.mp4?tr=w-200ImageKit still applies format and quality optimization while resizing. The video gets compressed to 184 KB and is delivered as WebM.
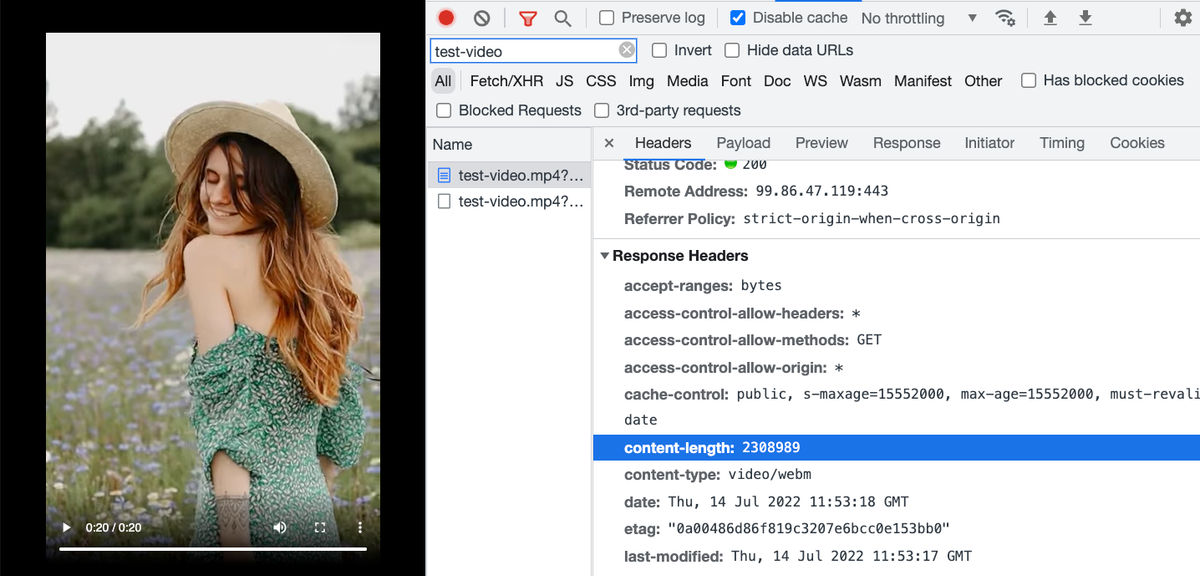
For vertical formats like Instagram Reels or TikTok-style content, specify both height and width. ImageKit handles the cropping in real time and returns the requested aspect ratio. For a 400 by 640 vertical video:
https://ik.imagekit.io/ikmedia/videodemo/test-video.mp4?tr=w-400,h-640The output is 2.3 MB.
For a deeper look at video cropping and resizing with ImageKit, see Crop and resize videos in React.
We can also watermark our video and control placement and formatting in real time. The example below uses ImageKit's layers syntax to overlay a logo image on the underlying video. You can also overlay text or another video on top of the base. No extensive setup. A URL change does it.
https://ik.imagekit.io/ikmedia/videodemo/test-video.mp4?tr=w-400,h-640,l-image,i-logo_HuFO6vJ2x.png,lx-10,ly-10,w-200,l-end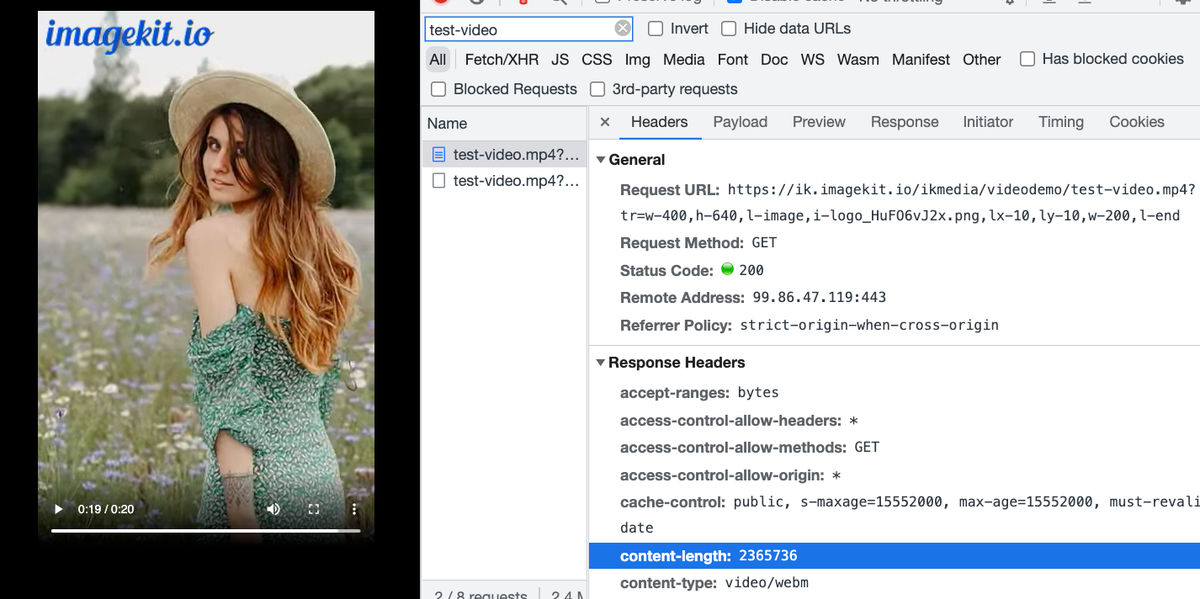
All of these transformations work without a specific player like Video.js. You can load the resulting URLs directly in a <video> tag and the browser will play them.
Adaptive bitrate streaming with GCS and ImageKit
Adaptive bitrate streaming encodes videos at different bitrates and resolutions and switches between them based on the viewer's network and device. All popular streaming services use it, and it's the central capability you'd otherwise reach for the Transcoder API to get.
ImageKit makes DASH and HLS available as URL parameters. As with everything else in the platform, you don't run encoding jobs or manage manifest files. You modify the URL.
For an HLS stream at 360p, 480p, and 720p:
https://ik.imagekit.io/ikmedia/videodemo/test-video.mp4/ik-master.m3u8?tr=sr-360_480_720For DASH, swap
ik-master.m3u8forik-master.mpd. The same source URL produces both protocols on demand.
Compare this URL to the JSON job config in the Transcoder API section above. They're aimed at the same outcome, producing HLS and DASH manifests at multiple resolutions from one source, but the operational surface area is very different.
When the URL is requested for the first time, ImageKit starts transcoding the video to the requested resolutions in the background, and if the processing takes long, the first request for a manifest may return a 202 response. It stores the manifest file and segment chunks internally and serves them from the CDN on subsequent requests after all transcoding is complete.
For production workflows, trigger the ABS URL during upload/publish, listen for the webhook, and expose the player only after the
video.transformation.readyevent. This way, you avoid the 202 response and ensure a smooth experience for the first viewer. This is covered later in this guide.
You can load the manifest URL directly in any HLS-capable player. Safari supports HLS playback natively. For Chrome, Firefox, and Edge, use a JavaScript player such as Video.js, hls.js, or ImageKit's Video Player SDK. DASH usually requires a player such as Shaka Player or dash.js.
In the network panel of any browser, you can watch the player request a 360p segment first for fast initial load, then switch to 720p once the player determines the device and connection support it.

Skip the player setup entirely
If you'd rather not wire up Video.js, hls.js, or Shaka yourself, ImageKit's Video Player SDK ships ready to play HLS and DASH streams out of the box. It also adds features you'd otherwise build separately, including AI-powered subtitles, translations, and auto-generated chapters, so a complete viewing experience is available without stitching together multiple libraries.
Webhooks for transcoding completion
Generating manifests and segments at multiple resolutions takes time on the first request. To improve the development experience and provide certainty about when an asset is ready, ImageKit offers video webhooks that fire on transcoding completion:
{
  "type": "video.transformation.ready",
  "id": "a03031b5-ad5f-4985-8cf5-4de67630f6d7",
  "created_at": "2026-05-15T12:00:11.703Z",
  "request": {
    "x_request_id": "fa98fa2e-d6cd-45b4-acf5-bc1d2bbb8ba9",
    "url": "https://ik.imagekit.io/ikmedia/videodemo/test-video.mp4/ik-master.m3u8?tr=sr-360_480_720",
    "user_agent": "Mozilla/5.0 (Macintosh; Intel Mac OS X 10.15; rv:101.0) Gecko/20100101 Firefox/101.0"
  }
}
Webhooks are optional. The transcoding process described above works the same whether or not you subscribe to them.
No re-processing required when delivery requirements change
One of the operational costs of a traditional Transcoder API pipeline is that changes to delivery requirements (a new watermark, a new aspect ratio, a new resolution tier) require re-running encoding jobs across your entire back catalog. That cost compounds as your library grows: you pay per-minute of output for every resolution in every job, plus additional GCS storage for derivatives, plus engineering time to coordinate the re-processing.
With ImageKit, requirement changes are URL changes. You modify the transformation parameters and the new variant is generated on the next request and cached at the edge. Videos that aren't requested are never processed. Videos that need an updated transformation get it the first time someone asks for it.
For a team weighing the Transcoder API against ImageKit and worried about the operational overhead of running encoding jobs going forward, this is the piece that disappears entirely.
What we built
Google Cloud Storage continues to be the right place to store original video assets if your stack lives on GCP. What it doesn't do on its own is turn those assets into a streaming experience: that requires either a Transcoder API pipeline with its associated job orchestration and output management, or a real-time API like ImageKit on top of the bucket.
Keep your videos in GCS and attach the bucket to ImageKit as an origin. The setup takes about fifteen minutes. From that point, every video in your bucket is streamable through ImageKit's URL endpoint, with HLS or DASH adaptive bitrate, format optimization, real-time transformations, watermarking, and webhook notifications, all configured as URL parameters or dashboard settings.
Don't want to manage GCS at all?
ImageKit can host your videos directly in its media library. Creative and marketing teams often find uploading, organizing, and sharing videos there simpler than working with raw GCS storage, while still getting the same streaming and transformation capabilities.
ImageKit's free plan includes 500 seconds of SD video processing and 20 GB of streaming bandwidth per month, which is enough to validate the approach against your real content before committing.
Sign up for a free ImageKit account and try it against an existing video in your GCS bucket.
If your videos are on a different cloud provider, the same approach works for AWS S3 and Azure Blob Storage.


