The concept of adding text to images in web development has been around for a long time. A vast majority of websites rely on this to communicate their business offerings.
The common notion is that one needs image editing tools to place text over the images. On the contrary, it is possible to do it with the help of HTML and ImageKit. ImageKit is an image optimization and transformation tool that offers real-time transformations, including placing text over images.
In this article, we will look at adding different forms of text on images with HTML using code samples. Finally, we will also see how using ImageKit can help you place text on images easily and at scale without designer or developer dependencies.
But why place text on images?
There are so many reasons why people place text on images, some of which are:
✅ To capture user attention
Blog banners, and video thumbnails, are classic examples of text on images. They are primarily used to capture user attention and provide contextual information about the content.
✅ To highlight ongoing offers
Online stores use text labels and callouts to announce ongoing offers and discounts on product images.
✅ To protect images
Protect images from unauthorized usage or copyright infringement by placing watermarks—for example, a transparent logo on the bottom right corner of an image.
Prerequisites for placing text on image
To understand how to place text over an image, you need two basic and free resources:
- A basic understanding of HTML and CSS
- An ImageKit.io account
The two straight-forward methods of placing text on images
Before we get into the how-to part, let’s take a quick look at how to resize photos using ImageKit. We will be referring to image resizing a lot during this article, so you must understand what it is all about and how ImageKit helps with it.
For this article, we will use a single image of this urban skyline view and how images are placed over it in different positions and formats.

https://ik.imagekit.io/fvilrnl1zve/hero.png1. Resizing image with ImageKit (No coding required)
To resize an image, you use w, which stands for width, and h, which stands for height. For example, in the image below, w indicates the image width, 1200, and h indicates the height, 300.

https://ik.imagekit.io/fvilrnl1zve/hero.png?tr=w-1200,h-300If you want to resize the image to another dimension, you can replace the width of 1200 with another value, say 600, which will reduce the image width to 600, which is half of the earlier. You can change the image height the same way. Check out the docs for more explanations and examples.
In this case, you can change the image height and width by changing the values in the URL as tr=w-1200,h-300.
Now that we have seen how to resize an image let's understand placing images on the text. There are so many methods that help place text on images in websites and applications generally, but in this article, we will see how this can be achieved with HTML and later see how ImageKit can help.
2. Placing text on images with HTML
Under the HTML method, text can be placed on the image through two methods:
- Using position attributes
- Using CSS Pseudo Classes
1. Using Position attributes
Suppose we have an HTML that looks like this:
<div class="example">
<img  class="background-image" src="https://ik.imagekit.io/fvilrnl1zve/hero.png?tr=w-1200,h-500">
<div class="overlay-text">
<h1>Welcome to our Blog</h1>
<p>We are committed to uploading educative content daily.</p>
</div></div>
We can make use of the position attributes to place our text on the image
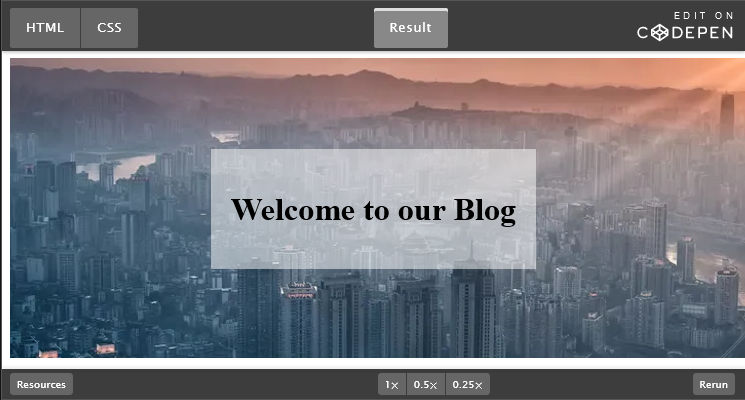
https://codepen.io/olawanlejoel/embed/ZEJEEaV
In the above example, you will notice we added a transparent background to our text so that the text is prominently visible to the readers. Although we don’t need to add transparent background below our text, we can decide to add a gradient to the image so that the text can pop. This way, we would need to make use of our image as the background image:
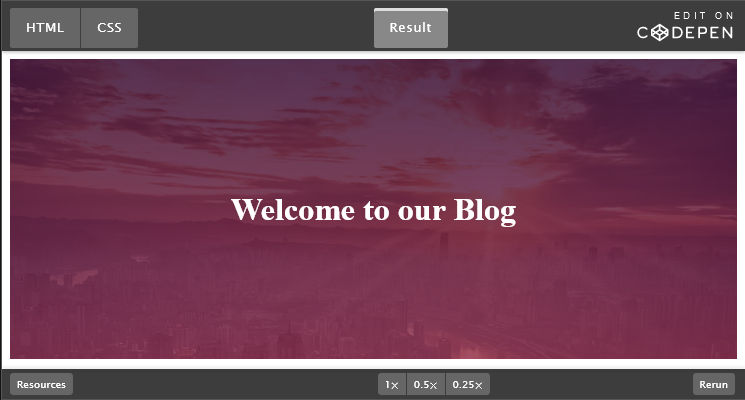
https://codepen.io/olawanlejoel/pen/NWvWPKO
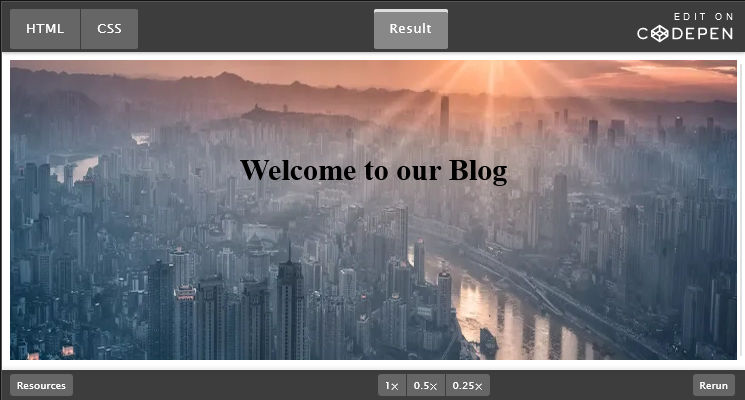
Let’s also change the position of the text with CSS. Let’s place the text at the bottom and the bottom right.
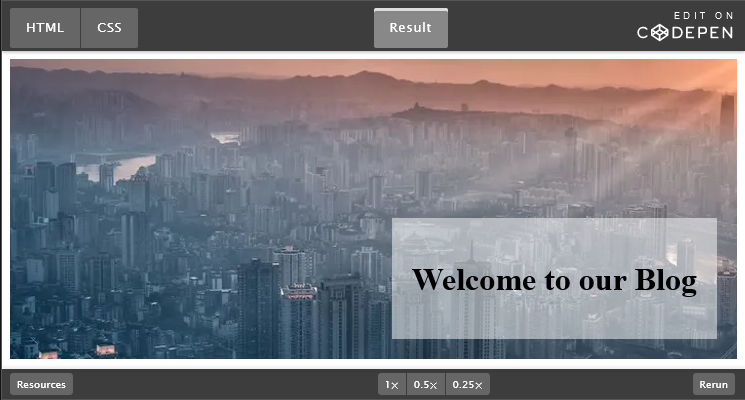
https://codepen.io/olawanlejoel/pen/BadGQgx
2. Using CSS Pseudo Classes
Another method of placing text on images with HTML and CSS is using the ::after and ::before CSS pseudo-elements along with content CSS property to control the content for text overlay, meaning all text(s) will be stored in the CSS only.
https://codepen.io/olawanlejoel/pen/zYdYxPK
Text overlay using ImageKit
ImageKit is an image CDN with automatic image and video optimization, real-time transformation, and cloud storage capabilities. It provides an easy way to manage & deliver images on the web and mobile apps. Further, it doubles up as a cloud-based DAM system, storing all your media assets in a centralized location with a proper folder structure.
When it comes to image transformations, ImageKit allows you to resize, crop, rotate, change image format, add text, and image overlay using URL parameters.
Also, ImageKit offers several advantages in image transformation compared to HTML.
| HTML | ImageKit |
|---|---|
| Brower-specific and will not work on mobile apps and other platforms. | Device and platform agonistic. Works anywhere you want it to work. |
| Platforms like Facebook, Twitter, Email, etc. will not accommodate HTML code for impage compression. | Allows transforming images to any dimension or format that are compatible with all platforms and services. |
| Required heavy dependence on developers. Or requires marketers and designers to become adept with HTML programming, which is not feasible. | User-friendly and does not require any technical knowledge. Any layman user can easily use to transform images without relying on developers. |
Why use ImageKit
ImageKit offers several image optimization capabilities, including automatic Image Optimization with CDN, 50+ image transformations, AI-based cropping, an integrated media library with advanced image tagging, free image hosting, and intelligent compression, among many others.
Getting started with ImageKit
To start placing text overlays on images effortlessly, you will need an ImageKit account. You can create an account here if you don’t have one. ImageKit offers a generous free plan that gives you up to 20GB of bandwidth which is FREE every month!
Placing text on images with ImageKit
Placing Text on images with ImageKit can be achieved by adding some parameters to the URL, just as we did when we cropped the image by adding tr=w-1200,h-300 to the URL.
Adding parameters to URL can be done in two ways, which are:
https://ik.imagekit.io/fvilrnl1zve/hero.png?tr=w-1200,h-300
https://ik.imagekit.io/fvilrnl1zve/tr:w-1200,h-300/hero.png
Either approach works well, but we will work with the first approach for this discussion.
➡️ Step 1
Let's add the text “Welcome to our Blog” with font size 25px and color black, which has a hex code of #000000. We will use the text layer transformation.
The transformation will be l-text,i-Welcome to our Blog,fs-25,co-000000,l-end
The final URL becomes:
https://ik.imagekit.io/fvilrnl1zve/hero.png?tr=w-1200,h-300,l-text,i-Welcome to our Blog,fs-25,co-000000,l-end
Output looks like:

➡️️️ Step 2
Let’s add the transparent white background, i.e. #FFFFFF80, below the text, so it can pop out for readers to see easily. We will add bg-FFFFF80 parameter to the URL.
The URL will be:
https://ik.imagekit.io/fvilrnl1zve/hero.png?tr=w-1200,h-300,l-text,i-Welcome to our Blog,fs-25,co-000000,bg-FFFFFF80,l-end

️➡️ Step 3
The last thing will be to add padding of 40px to the text, so there is space between the text and the background image. We will add pa-40 parameter to the URL.
The URL will be:
https://ik.imagekit.io/fvilrnl1zve/hero.png?tr=w-1200,h-300,l-text,i-Welcome to our Blog,fs-25,co-000000,bg-FFFFFF80,pa-40,l-end
The final result image would be:

Placing text on image: other use cases
Now let’s look at other use cases where placing text on images would be useful. These include:
- Blog cards
- Thumbnail creation
- Website banner use case
- Text watermark on images
- e-commerce use case
Blog banners
Blog banners are images that accompany an article. It could be a plain image, but having text on it is considered ideal since it gives context to the article and aids in increasing the click-through rates. Further, the same blog banners can be used as social cards.
Social cards are image previews you see on social media platforms like Facebook, Twitter, LinkedIn, etc. when a blog or web page is shared. Most CMS platforms allow using the blog banner as social cards for Facebook and Twitter.
Let’s see how to let’s generate a blog banner with ImageKit.
Image layer supports many transformation. In this URL we will use a few:
- w & h parameter for width and height dimensions
bgfor the background.pato define the padding around text.fsfor font sizecofor font color
So, to achieve the resultant image blog, the parameters would be:
https://ik.imagekit.io/fvilrnl1zve/Blog_Banner.jpg?tr=w-1200,h-400,l-text,i-Understanding the Concept of Design,fs-45,co-000000,bg-FFFFFF80,pa-40,lx-753,ly-200,l-end
The output looks like:

Thumbnails
Thumbnails are smaller images of a bigger image used to represent a video or an image. They help recognize and organize images, serving the same role as a normal text index for words. You can create any thumbnail easily with ImageKit, which will help deliver a delightful experience to your readers without compromising page load time or SEO.
Typical places where you find thumbnails include:
- Online image galleries
- Blog home pages
- Video platforms such as YouTube or OTT services
- Online shops display their products, such as an overview of the product portfolio.
An example of a Thumbnail as in the image below, which can be achieved easily using the following parameters:
https://ik.imagekit.io/fvilrnl1zve/Personal_Vlog_YouTube_Thumbnail_RfvCUaqmDq.png?tr=l-text,lx-653,ly-150,i-Weekend Morning Routine,fs-90,co-000000,w-500,bg-FFFFFF80,pa-40,ia-left,l-end

Website banners
A web banner or hero image of a website that introduces users to what the website is all about once they land on the website. It could be a static image, a video animation, or a carousel.
It is easier to create website banners of various dimensions with ImageKit. Most often, these images usually have a call-to-action button, which can be added to the website during the web development stage. However, with ImageKit, you can easily overlay texts at any stage, thus giving total flexibility over changing the website copy or even its positioning on the image.
The image below is a simple example which was achieved easily using:

https://ik.imagekit.io/fvilrnl1zve/web-banner.jpg?tr=w-1200,h-500,l-text,i-Welcome to Jay Commerce,fs-50,w-400,co-000000,lx-753,ly-200,ia-right,tg-bold,l-end
Text watermark on images
A text watermark is text that appears on a picture and is generally lighter in color than the rest of the image. They typically take the form of a semi-transparent line of text, symbol, thumbnail, or logo on the image to make it clear that the rights of the particular image belong to your brand and that it cannot be used without authorization.
ImageKit makes it easy to add watermarks to images, as shown in the example below through its overlay transformation feature.

Product labels/tags
On an e-commerce website, you will frequently see particular promotional or information labels on a product image, such as the image below. Usually, you will need a graphic designer to create specific images and a web developer to place the image on the live website. It is a time-consuming and tedious process. But not so with ImageKit. ImageKit enables you to place labels or tags on a real-time basis without requiring designer or developer intervention.
For example, in the image below, the “Most popular” label was added using the text on the imaging capability of ImageKit. As we have seen in previous examples, you can alter the text background color and other parameters.

https://ik.imagekit.io/fvilrnl1zve/Untitled_design_8vwRNLtuFe.png?tr=w-394,f-png,h-540,l-text,i-MOST POPULAR,co-FFFFFF,bg-FF0000,r-4,pa-8_8,lx-135,ly-480,tg-bold,fs-30,l-end
In a nutshell
This article showed us how to place an image using HTML and ImageKit. We also saw how ImageKit makes it easier to optimize your images compared to HTML coding. We also worked on some popular use cases of placing text on images on blog banners, image thumbnails, e-commerce product tags, etc. Placing images on text can be a game-changer for eCommerce and media businesses that want to insert textual information as an overlay atop their images.
Of course, doing it manually will be a tedious and time-consuming task. It is here that tools like ImageKit prove beneficial. With ImageKit, you can easily place text on your images and transform them in several ways to make them work for your business. One major advantage of using ImageKit is that you can use this URL in mobile, desktop, iOS, and Android apps and still achieve the same results.
If you haven’t signed up for ImageKit, NOW is the right time.
Get started with our forever-free plan.
Related resources
https://imagekit.io/blog/css-image-overlay/
https://docs.imagekit.io/features/image-transformations/overlay-using-layers


