


In this tutorial, we will learn how to handle file upload in a Node.js backend. We will cover both the front end and the back end.
In the end, we will have an application that works like this. All the source code is hosted on GitHub.
Key takeaways
- Creating a customized user interface for uploads. Learn the basics of file selection and drag and drop.
- Learn how to handle uploads in the Node.js backend and implement an upload progress bar in the front end.
- Basic file type and size validation.
- Things you should consider when designing a file upload system, e.g., security, scalability, and flexibility.
Let’s dive in!
Setup up environment
Assuming you have Node.js installed, let’s create a new npm project.
mkdir nodejs-upload
cd nodejs-upload
npm init
Let’s create a server using Express.js:
npm install expressNow, our directory structure should look like this.
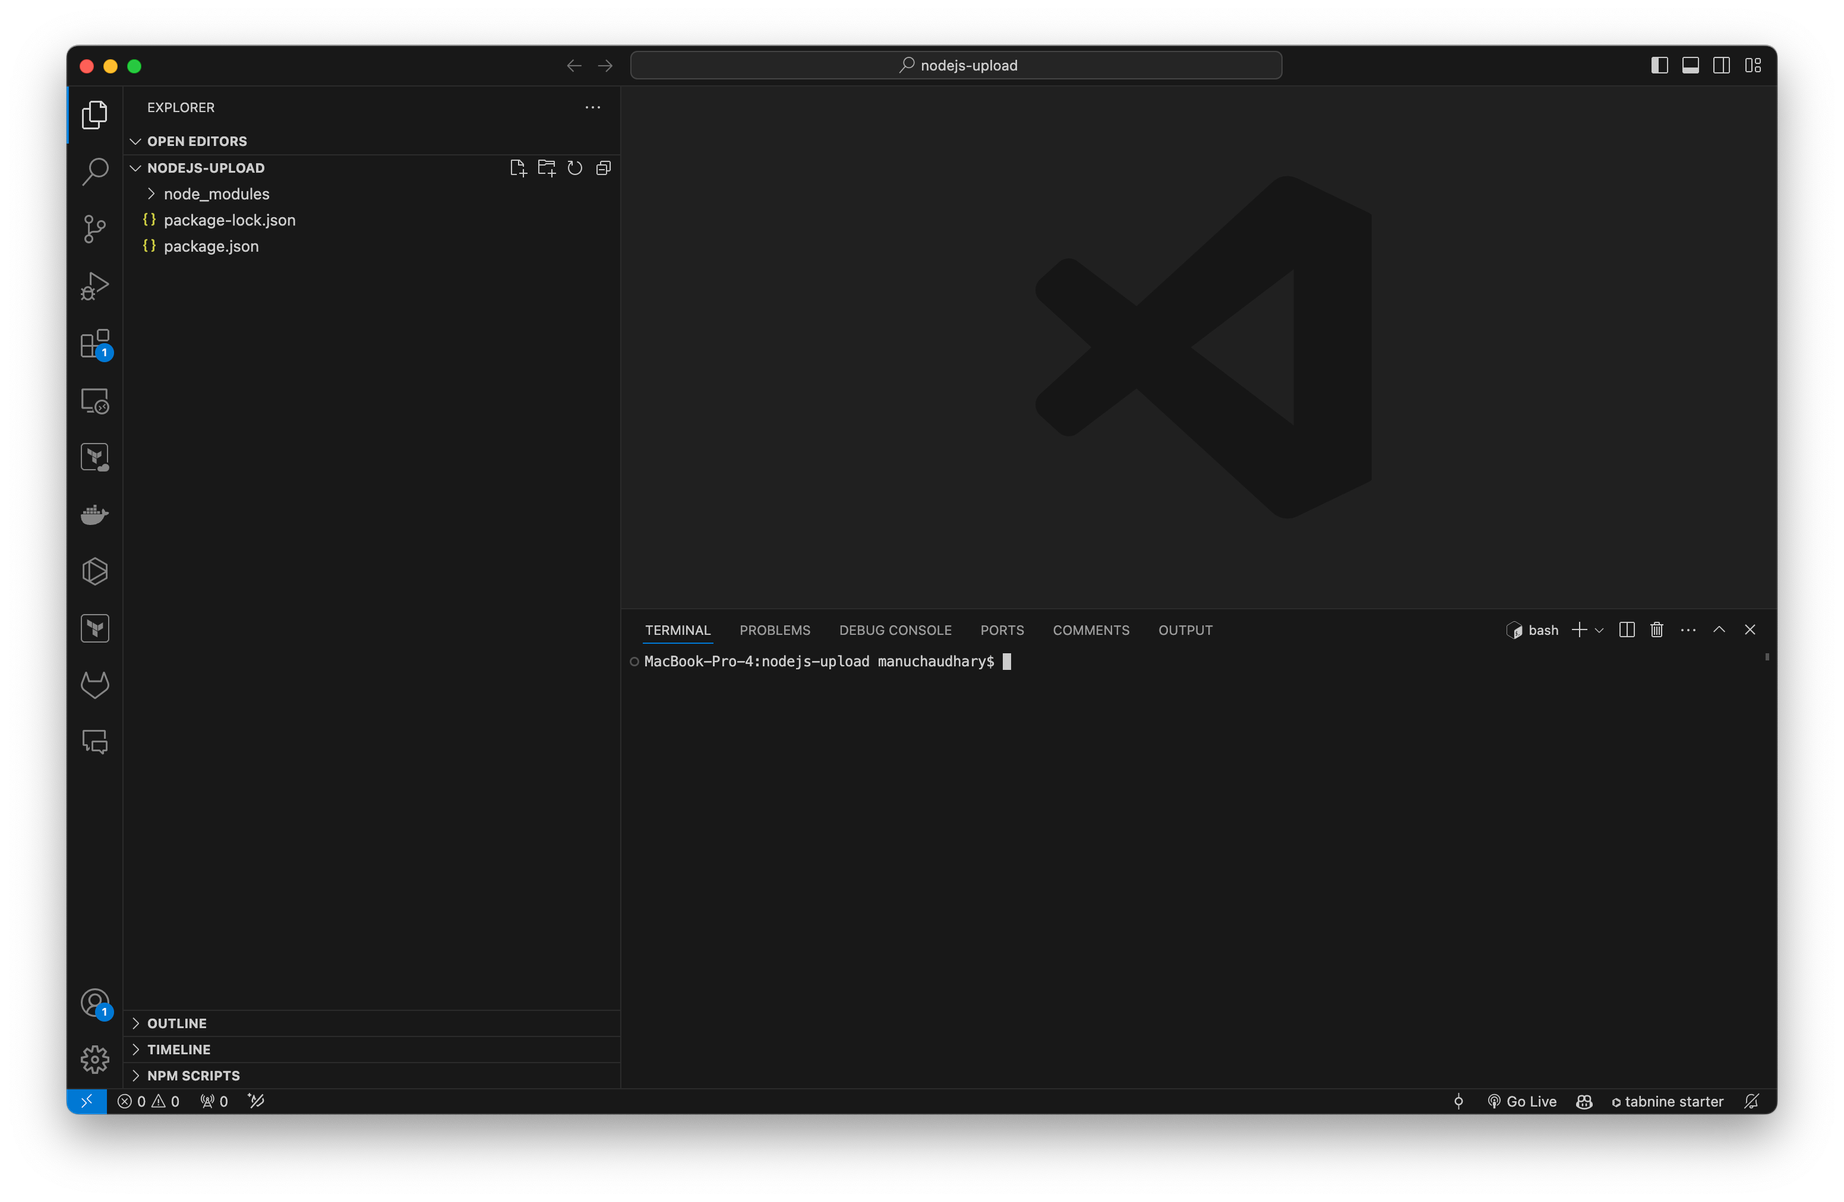
Let’s create a new file app.js
const express = require('express')
const app = express()
const port = 3000
app.get('/', (req, res) => {
res.send('Hello World!')
})
app.listen(port, () => {
console.log(`Example app listening on port ${port}`)
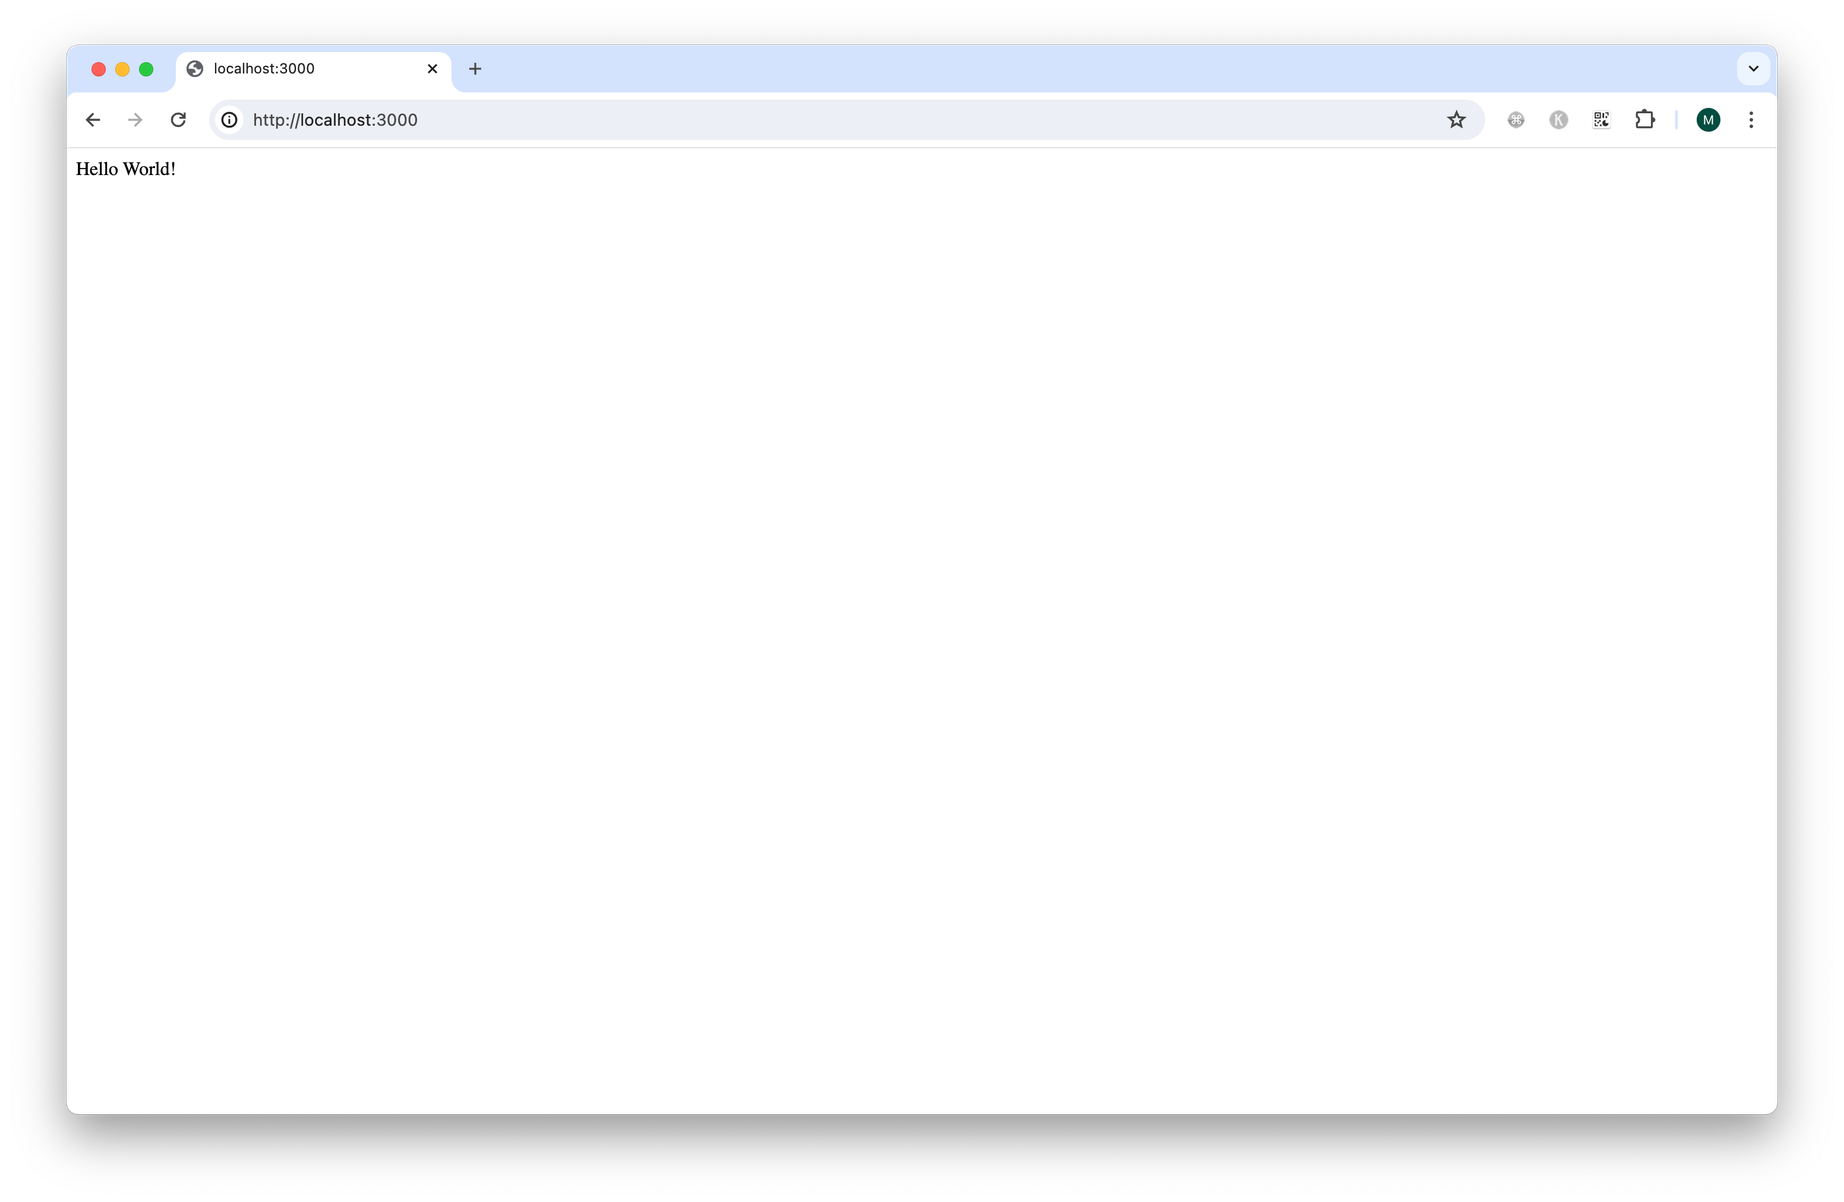
})Run the server.
node app.jsThis will run a web server and listen to requests on port 3000. Let’s open http://localhost:3000 in the browser:
Create a file upload form
Standard HTML file type input element allows file selection.
<form action="/upload-endpoint" enctype="multipart/form-data" method="POST">
    <label for="file-upload">Select file:</label>
    <input type="file" name="file-upload" required />
    <input type="submit" value="submit">
</form>
To serve a custom HTML on http://localhost:3000, let’s use the EJS templating engine in Express.js.
npm install ejsCreate a directory view in the project and create an index.ejs file inside that.
<!DOCTYPE html>
<html>
  <head>
    <meta charset="utf-8">
    <meta name="viewport" content="width=device-width,minimum-scale=1">
    <link rel="preconnect" href="https://fonts.googleapis.com">
    <link rel="preconnect" href="https://fonts.gstatic.com" crossorigin>
    <link href="https://fonts.googleapis.com/css2?family=Montserrat:ital,wght@0,100..900;1,100..900&display=swap" rel="stylesheet">
    <title>Upload Files</title>
    <style>
      /* Add styles here */
    </style>
  </head>
  <body>
    <form class="upload-form" action="/upload-file" method="post" enctype="multipart/form-data">
      <h1>Upload File</h1>
      <label for="file">
        <i class="ph ph-upload"></i>
        <span> Drag & drop or <span style="color: #0c7ce5; display: inline-block; margin: 0px 2px;">browse</span> your files </span>
      </label>
      <input id="file" type="file" name="file">
      <div class="result" style="display: none;">
        <i class="ph ph-file"></i>
        <div class="file-details">
          <span class="file-name"></span>
          <span class="file-size"></span>
        </div>
        <div class="upload-result"></div>
      </div>
    </form>
    <script src="https://unpkg.com/@phosphor-icons/web"></script>
    <script type="text/javascript">
      /* Add JavaScript here */
    </script>
  </body>
</html>
Let’s configure the express server to use EJS as a templating engine and serve this form on http://localhost:3000/
const express = require('express')
const app = express()
const port = 3000
const path = require("path");

// View Engine Setup
app.set("views", path.join(__dirname, "views"));
app.set("view engine", "ejs");

app.get('/', (req, res) => {
  res.render("index");
})

app.listen(port, () => {
  console.log(`Example app listening on port ${port}`)
})node app.js command and running it again. At this point, you can also install nodemon to automatically restart the Node.js application when you change code. This saves a lot of time during development.
npm install -g nodemonor npm install --save-dev nodemonAnd then run the following command to watch files with
js and ejs extension.nodemon -e js,ejs app.jsThis is how it looks:
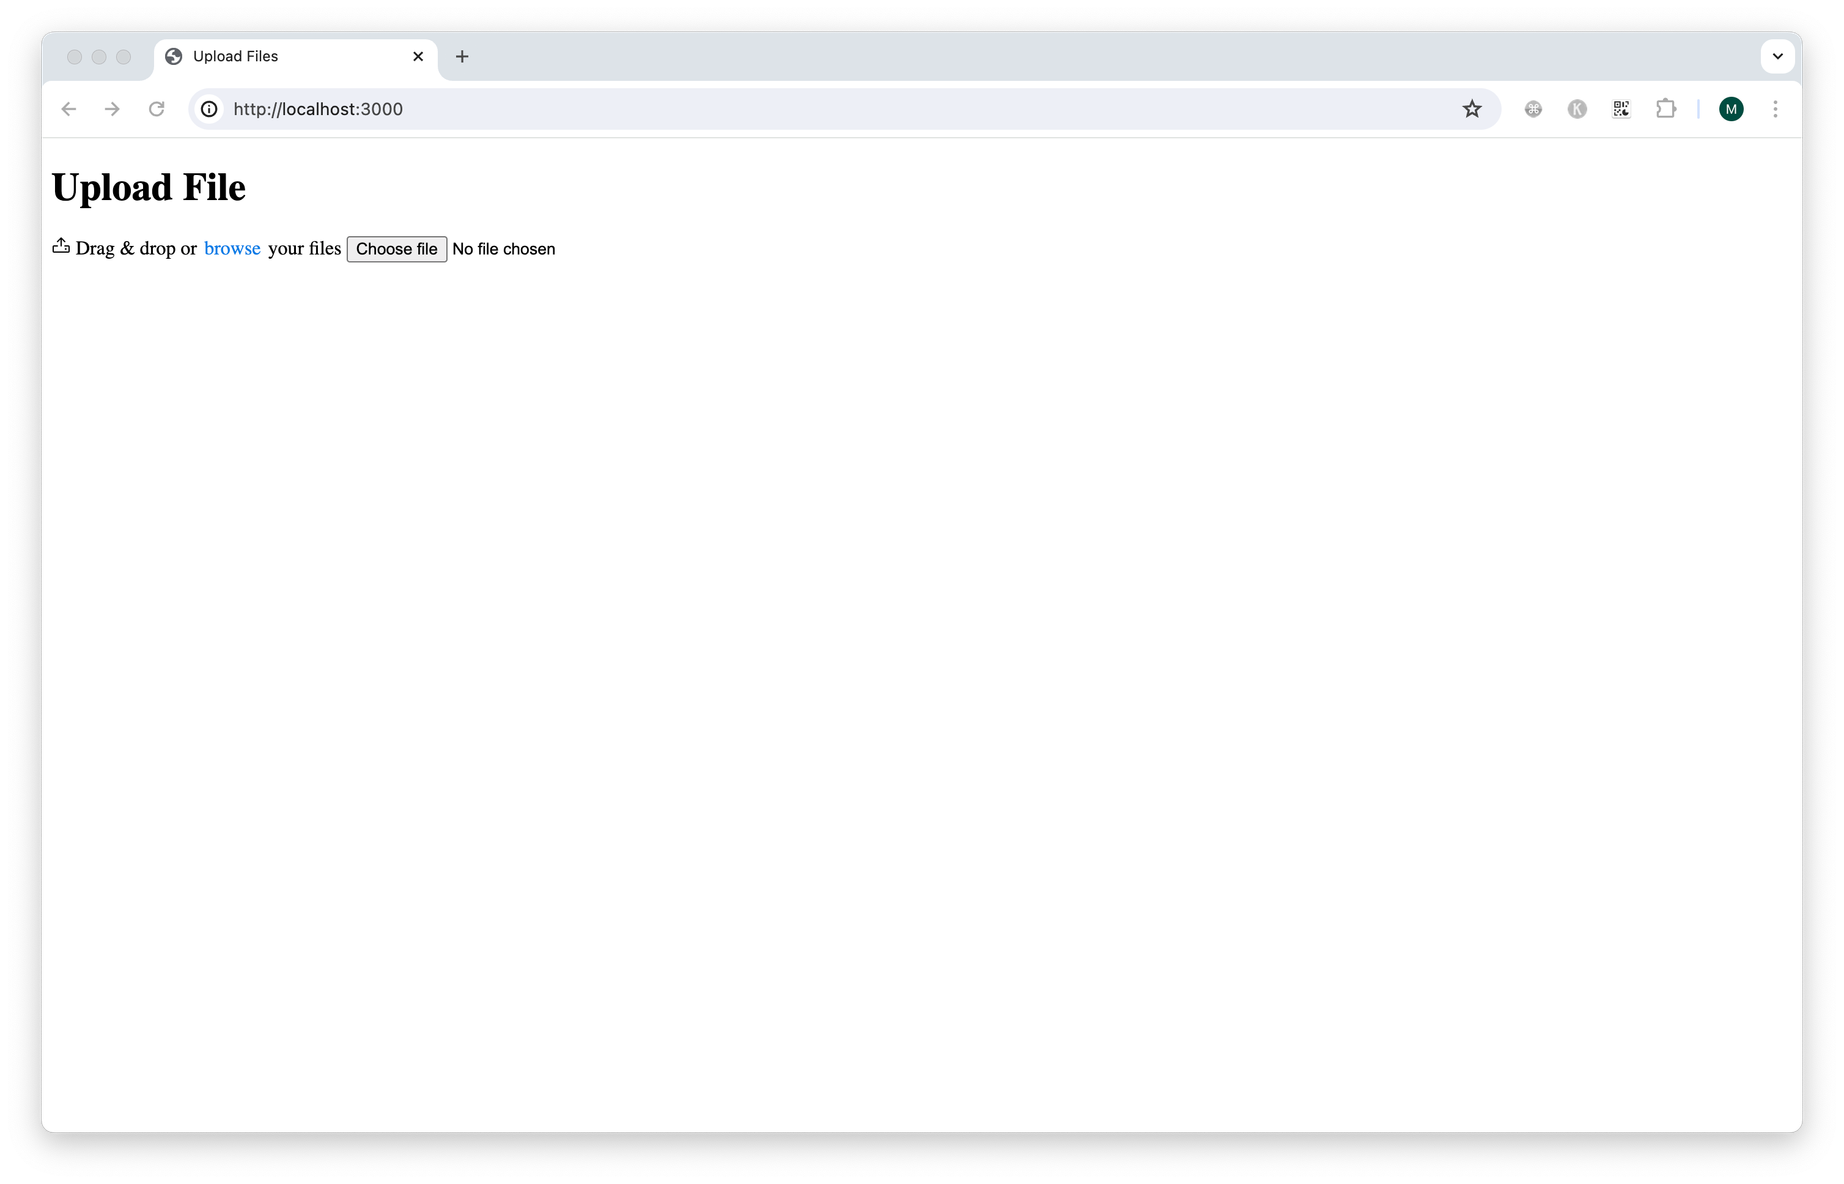
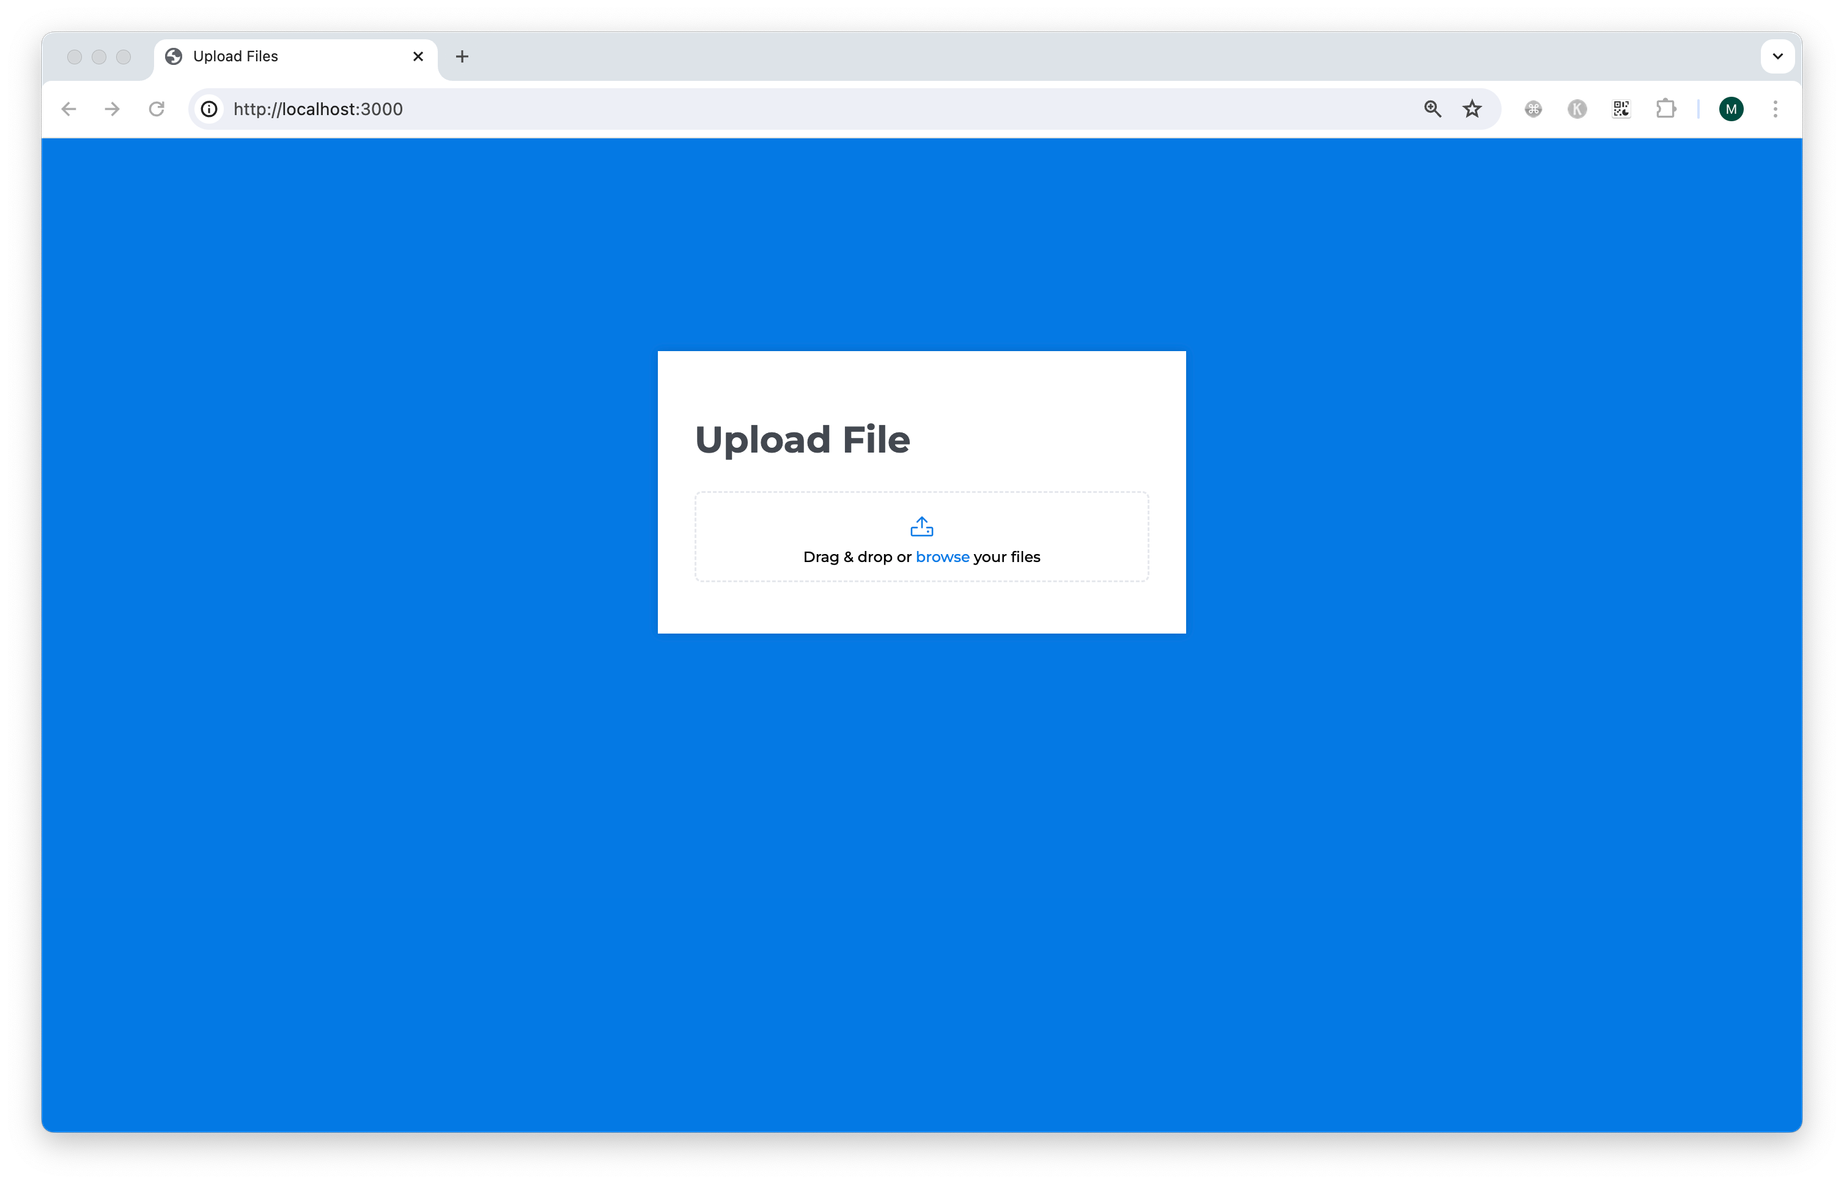
Now, let’s change the appearance of this form to make it look awesome. Add the CSS code from the provided file to the style tag at the end of the head.
Here is the whole CSS hosted on Github.
This is what we have with the CSS applied.
To make drag & drop work, let’s add necessary Javascript.
<script type="text/javascript">
    const form = document.querySelector('.upload-form');
    const fileInput = form.querySelector('input[type="file"]');
    const outputBox = form.querySelector('.result');

    function uploadFile(file) {
        outputBox.querySelector('.file-name').textContent = file.name;
        outputBox.querySelector('.file-size').textContent = `${(file.size / 1024).toFixed(2)} KB`;

        outputBox.querySelector('.upload-result').innerHTML = `
    <i class="ph ph-circle-notch"></i>
  `;

        outputBox.style.display = 'flex';

        const formData = new FormData();
        formData.append('file', file);

        const xhr = new XMLHttpRequest();
        xhr.open('POST', form.action);

        xhr.upload.onprogress = (event) => {
            const progress = (event.loaded / event.total) * 100;
            outputBox.querySelector('.progress').style.width = `${progress}%`;
        }

        xhr.onreadystatechange = () => {
            if (xhr.readyState === XMLHttpRequest.DONE) {
                if (xhr.status === 200) {
                    outputBox.querySelector('.upload-result').innerHTML = `
          <span>${xhr.responseText}</span>
          <i class="ph ph-check-circle"></i>
        `
                } else {
                    outputBox.querySelector('.upload-result').innerHTML = `
          <span>${xhr.responseText}</span>
          <i class="ph ph-x-circle"></i>
        `
                }
            }
        }

        xhr.send(formData);
    }

    form.addEventListener('dragover', function (event) {
        event.preventDefault();
    })

    form.addEventListener('drop', function (event) {
        event.preventDefault();
        if (event.dataTransfer.files.length) {
            uploadFile(event.dataTransfer.files[0]);
        }
    })

    fileInput.addEventListener('change', function (e) {

        const file = fileInput.files?.[0];

        if (file) {
            uploadFile(file);
        } else {
            outputBox.textContent = 'No file selected';
        }

        form.reset();
    });

</script>
In the above code, we are performing the following tasks:
- It selects the necessary DOM elements from the HTML document using document.querySelector().
- We bind various events using addEventListener() to perform their respective operations. During the dragover event, it's essential to call
event.preventDefault()to enable proper drop functionality. - When a file is selected via the file picker, it triggers the change event, the file is obtained as
HTMLInputElement.files, which is essentially a fileList. We select a single file by accessingevent.target.files[0]and then pass the file touploadFilefunction. - In the case of a drop event, the file is obtained from the dataTransfer property of the event, which contains a list of files. We access a single file using
event.dataTransfer.files[0]. - The
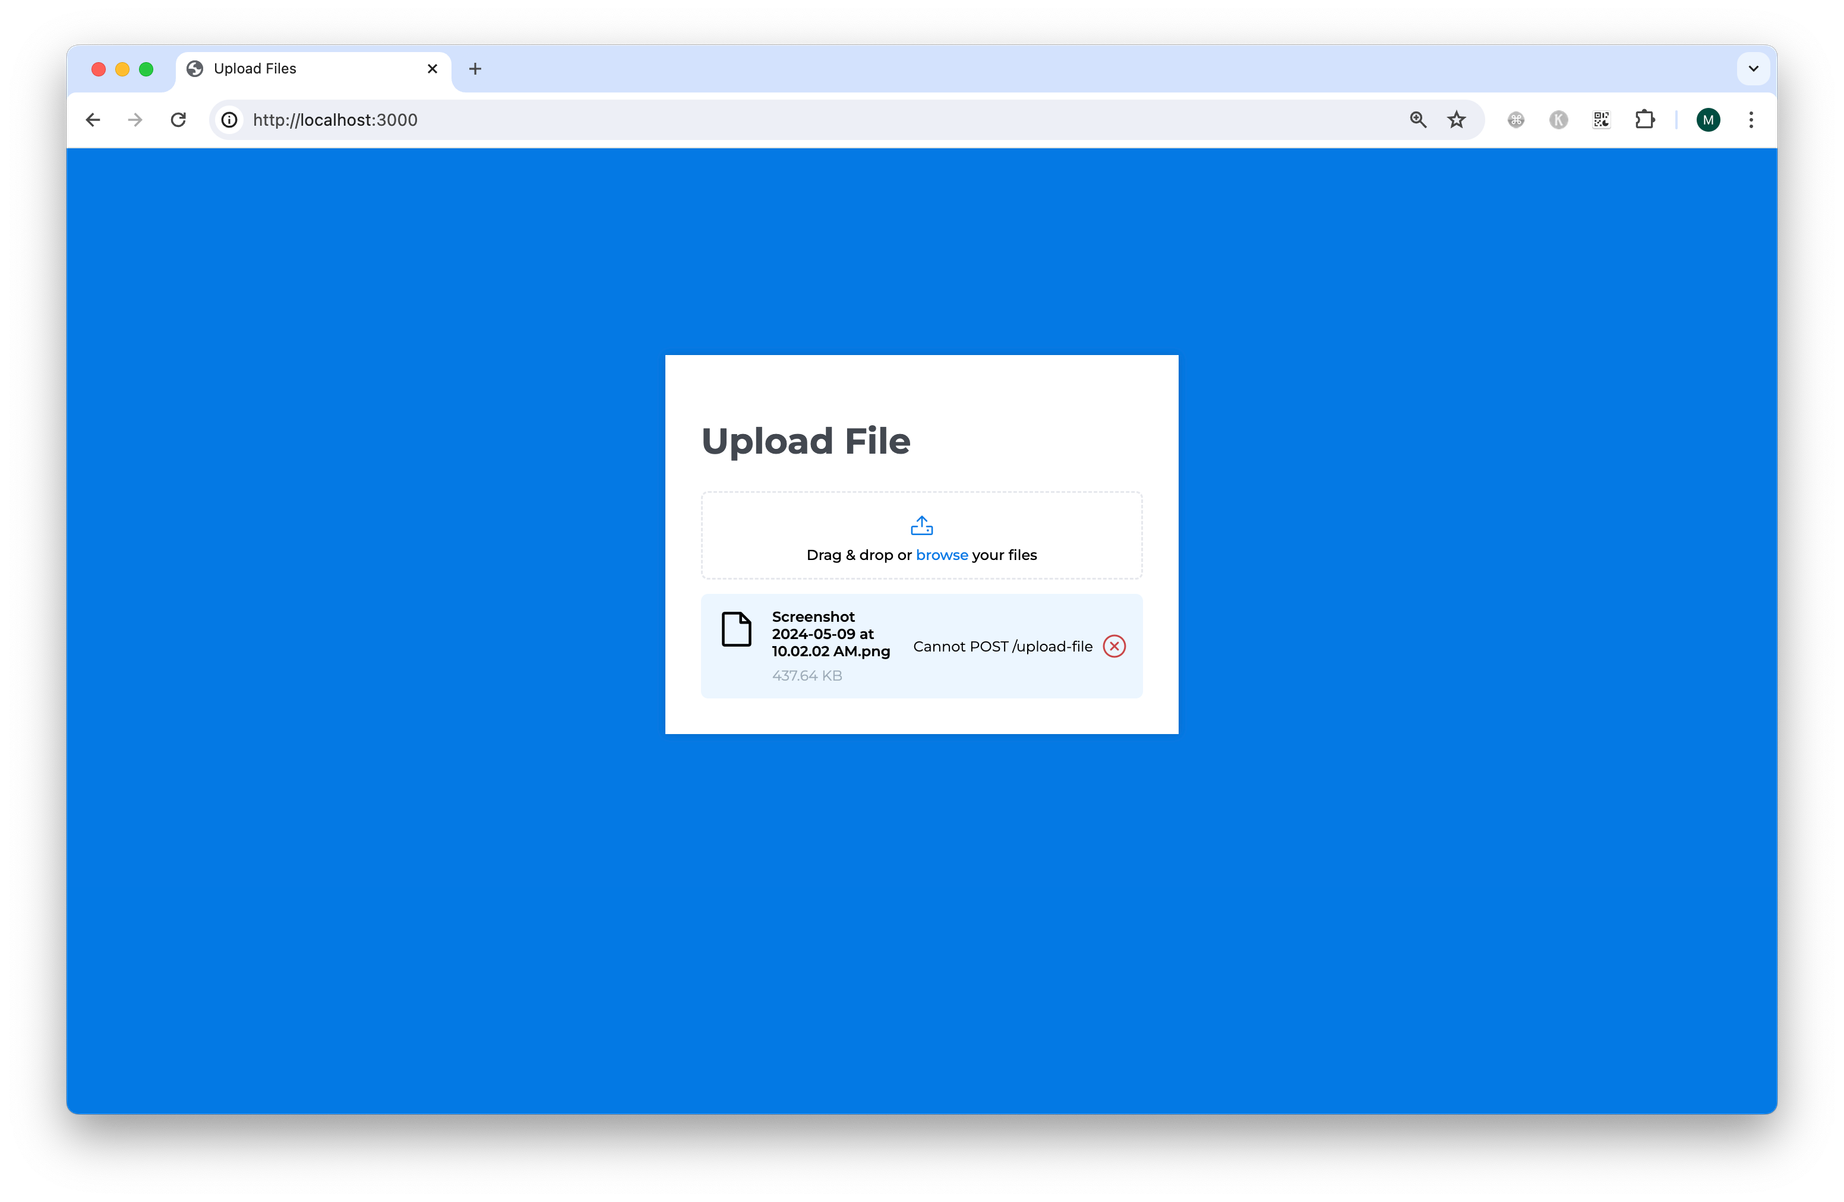
uploadFilefunction updates theoutputBoxwith file information, such as the file name and size. It then appends the file as form data and initiates anXMLHttpRequest. ThisXMLHttpRequestis configured to send a POST request to the server using the form's action URL i.e./upload-file - Form is submitted with a POST method on
/upload-fileendpoint which doesn’t exist at this point. If you try to upload a file now, you will get below error.
Implementing upload endpoint in Node.js backend.
It's time to implement the /upload-file endpoint. The browser sends multipart/form-data requests. To handle this on the Node.js backend, we need Multer.
Multer is a node.js middleware for handling multipart/form-data, primarily used for uploading files.
Let’s install multer.
npm install multerLet’s modify app.js
const express = require('express')
const app = express()
const port = 3000
const path = require("path");
const multer = require('multer')
const upload = multer({ dest: 'uploads/' })
// View Engine Setup
app.set("views", path.join(__dirname, "views"));
app.set("view engine", "ejs");
app.get('/', (req, res) => {
res.render("index");
})
app.post('/upload-file', upload.single('file'), (req, res) => {
res.send('File uploaded successfully')
})
app.listen(port, () => {
console.log(`Example app listening on port ${port}`)
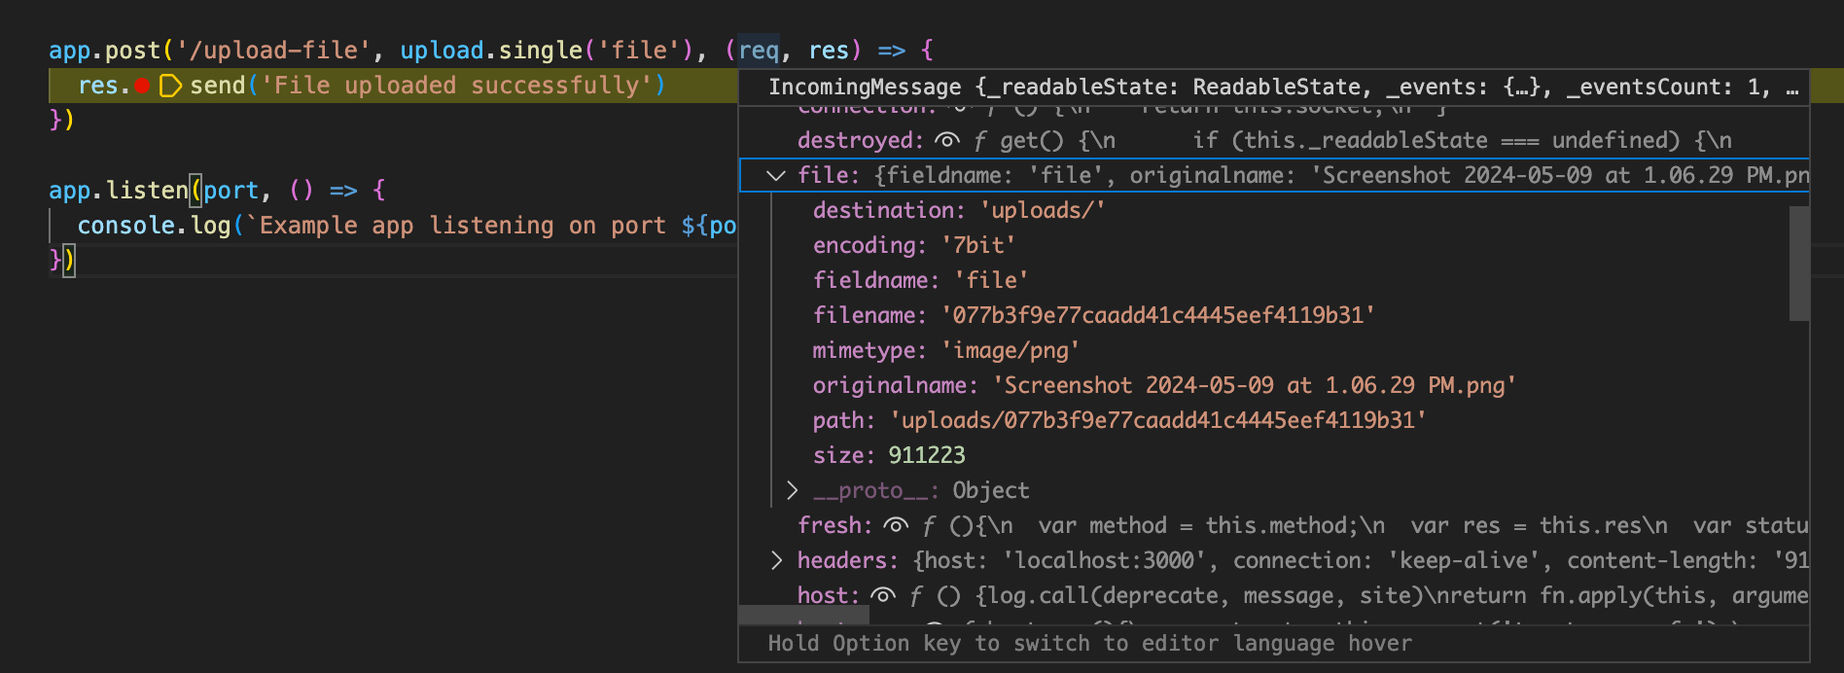
})multer({ dest: 'uploads/' })configures multer to save files on disk in theuploadsfolder. If we don't specify this, files won't be written anywhere.- Then we added a middleware,
upload.single('file')in upload POST endpoint. This middleware addsfileorfilesobject in therequestwhich we can see. Remember that our file input element name isfile, that is why we are usingupload.single('file'). The uploaded file will be stored inreq.file. - You can use
.array(fieldname[, maxCount])to accept an array of files, all with the namefieldname. Optionally error out if more thanmaxCountfiles are uploaded. The array of files will be stored inreq.files.
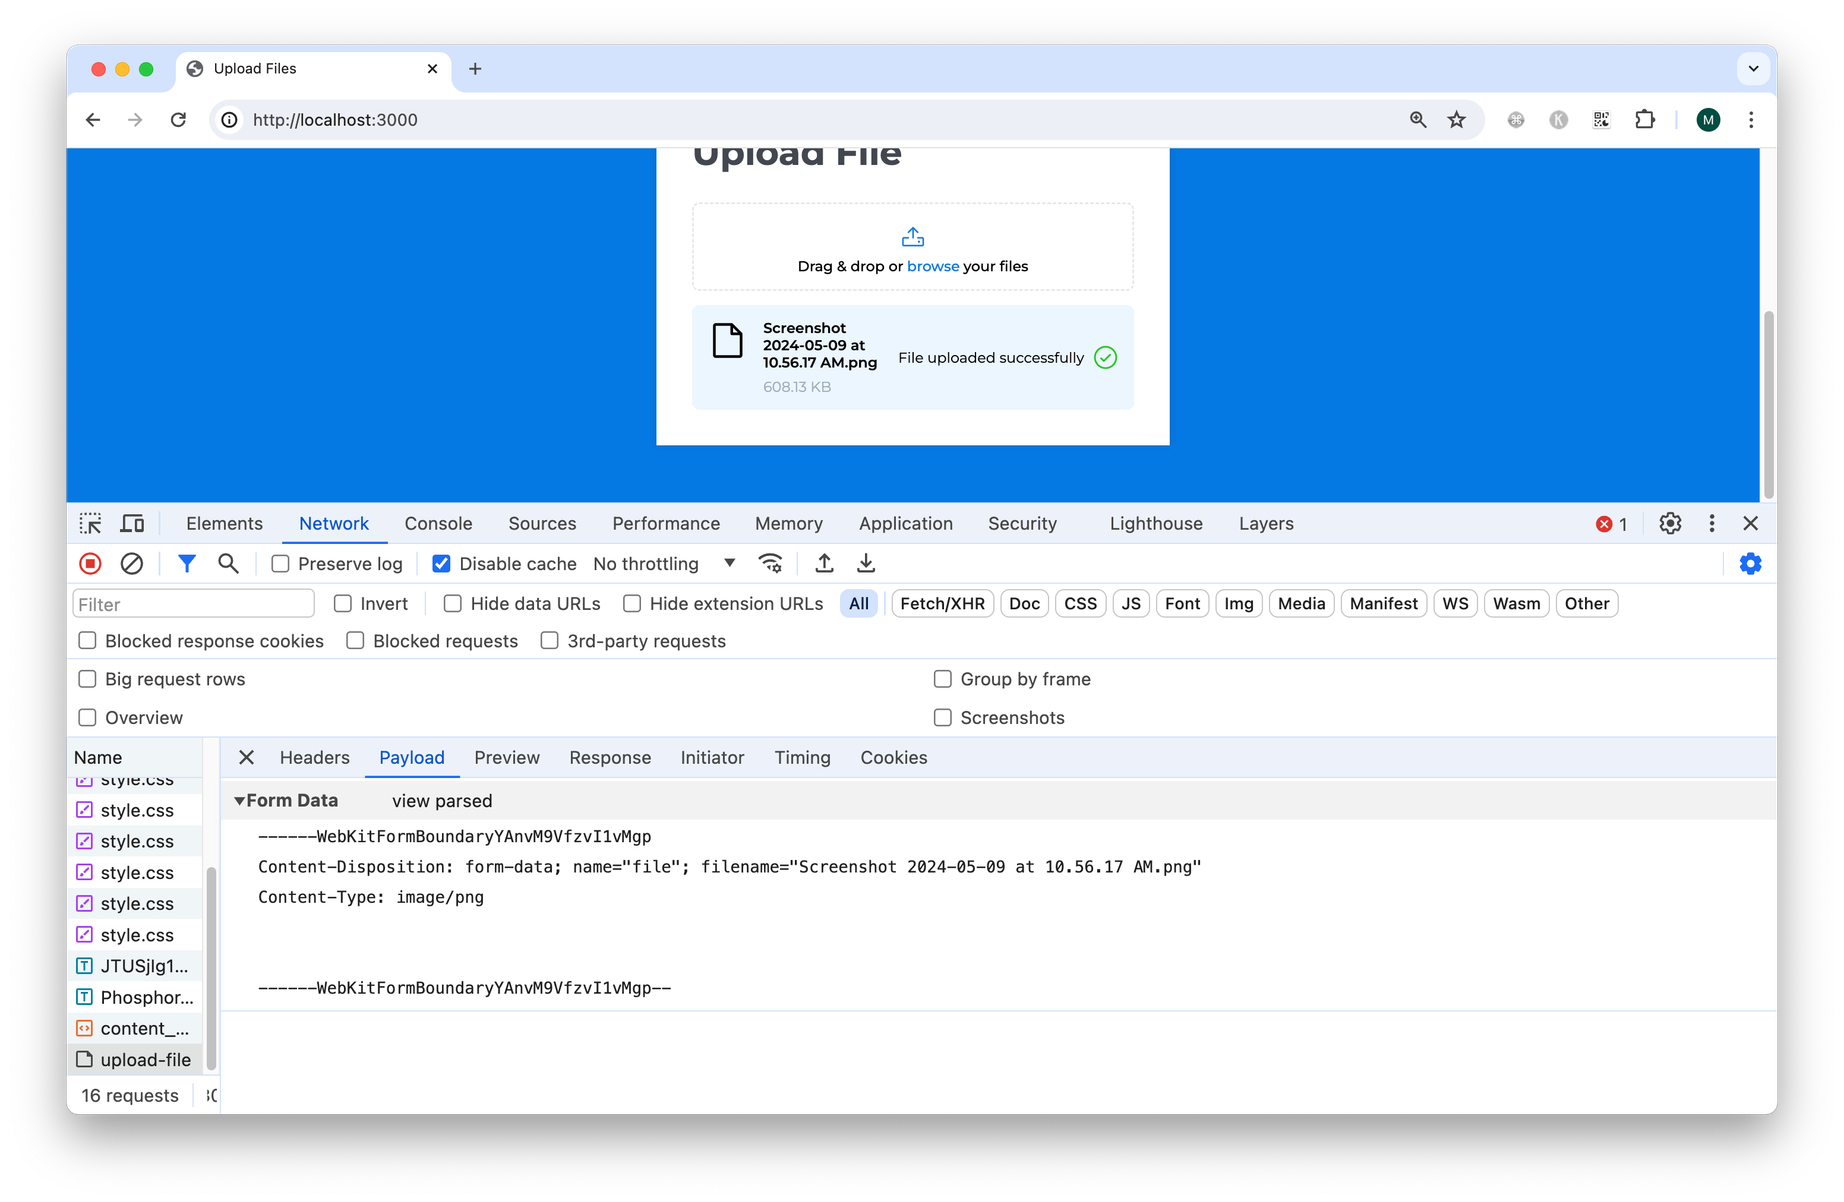
Now, when we drag & drop a file, the request succeeds.
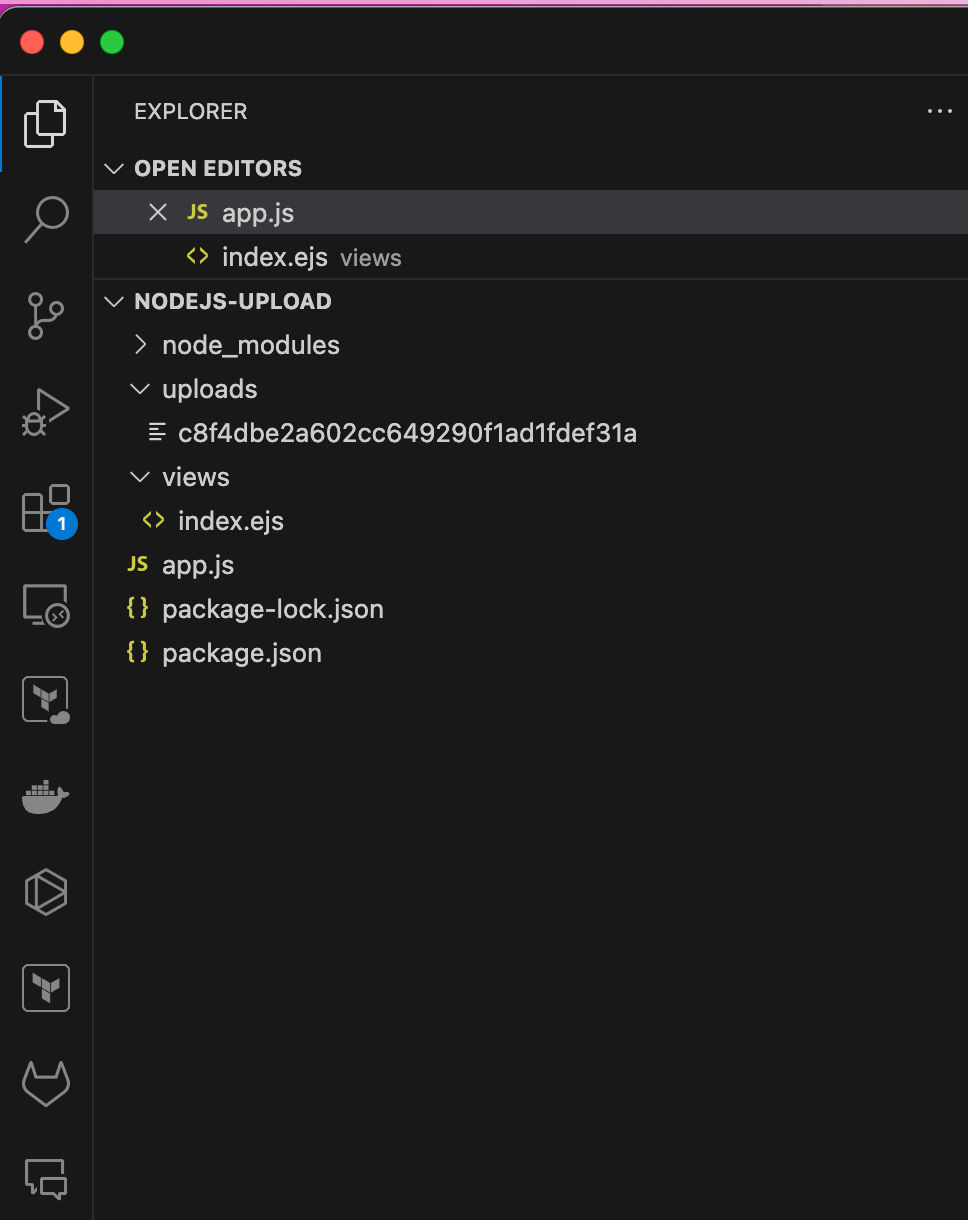
And the file is successfully uploaded in side the desired destination i.e. uploads folder.
By default, Multer will rename the files to avoid naming conflicts. However, the renaming function can be customized according to your needs.
Let’s debug the code once and see what is available in req.file.
Upload Validations
In a real-world application, you will often need to put some checks on the uploaded media. Let’s see how to limit the upload based on file size.
Let’s modify the multer instance and add a file size limit.
const upload = multer({
  dest: 'uploads/',
  limits: {
    fileSize: 1000
  }
})
fileSize controls the the max file size (in bytes). Let’s set it to a very lower number 1000 to see how to throw error.
When encountering an error, Multer will delegate the error to Express. You can display a nice error page using the standard Express way.
Let’s add a global error handler.
app.use((err, req, res, next) => {
  const error = err.message || 'Internal Server Error'
  res.status(500).send(error)
})
Now, when we try to upload a file, we should get an error.
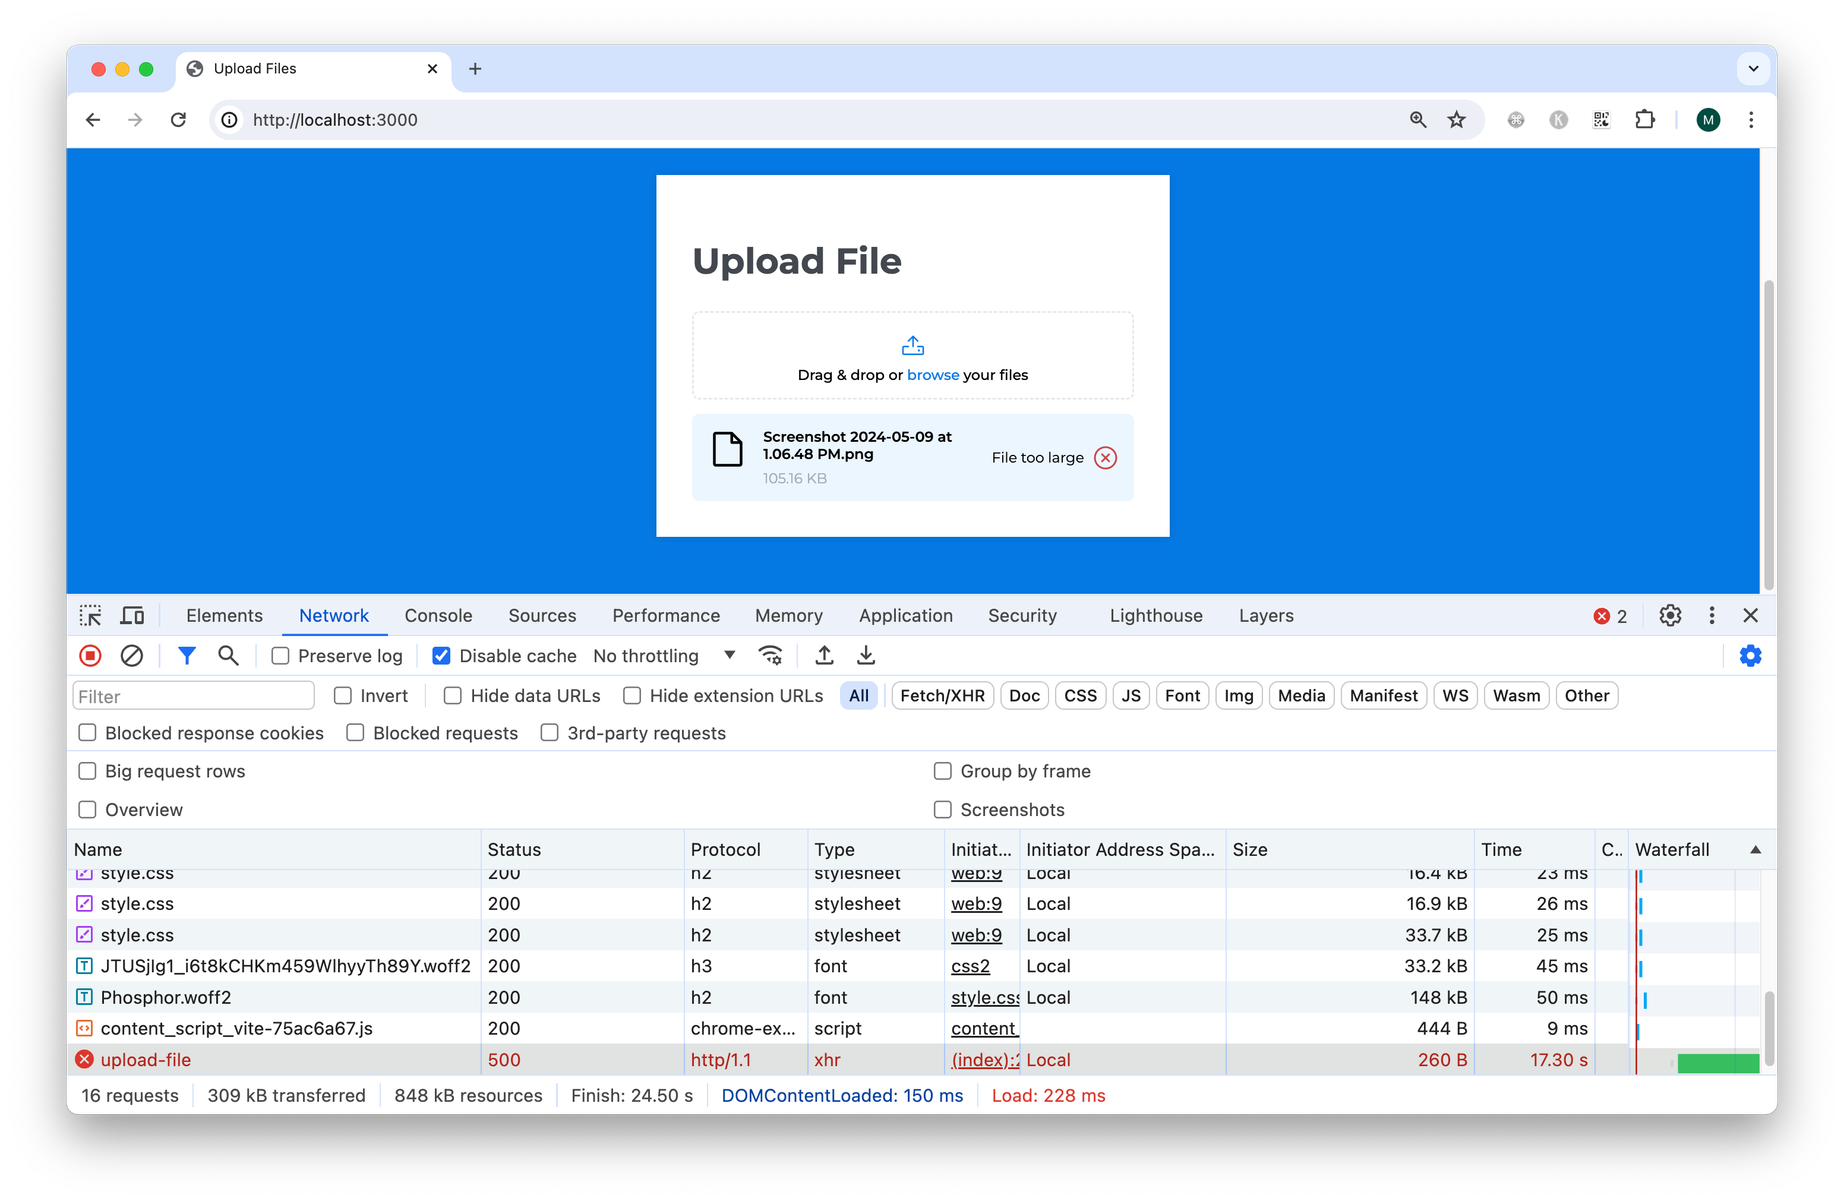
With the debugger attached, we can see the Multer err object.
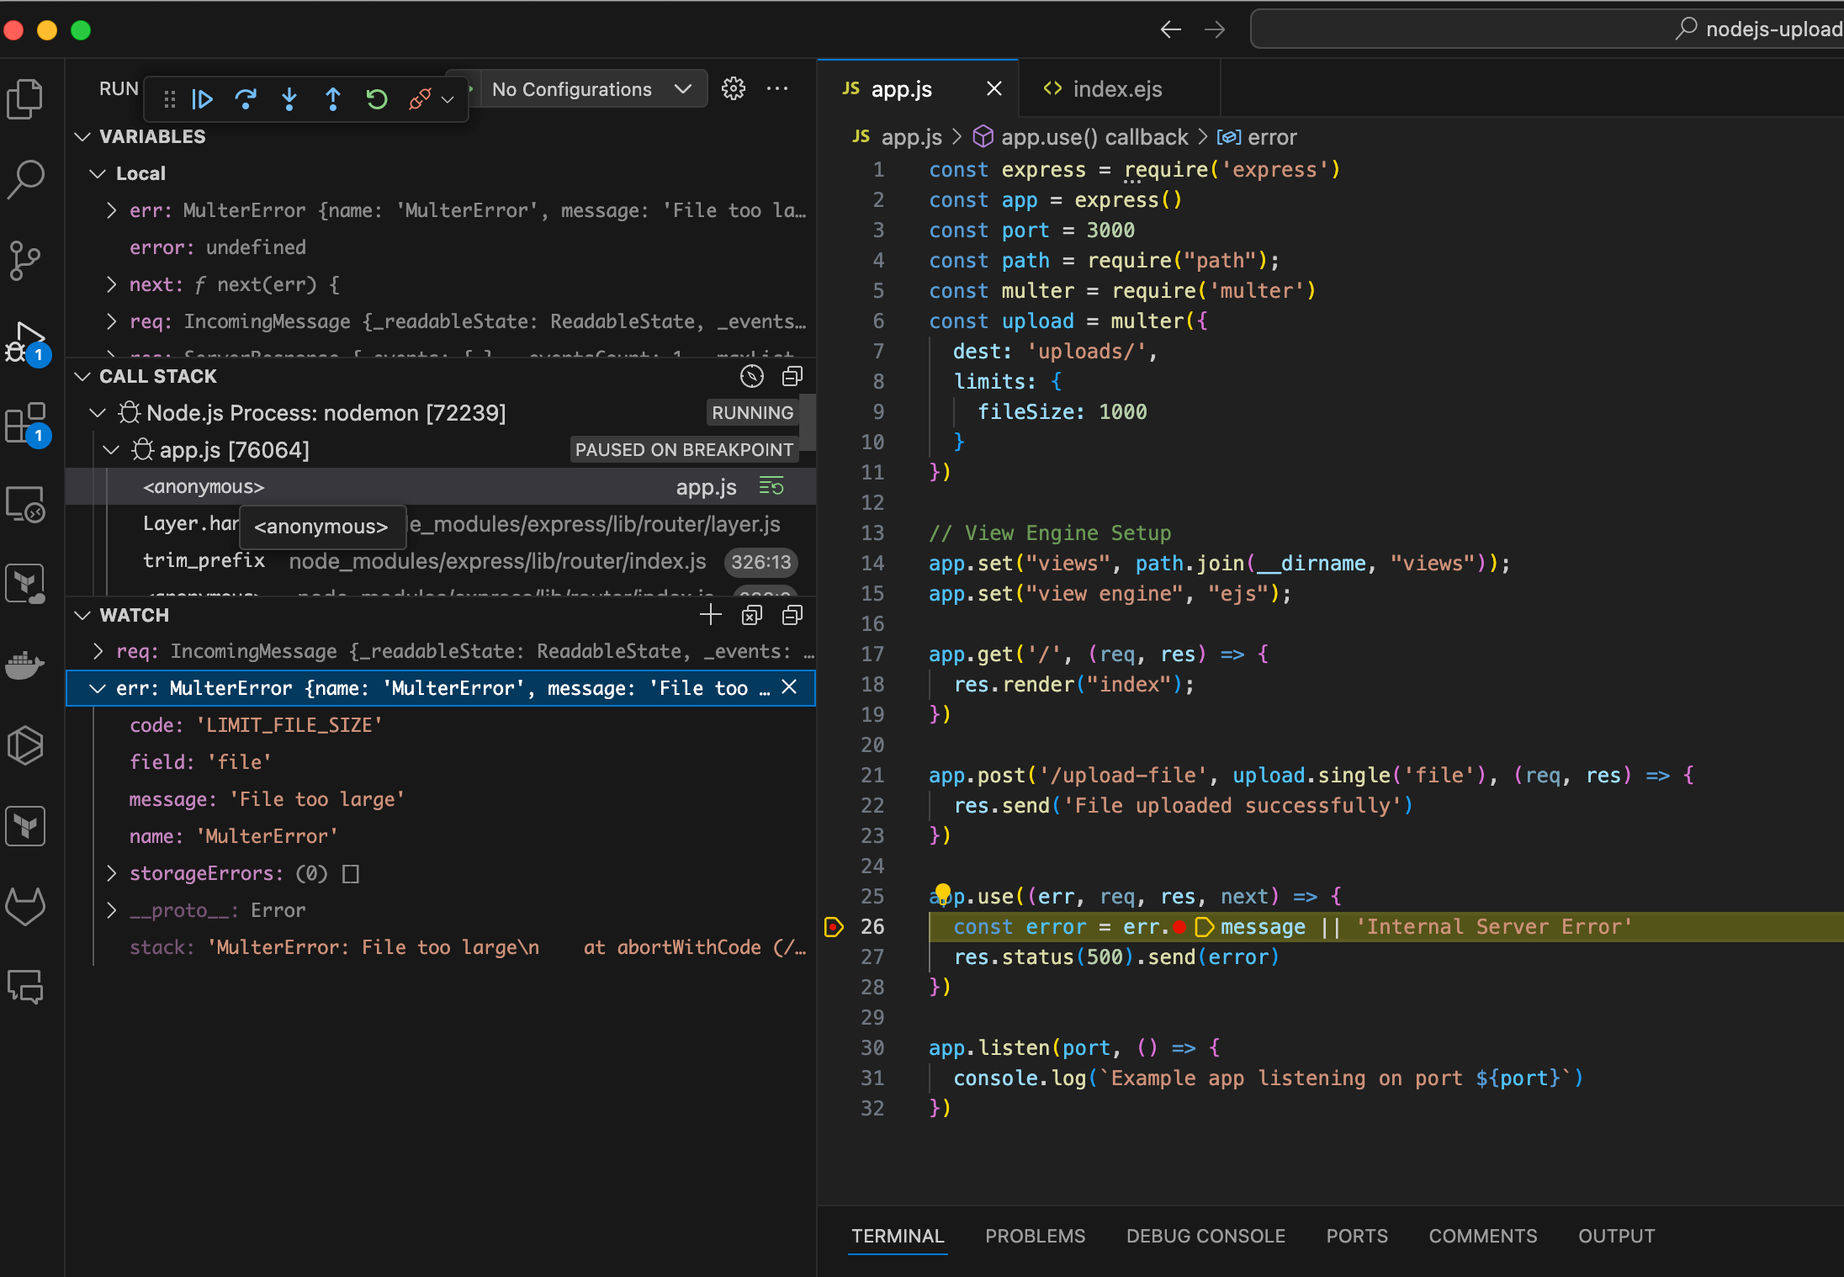
We are using the 4.19.2 version; Multer can send these errors.
LIMIT_PART_COUNT: 'Too many parts',
LIMIT_FILE_SIZE: 'File too large',
LIMIT_FILE_COUNT: 'Too many files',
LIMIT_FIELD_KEY: 'Field name too long',
LIMIT_FIELD_VALUE: 'Field value too long',
LIMIT_FIELD_COUNT: 'Too many fields',
LIMIT_UNEXPECTED_FILE: 'Unexpected field',
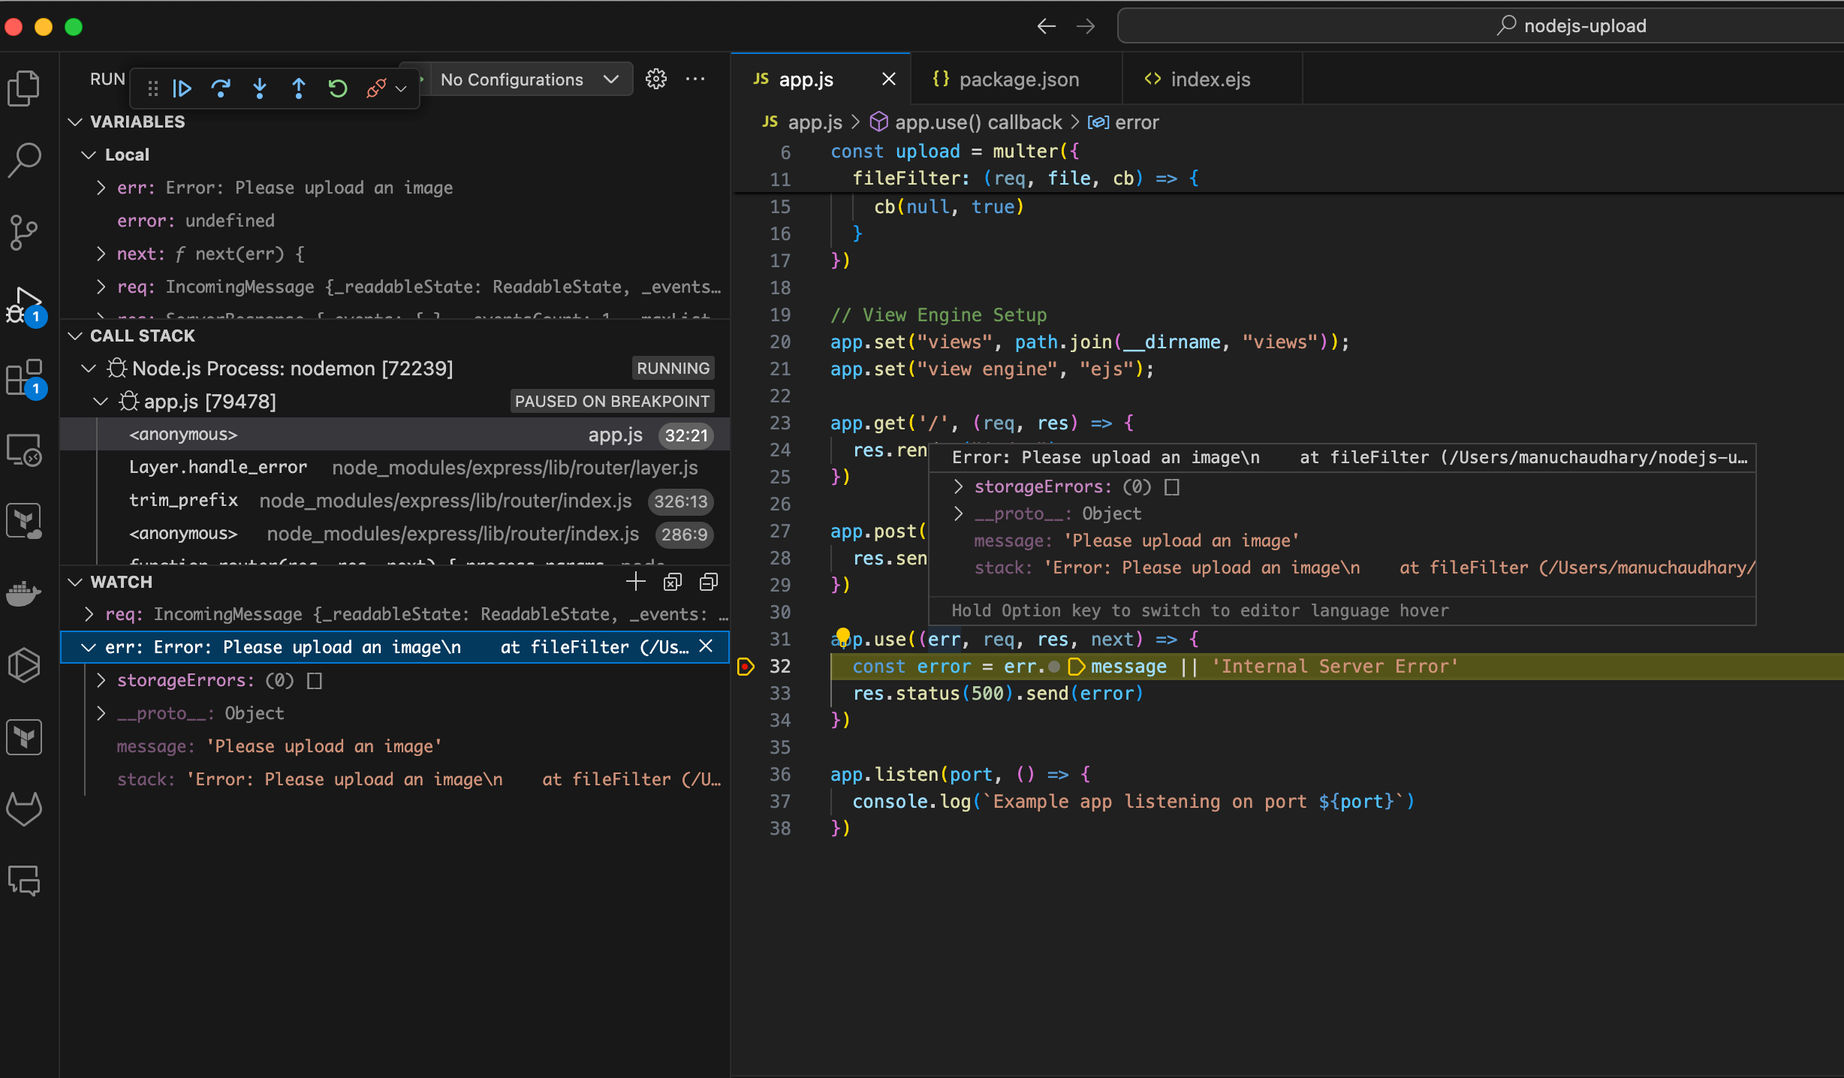
MISSING_FIELD_NAME: 'Field name missing'Let’s say we want the user to be able to upload only images. This can be done using the fileFilter option in Multer, as shown below.
const upload = multer({
  dest: 'uploads/',
  limits: {
    fileSize: Infinity // Changed this to allow file upload
  },
  fileFilter: (req, file, cb) => {
    if (!file.mimetype.startsWith('image/')) {
      return cb(new Error('Please upload an image'))
    }
    cb(null, true)
  }
})
If we try to upload a HTML file, the upload API returns an error.
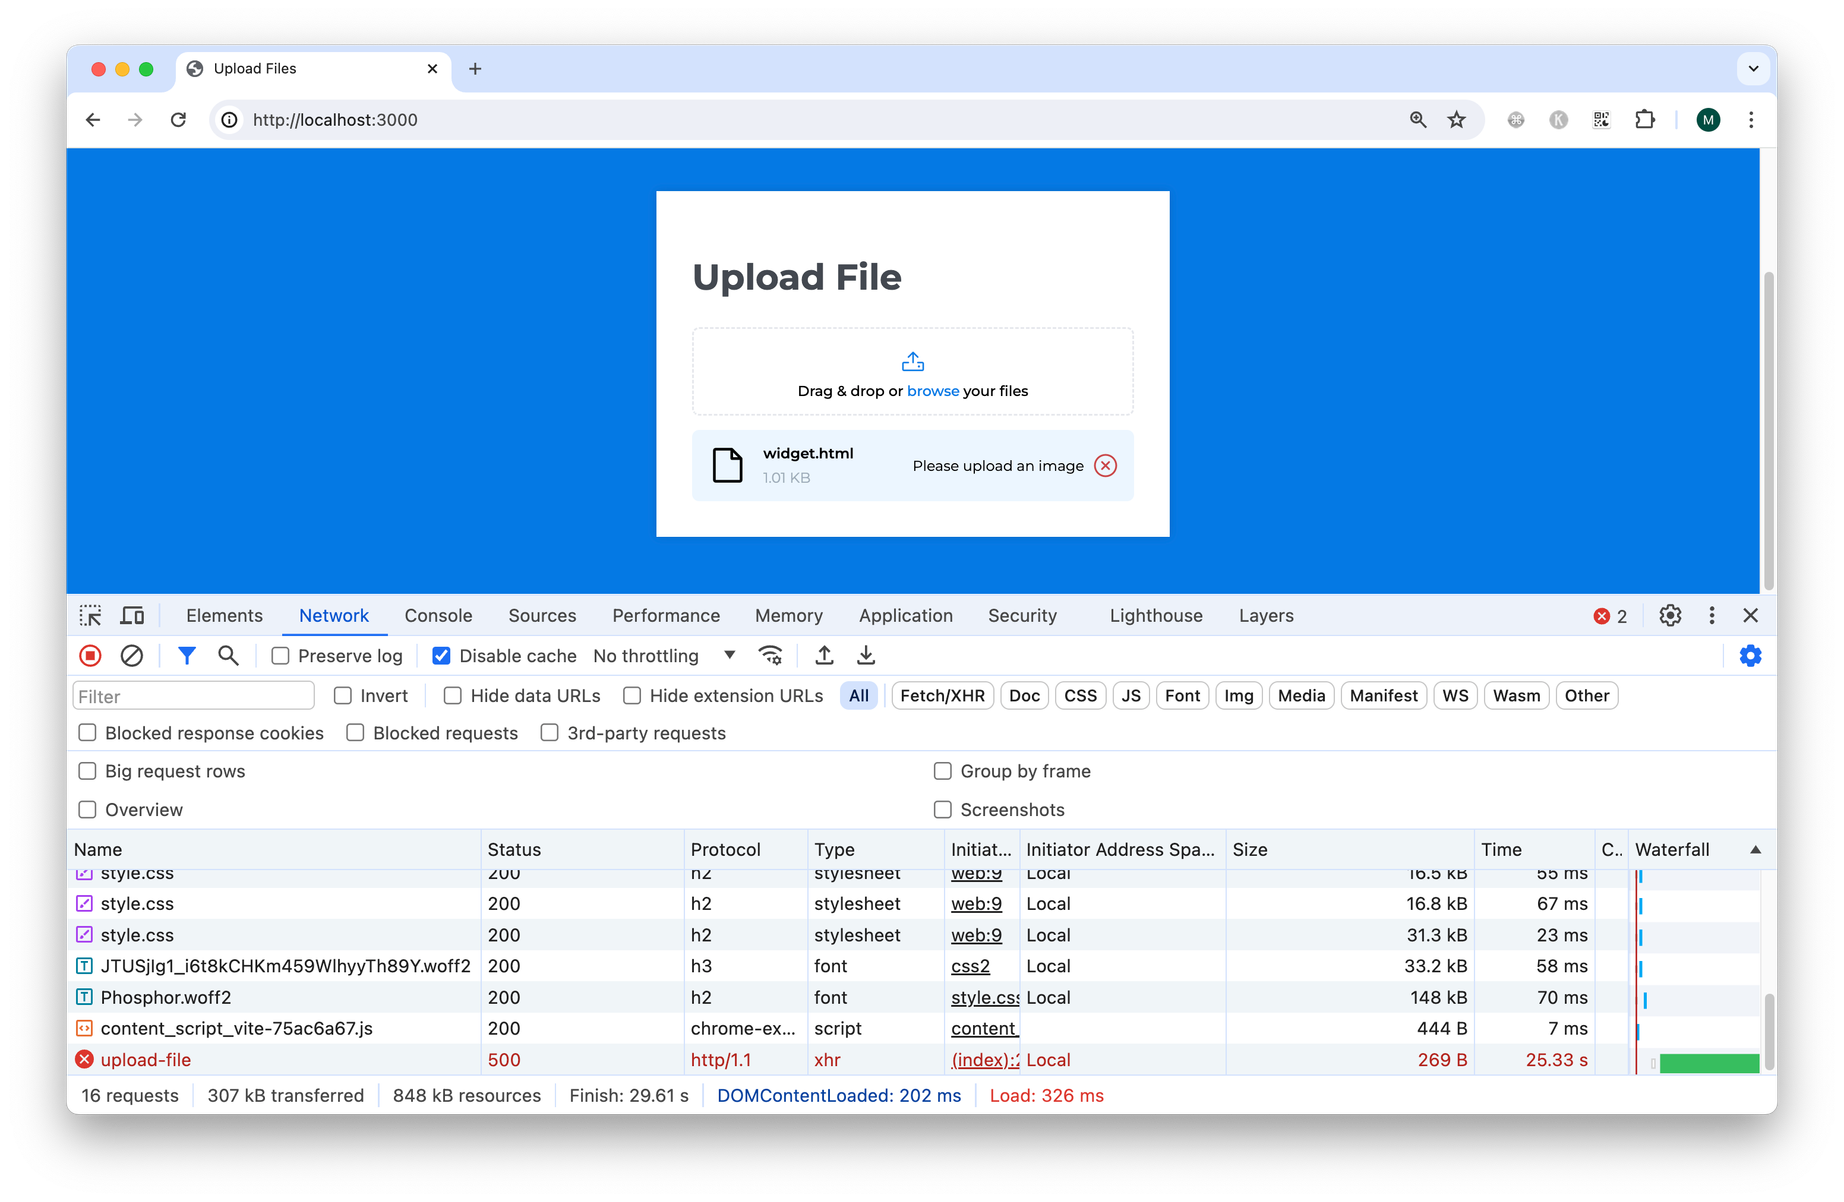
With the debugger attached, we can see the Multer err object.
What are the potential pitfalls of this DIY approach?
Building your own upload system is feasible and useful for small projects, but what happens if your app becomes popular? Can it manage a surge in users uploading large files? Will uploads remain fast? These are important questions to consider when developing your upload feature.
While making your own system is educational, it might not be practical for real-world uses. ImageKit.io is a third-party service that can take care of all your file upload and storage requirements.
Let’s look at some problems and ideal solutions.
Limited Server Storage
- In the mentioned example, uploaded files are stored on a server’s disk, which has limited space. As your needs grow, you'll need bigger disks.
- Another issue with disks is that they can only connect to one server at a time, which can hinder running multiple application instances.
- ImageKit allows you to manage uploads across the globe, handling billions of files, terabytes of data, and hundreds of requests per second.
Slow Uploads for Large Files
- Uploading large files, like videos, can be slow and might require a more robust backend. If users are worldwide, they could face delays when uploading to a server in just one location.
- One solution is to operate your application's backend across several regions.
- ImageKit provides a global upload endpoint. This feature smartly directs your uploads to the closest of six strategically placed global regions to reduce upload time.
Security Risks
- Uploading files can expose your server to security threats, allowing hackers to upload harmful files that could jeopardize your cloud setup.
- Using an external service to handle file uploads can protect your server from various attacks.
File delivery for web use-case
- Once you have successfully uploaded the files, you might have a use case for delivering them to your users. This requires creating another layer in your application to handle media optimization.
- ImageKit offers a robust delivery API that supports high traffic and includes features like automatic image optimization, resizing, cropping, watermarking, format conversion, video optimization, and streaming.
Uploading in ImageKit from Node.js app
Our Node.js SDK makes uploading files to ImageKit in Node.js simple. This SDK facilitates seamless interactions with ImageKit's Upload API, enabling advanced features like auto-tagging, AI-based background removal, and dynamic resizing of images and videos.
SDK Setup
To begin, initialize the ImageKit instance with your API credentials:
var ImageKit = require("imagekit");

var imagekit = new ImageKit({
    publicKey : "your_public_api_key",
    privateKey : "your_private_api_key",
    urlEndpoint : "https://ik.imagekit.io/your_imagekit_id/"
});
File Upload
The .upload() method is used for uploading files. It requires the file and fileName parameters at a minimum. The complete list of supported parameters is available in the upload API docs.
imagekit.upload({
    file : <url|base_64|binary>, // File content to upload
    fileName : "my_file_name.jpg", // Desired file name
    extensions: [
        {
            name: "google-auto-tagging",
            maxTags: 5,
            minConfidence: 95
        }
    ],
    transformation: {
        pre: 'l-text,i-Imagekit,fs-50,l-end',
        post: [
            {
                type: 'transformation',
                value: 'w-100'
            }
        ]
    }
}).then(response => {
    console.log(response);
}).catch(error => {
    console.log(error);
});
Here we are doing a couple of things besides simple upload.
Automated Tagging
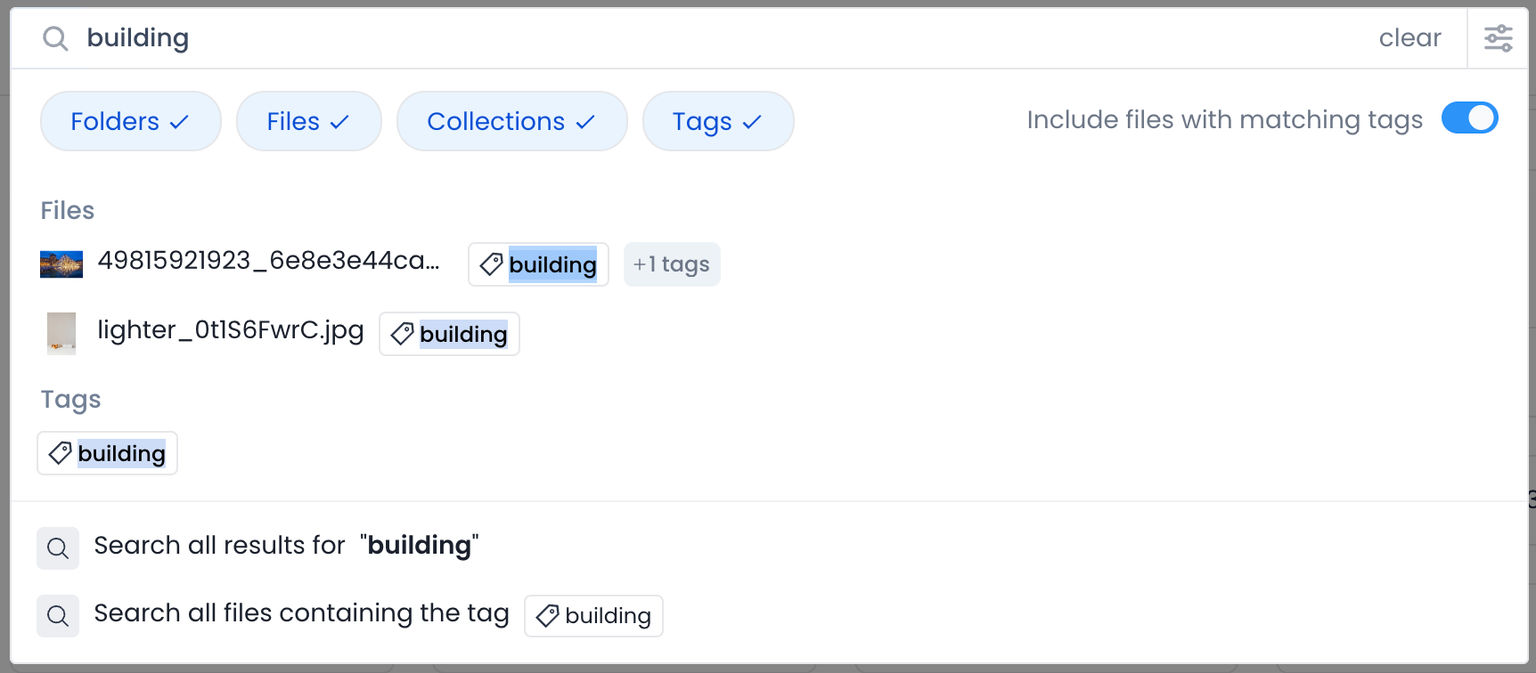
With the extensions parameter, we are telling ImageKit to leverage powerful label detection APIs by Google Cloud Vision to add tags to uploaded media files. These tags allow for a seamless search.
For example, search results showing assets with one or more tags matching the search query, i.e., building:
AI-based Background Removal
You can apply background removal extensions during the upload itself. This will remove the background from the original image and upload a new version. Here is a simple example; you can learn more about it from the docs.
"extensions": [
        {
            "name": "remove-bg",
            "options": {
                "add_shadow": true,
                "bg_color": "green"
            }
        }
 ]
Reducing dimension and file size before storing
If your users are uploading high-res images and videos and you don’t want to increase your storage cost, you can leverage pre- and post-transformation in ImageKit. This allows you to modify media files before upload and eagerly generate transformations after upload. The syntax is pretty straightforward; you can learn more from the docs.
{
  /*
  ...rest of the Upload API request parameters
  */
  "transformation": {
    "post": [
        {
          "type": "abs",
          "value: "sr-240_360_480_720_1080",
          "protocol": "dash"
        },
        {
          "type": "transformation",
          "value": "h-300"
        }
    ]
  }
}
Conclusion
As we learned, handling file upload in Node.js is easy. However, there are a few things you should keep in mind.
- Never trust the client's MIME type when restricting uploads based on file type. Instead, detect file type using a magic number. This method is also not guaranteed to work 100% of the time, but it is much better than trusting the client.
- Avoid storing uploads on the filesystem. Disk storage is often limited and slow. Use a headless DAM like ImageKit.
- Do not execute untrusted files on your server.