A video background might look great during development, but it often causes performance issues when your Next.js app reaches real users and networks.
This article shows you how to use ImageKit to automatically compress videos, convert them to the best format for each browser, and deliver them through a global CDN.
For a working example, see the GitHub repository.
Introduction
Background videos are commonly used in hero sections to add visual interest.
Unlike regular videos, background videos are typically:
- Autoplayed
- Muted
- Looped
Because they start automatically and often sit behind critical UI, background videos need to load fast and stay out of the way.
The problem with background videos
The biggest challenge with background videos is the cost of running them on users' devices.
During development, you'll likely have a fast machine with a good internet connection. In production, you can't control that. Your users might be dealing with low-end mobile devices, unstable connections, or browsers that don't support your video format.
In this article, you'll create an example Next.js application with a background video and learn how to optimize it with ImageKit.
Prerequisites
Before you start, make sure you have:
- A video to use as background: We'll use this ocean video from Pexels
- A free ImageKit account
- Node.js installed
Set up the project
Scaffold your Next.js app and install the @imagekit/next:
npx create-next-app@latest nextjs-background
cd nextjs-background
npm install @imagekit/next
npm run dev
When prompted with Would you like to use the recommended Next.js defaults?, select Yes.
The dev server starts at http://localhost:3000.
Add video to the project
- Open the project in your favorite IDE
- Download the ocean video
- Place it in the
publicdirectory - Rename it
bg-video.mp4
Create a page with a background video
Update app/page.tsx with a basic background video:
import Link from 'next/link';
export default function Home() {
return (
<div className="relative w-full h-screen overflow-hidden">
<video
autoPlay
muted
loop
playsInline
preload="none"
poster="/bg-video-poster.jpg"
className="absolute inset-0 w-full h-full object-cover"
>
<source src="/bg-video.mp4" type="video/mp4" />
Your browser does not support the video tag.
</video>
<div className="absolute inset-0 bg-black/40">
<div className="relative z-10 flex flex-col items-center justify-center h-full text-center text-white space-y-6 px-4">
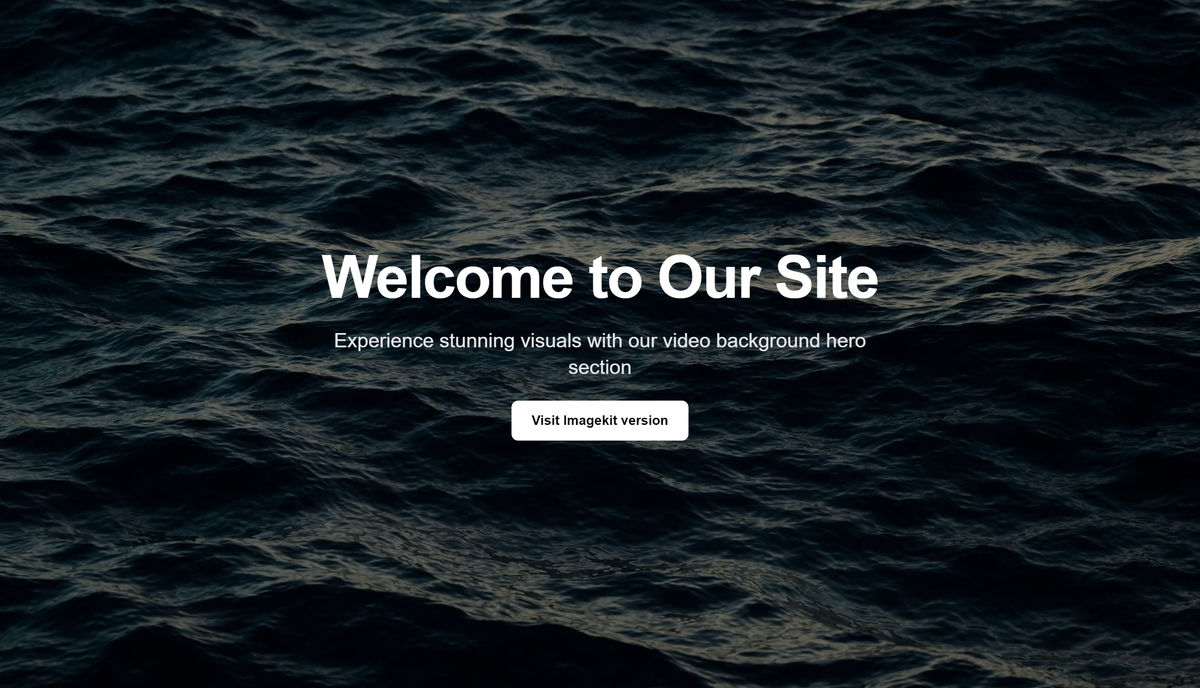
<h1 className="text-5xl md:text-7xl font-bold tracking-tight">
Welcome to Our Site
</h1>
<p className="text-xl md:text-2xl max-w-2xl text-gray-200">
Experience stunning visuals with our video background hero section
</p>
<Link
href="/imagekit"
className="bg-white text-black px-6 py-3 rounded-lg font-semibold hover:bg-gray-200 transition-colors"
>
Visit ImageKit version
</Link>
</div>
</div>
</div>
);
}Add a still frame from your video to public/bg-video-poster.jpg to use as the poster. This shows while the video loads and acts as a fallback if the video fails.
Understand the video attributes
For the video element, we use six attributes that are all required or commonly recommended for background video to work reliably:
autoPlay: the video plays automatically when the page loadsmuted: required for autoplay to work on most mobile browsers; without this, browsers block autoplayloop: video repeats continuouslyplaysInline: prevents fullscreen playback on iOS, which is essential for backgroundspreload="none": Good-to-have. Tells the browser not to download any video data until playback starts; without this, some browsers will eagerly fetch the entire file on page loadposter: Good-to-have. A still image is shown while the video loads; it also acts as a fallback if the video fails to load.
For the full list of video element attributes and browser support details, see MDN: The Video Element.
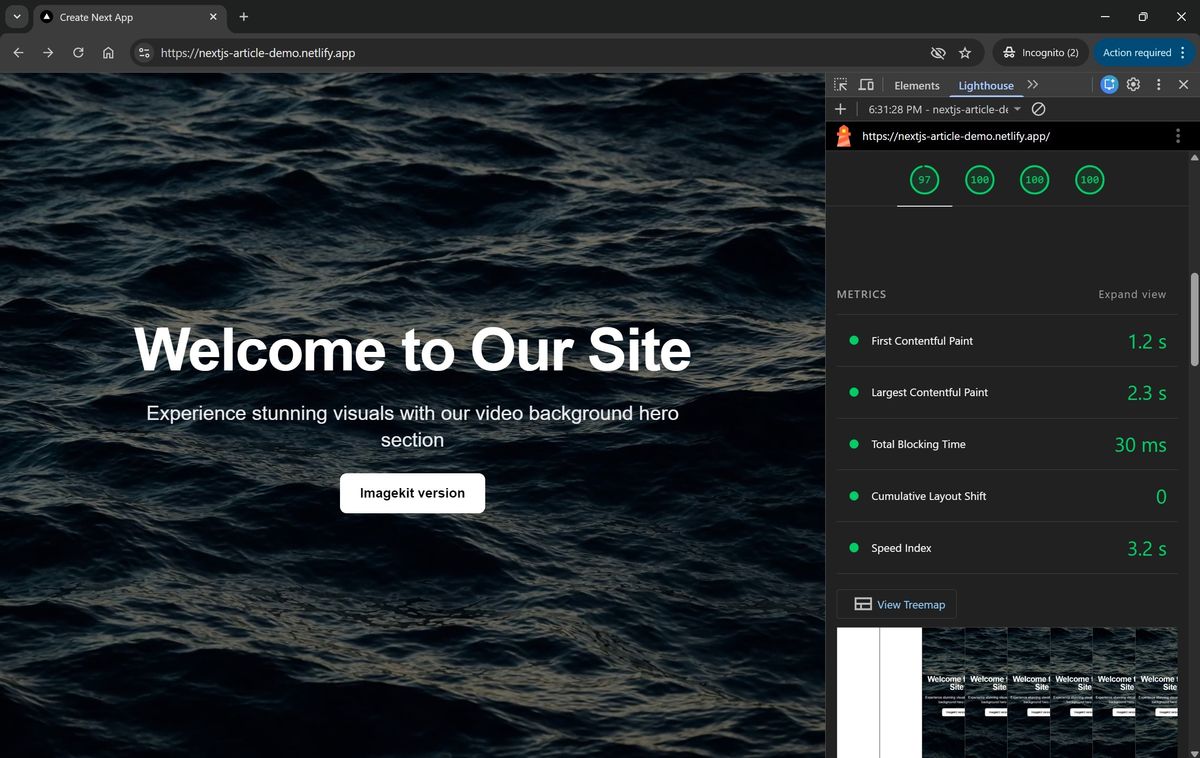
Check performance
Open browser DevTools, select the Network tab, and refresh the page. You'll notice that bg-video.mp4 is around 30 MB. Every browser and device downloads that same file, regardless of screen size or connection speed.
Running Lighthouse gives baseline metrics to compare against:
| Metric | Before |
|---|---|
| FCP (First Contentful Paint) | ~1.2s |
| LCP (Largest Contentful Paint) | ~2.3s |
| Video file size | ~30 MB |
ImageKit version
Now rebuild the page using the ImageKit SDK.
Upload your video to ImageKit
- Sign in to your ImageKit dashboard
- Open Media Library from the side menu
- Select + New → File upload
- Upload the
bg-video.mp4from yourpublicdirectory
Your video will be available at:
https://ik.imagekit.io/your_imagekit_id/bg-video.mp4Replace your_imagekit_id with your actual ImageKit ID in URLs and in the following code. To find it, see your Profile section.
Configure the ImageKit provider
The @imagekit/next provides an ImageKitProvider that makes your ImageKit URL endpoint available to all components.
Create a providers wrapper:
// app/providers.tsx
'use client';

import { ImageKitProvider } from '@imagekit/next';

export function Providers({ children }: { children: React.ReactNode }) {
  return (
    <ImageKitProvider
      urlEndpoint={process.env.NEXT_PUBLIC_IMAGEKIT_URL_ENDPOINT!}
      transformationPosition="query"
    >
      {children}
    </ImageKitProvider>
  );
}
Wrap your layout:
// app/layout.tsx
import { Providers } from './providers';

export default function RootLayout({ children }: { children: React.ReactNode }) {
  return (
    <html lang="en">
      <body>
        <Providers>{children}</Providers>
      </body>
    </html>
  );
}
Add your URL endpoint to .env.local:
NEXT_PUBLIC_IMAGEKIT_URL_ENDPOINT=https://ik.imagekit.io/your_imagekit_idNever hard-code your ImageKit ID or URL Endpoint directly in component files. Use environment variables so you can deploy to different environments without changing code. See the Next.js Environment Variables guide for more.
Use the ImageKit SDK in your page
Create app/imagekit/page.tsx:
import Link from 'next/link';
import { Video } from '@imagekit/next';

const urlEndpoint = process.env.NEXT_PUBLIC_IMAGEKIT_URL_ENDPOINT!;

export default function ImageKitPage() {
  return (
    <div className="relative w-full h-screen overflow-hidden">
      {/*
        Video delivers the video through ImageKit's CDN with automatic
        compression and format conversion with no extra configuration needed.

        The transformation array tells ImageKit what to do before delivery:
          w-1280  → resize to 1280px wide (reduces payload significantly)
          ac-none → remove the audio track
      */}
      <Video
        src="/bg-video.mp4"
        transformation={[{ width: 1280 }, { raw: 'ac-none' }]}
        poster={`${urlEndpoint}/bg-video.mp4/ik-thumbnail.jpg?tr=so-3`}
        autoPlay
        muted
        loop
        playsInline
        preload="none"
        className="absolute inset-0 w-full h-full object-cover"
      />

      <div className="absolute inset-0 bg-black/40">
        <div className="relative z-10 flex flex-col items-center justify-center h-full text-center text-white space-y-6 px-4">
          <h1 className="text-5xl md:text-7xl font-bold tracking-tight">
            Welcome to Our Site
          </h1>
          <p className="text-xl md:text-2xl max-w-2xl text-gray-200">
            Experience stunning visuals with our video background hero section
          </p>
          <Link
            href="/"
            className="bg-white text-black px-6 py-3 rounded-lg font-semibold hover:bg-gray-200 transition-colors"
          >
            Visit non-ImageKit version
          </Link>
        </div>
      </div>
    </div>
  );
}
The Video component takes a src relative to your media library and a transformation array. The transformations are applied server-side by ImageKit before delivery. You don't need to pre-process anything locally.
The poster derives its URL from the same NEXT_PUBLIC_IMAGEKIT_URL_ENDPOINT environment variable you already configured, so it works across all your deployment environments without code changes.
What changed
Switching from a raw file URL to Video with transformations gives you three things:
Automatic format conversion. Open the Network tab in Chrome and check the Content-Type response header for the video request. You'll see video/webm even though the URL ends in .mp4. ImageKit reads the browser's User-Agent header and delivers VP9/WebM to browsers that support it, like Chrome, and H.264/MP4 to those that don't. You don't need to specify the format or codec. ImageKit chooses the best one automatically.
Resizing via w-1280. The source video is likely 4K or 1080p. For a background video that fills a viewport, 1280px wide is usually enough and delivers a meaningfully smaller file. Adding w-1280 to the transformation array is a one-line change that reduces the payload without any visible quality difference.
Audio removal via ac-none. The video is muted, so the audio track is wasted bytes. Adding ac-none strips it server-side, cutting another 10-20% from the file size.
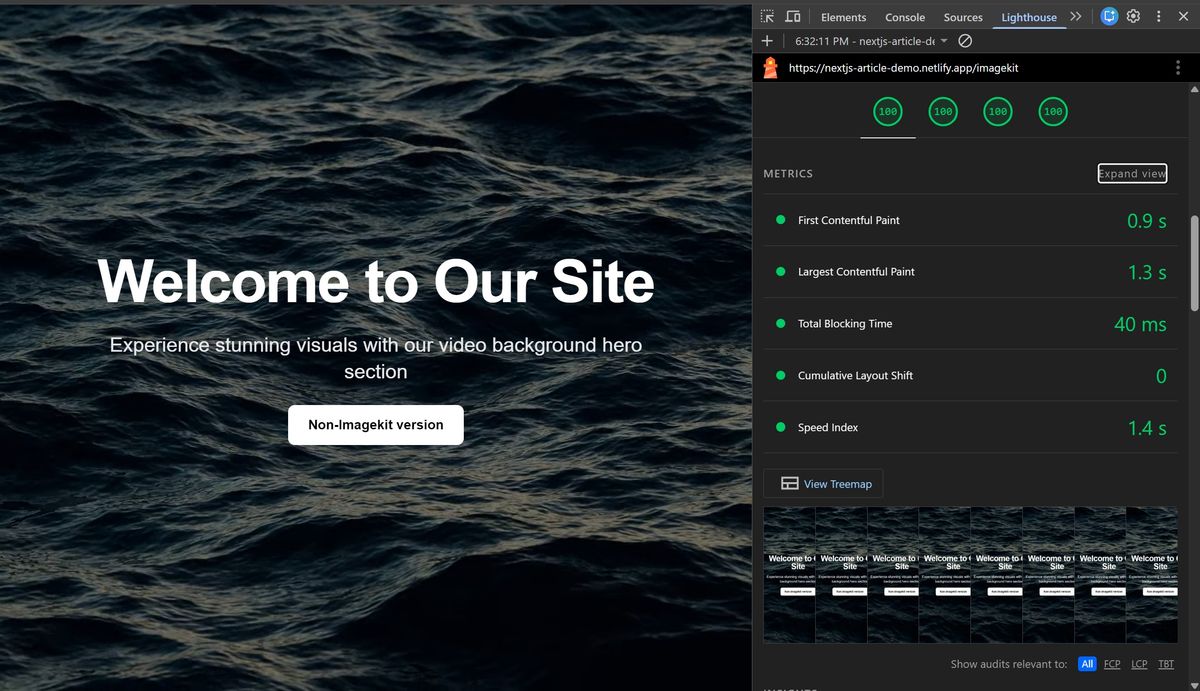
Compare the performance
| Metric | Before | After | Change |
|---|---|---|---|
| Video file size | ~30 MB | ~8 MB | ~73% reduction |
| FCP (First Contentful Paint) | ~1.2s | ~0.9s | 25% faster |
| LCP (Largest Contentful Paint) | ~2.3s | ~1.3s | 43% faster |
Results vary based on source video and network conditions. The file size reduction comes from a combination of resizing, audio removal, and format conversion. Test with your own video to get accurate numbers for your use case.
What ImageKit does under the hood
Automatic compression
ImageKit compresses videos to reduce file size without compromising visual quality. The default quality setting is 50 on a scale of 1-100. You can adjust this globally in the ImageKit dashboard under Optimization, or override it per-URL:
// Use quality 70 instead of the default 50
transformation={[{ width: 1280, quality: 70 }, { raw: 'ac-none' }]}
Automatic format conversion
ImageKit detects which video formats the browser supports by reading the User-Agent request header. Chrome receives VP9/WebM, a more efficient format than H.264. Older versions of Safari, for example, receive MP4 since they doesn't support WebM. The URL stays the same; the delivered format changes per browser.
For the full reference on video params, codecs, and supported formats, see the ImageKit Video Optimization Guide.
Best practices
Use a fallback image
Videos can fail to load due to a slow connection, browser issues, codec problems, or user settings. Always include a poster attribute so users see something instead of a blank screen.
ImageKit can automatically generate a thumbnail from any video. Add /ik-thumbnail.jpg to the video path and pass the URL using your NEXT_PUBLIC_IMAGEKIT_URL_ENDPOINT env variable:
const urlEndpoint = process.env.NEXT_PUBLIC_IMAGEKIT_URL_ENDPOINT!;

<Video
  src="/bg-video.mp4"
  transformation={[{ width: 1280 }, { raw: 'ac-none' }]}
  poster={`${urlEndpoint}/bg-video.mp4/ik-thumbnail.jpg?tr=so-3`}
  autoPlay
  muted
  loop
  playsInline
  preload="none"
  className="absolute inset-0 w-full h-full object-cover"
/>
The so-3 transformation extracts a frame at the 3-second mark, typically past any black opening frames. The poster image shows while the video loads, giving users something to see immediately.
Respect reduced motion preferences
Some users have vestibular disorders, migraines, or motion sensitivity. Autoplay videos can be physically uncomfortable or even nauseating for these users. Most operating systems let users indicate this preference, and you can detect it with the prefers-reduced-motion media query.
When reduced motion is preferred, show the poster image instead of playing the video. The fallback uses next/image to display the ImageKit-generated thumbnail, but Next.js requires remote image domains to be explicitly allowed via remotePatterns. Add ik.imagekit.io to your next.config.ts before this works:
// next.config.ts
import type { NextConfig } from 'next';

const nextConfig: NextConfig = {
  images: {
    remotePatterns: [
      {
        protocol: 'https',
        hostname: 'ik.imagekit.io',
      },
    ],
  },
};

export default nextConfig;
Then the reduced-motion component:
'use client';

import { useEffect, useState } from 'react';
import Image from 'next/image';
import { Video } from '@imagekit/next';

const urlEndpoint = process.env.NEXT_PUBLIC_IMAGEKIT_URL_ENDPOINT!;
const posterUrl = `${urlEndpoint}/bg-video.mp4/ik-thumbnail.jpg?tr=so-3`;

export default function AccessibleVideoBackground() {
  const [prefersReducedMotion, setPrefersReducedMotion] = useState(() => {
    if (typeof window === 'undefined') return false;
    return window.matchMedia('(prefers-reduced-motion: reduce)').matches;
  });

  useEffect(() => {
    const mediaQuery = window.matchMedia('(prefers-reduced-motion: reduce)');
    const handleChange = (e: MediaQueryListEvent) => setPrefersReducedMotion(e.matches);
    mediaQuery.addEventListener('change', handleChange);
    return () => mediaQuery.removeEventListener('change', handleChange);
  }, []);

  return (
    <div className="relative w-full h-screen overflow-hidden">
      {prefersReducedMotion ? (
        <Image
          src={posterUrl}
          alt="Ocean waves background"
          fill
          className="object-cover"
          priority
        />
      ) : (
        <Video
          src="/bg-video.mp4"
          transformation={[{ width: 1280 }, { raw: 'ac-none' }]}
          poster={posterUrl}
          autoPlay
          muted
          loop
          playsInline
          preload="none"
          className="absolute inset-0 w-full h-full object-cover"
        />
      )}
    </div>
  );
}
This small addition makes your site accessible to a much wider audience. For more on how the media query works across operating systems and browsers, see MDN: prefers-reduced-motion.
Conclusion
Background videos require careful handling to avoid performance issues, especially on mobile devices and slower networks. The core fixes are:
- Resize the video to match your actual display size
- Remove the audio track (background videos don't need it)
- Let ImageKit handle format conversion automatically (WebM for Chrome, MP4 for Safari)
- Add a poster image as a fallback using ImageKit's auto-thumbnail feature
- Add
preload="none"to prevent the browser from eagerly downloading video data on page load - Respect
prefers-reduced-motionfor accessibility
The ImageKit SDK handles the delivery side. Upload once, and ImageKit takes care of compression, format conversion, and CDN delivery.
Try this experiment
Open the example repo, then in DevTools select the Network tab, open the throttling dropdown, and select Slow 4G. Reload both pages and compare the load times and video file sizes.
Check the Content-Type response header on the ImageKit video; you'll see video/webm in Chrome, confirming automatic format conversion is working.


