Subtitles do more than translate a video. They make silent-autoplay clips watchable in a feed, let deaf and hard-of-hearing viewers follow along, surface transcripts to search engines, and open your content up to viewers who speak a different language. They're also one of the highest-ROI features you can add to a video - most viewers who see subtitles turn them on and leave them on.
You have an MP4 and you want subtitles on it. There are four real options for that: ship a WebVTT track alongside the video, use an SRT file (which needs converting first), burn the captions into the video pixels with ffmpeg, or reach for the broadcast-adjacent formats (TTML, SSA/ASS) that some pipelines still expect. This post walks through each, then shows the ImageKit Video Player SDK version that collapses the hosted-WebVTT case into a single prop.
What "subtitles" actually are
Subtitles are timed text overlaid on a video. Two axes describe them:
- Format - WebVTT (
.vtt), SRT (.srt), TTML/IMSC (.ttml,.dfxp), or SSA/ASS (.ass). All four encode roughly the same thing: a list of cues with start times, end times, and text. The difference is which players and pipelines accept them, and how much styling and positioning they support. - Delivery - either a separate sidecar file that the player loads and renders on top of the video ("soft-sub"), or pixels baked into the video frame at encode time ("burned-in" or "hardcoded"). Soft-sub is toggleable and translatable; burned-in is permanent and universal.
One more distinction worth naming up front: subtitles translate spoken dialogue for viewers who can hear, captions transcribe dialogue plus non-verbal audio like music, sound effects, and speaker changes for viewers who can't. HTML5's <track> element expresses this with kind="subtitles" vs kind="captions", and the ImageKit Video Player SDK uses the same values.
Option 1: soft-sub via a WebVTT track
The web-native way to attach subtitles is a WebVTT file loaded as <track kind="subtitles">. Browsers render the UI for you - the CC button in the native video controls, the captions themselves, and the language menu when you have more than one track.
A minimal WebVTT file looks like this:
WEBVTT

00:00:00.500 --> 00:00:04.000
Welcome back to the workshop series.

00:00:04.500 --> 00:00:08.200
Today we're going to look at how the compiler
handles inline caching.

00:00:09.000 --> 00:00:12.750
Let's start with a quick recap of last week.
Wire it into a <video> element with a <track> per language:
<video controls>
  <source src="https://example.com/lesson.mp4" type="video/mp4" />
  <track kind="subtitles" src="/media/lesson-en.vtt" srclang="en" label="English" default />
  <track kind="subtitles" src="/media/lesson-es.vtt" srclang="es" label="Spanish" />
  <track kind="captions" src="/media/lesson-en-cc.vtt" srclang="en" label="English (CC)" />
</video>
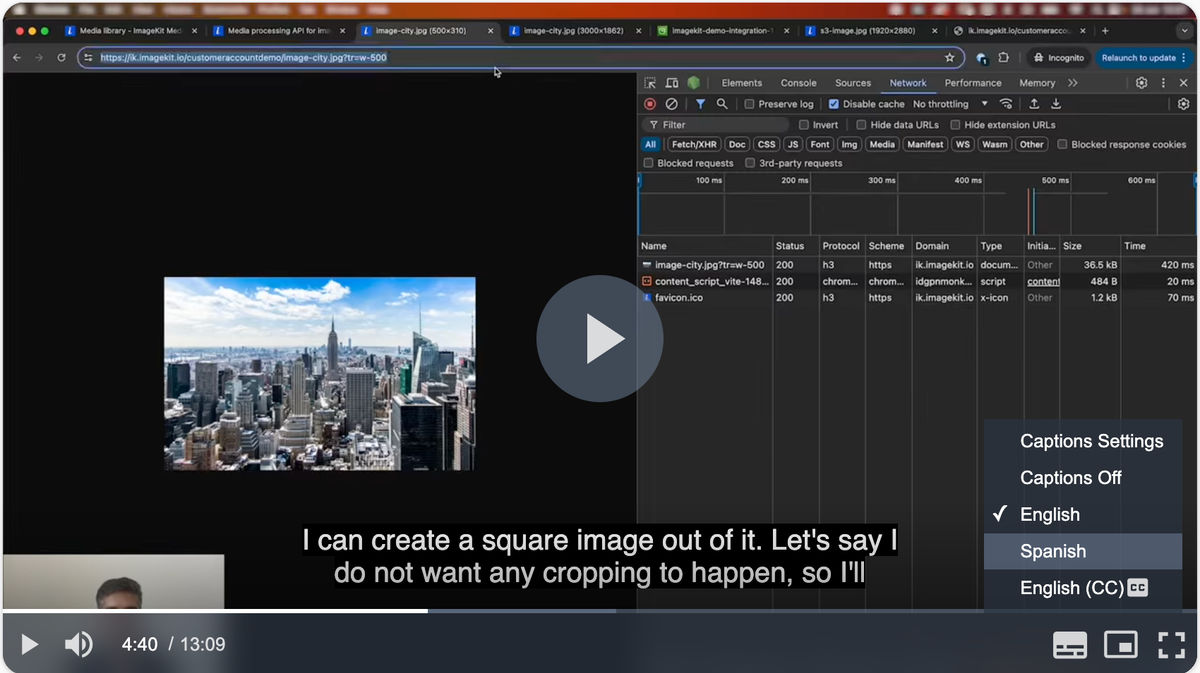
That's the whole thing. The browser reads the first default track, renders it below the video, and adds a CC menu to the controls with all three tracks listed by label. Turning tracks on and off is a native browser control - no JavaScript, no plugin.
Unlike chapters,where browsers parse the data but don't draw a UI, subtitles get a real native UI in every major browser. The <track> element on its own is often enough for the whole feature.
The same markup with a JavaScript player
Devs who already ship a player usually swap the raw <video> for Video.js or hls.js. In both cases the track shape stays identical - only the declaration changes.
Video.js takes an equivalent tracks: array in its config, matching the <track> fields one-for-one:
videojs("my-video", {
  controls: true,
  sources: [{ src: "lesson.mp4", type: "video/mp4" }],
  tracks: [
    { kind: "subtitles", src: "/media/lesson-en.vtt", srclang: "en", label: "English", default: true },
    { kind: "subtitles", src: "/media/lesson-es.vtt", srclang: "es", label: "Spanish" },
  ],
});
hls.js attaches to a plain <video> element and only handles the HLS manifest, so sidecar <track> elements keep working unchanged:
<video controls>
  <track kind="subtitles" src="/media/lesson-en.vtt" srclang="en" label="English" default />
</video>

<script type="module">
  import Hls from "hls.js";
  const video = document.querySelector("video");
  if (Hls.isSupported()) {
    const hls = new Hls();
    hls.loadSource("https://example.com/lesson.m3u8");
    hls.attachMedia(video);
  }
</script>
HLS can also declare subtitle tracks directly in the master playlist with #EXT-X-MEDIA:TYPE=SUBTITLES. When that's how your .m3u8 is packaged, hls.js discovers the tracks automatically and exposes them as hls.subtitleTracks / hls.subtitleTrack. No <track> elements needed, and the browser's native CC menu is populated from the manifest.
Option 2: SRT files and converting to WebVTT
SRT is the older, simpler subtitle format. If you've ever downloaded subtitles for a movie, they were almost certainly .srt. The syntax is similar to WebVTT but with two differences: no WEBVTT header, and timestamps use a comma instead of a period for milliseconds:
1
00:00:00,500 --> 00:00:04,000
Welcome back to the workshop series.

2
00:00:04,500 --> 00:00:08,200
Today we're going to look at how the compiler
handles inline caching.
Browsers do not render .srt in <track>, only WebVTT. Almost every transcription workflow you might have, like Premiere Pro's Speech to Text, Descript, Loom's transcript download, Otter, Rev, exports .srt by default. So the practical workflow is: get the SRT, convert to WebVTT, then ship the WebVTT.
ffmpeg does the conversion in one line:
ffmpeg -i lesson.srt lesson.vttIf you're batch-converting a folder, wrap it in a shell loop:
for f in *.srt; do ffmpeg -i "$f" "${f%.srt}.vtt"; doneThe output is a .vtt you can drop into an existing <track> element without any other changes.
Option 3: burned-in captions with ffmpeg
Burning subtitles into the video means the captions become part of the pixel data.
That sounds worse than soft-sub, and for a real player it is. But there are contexts where soft-sub isn't an option: muted-autoplay hero videos on a landing page, social clips exported for platforms whose player ignores tracks, or background loops on a marketing page. If the viewer will never see your player's controls, burning the captions in is the only way they'll read the text.
ffmpeg takes an SRT or WebVTT file as an input filter and re-encodes the video with the captions rendered on top:
ffmpeg -i lesson.mp4 -vf "subtitles=lesson.srt" lesson-with-subs.mp4For a WebVTT source:
ffmpeg -i lesson.mp4 -vf "subtitles=lesson.vtt" lesson-with-subs.mp4You can pass a force_style string to control the font, size, colour, and outline of the burned-in text:
ffmpeg -i lesson.mp4 \
  -vf "subtitles=lesson.srt:force_style='Fontname=Inter,Fontsize=22,PrimaryColour=&H00FFFFFF,OutlineColour=&H80000000,BorderStyle=3'" \
  lesson-with-subs.mp4
Two costs to keep in mind. First, this is a real re-encode - the whole video runs through the encoder again, which takes time and burns CPU. Second, the output is a single-language artifact. If you need English and Spanish, you produce and store two files.
Rule of thumb: use burn-in for one-off exports where the display context can't render tracks (silent social clips, hero backgrounds, embedded contexts you don't control). For anything shown in a real player, keep subtitles soft.
Option 4: TTML/IMSC and SSA/ASS
Two more formats occasionally show up.
TTML (Timed Text Markup Language) and its constrained profile IMSC are XML-based and used heavily in broadcast, DASH, and some HLS pipelines. Apple's fragmented MP4 subtitle support (iOS/tvOS) uses IMSC-in-MP4. If a video pipeline hands you a .ttml or .dfxp file, that's what it is. Browsers don't render TTML natively in <video> - convert to WebVTT with a tool like ttml2vtt or a converter built into your player toolchain.
SSA/ASS (Advanced Substation Alpha) is a rich, styled subtitle format most closely associated with anime fansubs. It supports positioned text, per-line fonts, colors, karaoke effects, and light animation. Browsers don't render .ass in <video> either. If you're consuming it, convert to WebVTT accepting that most styling will be lost or burn it in with ffmpeg, which reads .ass natively:
ffmpeg -i lesson.mp4 -vf "ass=lesson.ass" lesson-with-subs.mp4For a normal web workflow you'll almost never encounter these; when you do, the answer is "convert to WebVTT."
Why this is more than most teams need
Producing subtitles is where the real cost sits. The formats are stable; the delivery is a well-worn path. What actually eats the time is:
- Transcribing the video. Either you type it out, pay a service to do it, or run automatic speech recognition and hand-correct.
- Translating for multi-language. Machine translation for subtitles is a real product category; even so, the output usually gets a human review pass before shipping.
- Keeping tracks in sync with the video. When someone re-encodes, replaces, or trims the video, the
.vttneeds to travel with it - including the URL that the<track>element points at. - Delivering the right format per surface. WebVTT for the browser, IMSC for iOS-native paths, a burned-in export for a muted social clip.
- Timing the cues. Cue length and rate of change matter for readability. The default of "everything the transcriber typed on one line" reads badly.
For a marketing site with a single feature video or a docs site with the occasional tutorial, that stack is more infrastructure than the feature warrants. The next section shows how the ImageKit Video Player SDK collapses the hosted-WebVTT case into a single prop.
Add subtitles with ImageKit
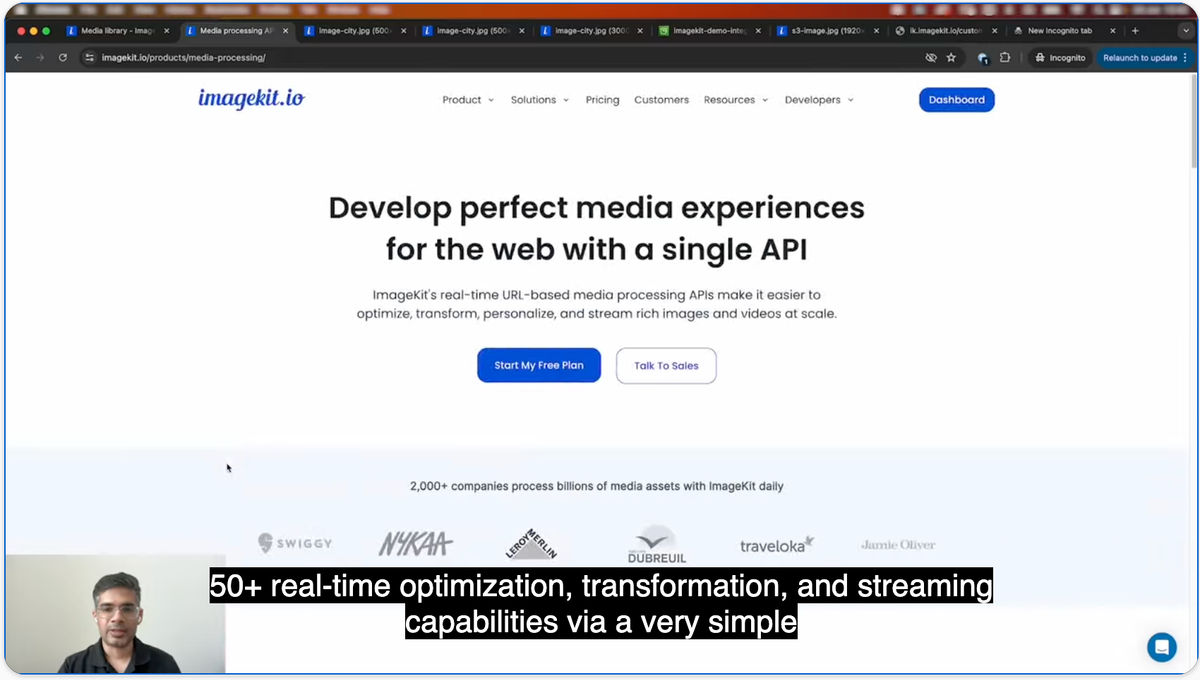
ImageKit is a real-time media optimization, transformation, and management platform that natively integrates with popular cloud storage like AWS S3, Google Cloud Storage, and Azure Blob Storage. There are two ways it helps with subtitles: host your existing .vtt files behind its CDN and keep your current player, or add its Video Player SDK for a built-in CC menu and optional AI transcription.
Skip the SDK: use ImageKit as your CDN
If your existing player (raw <video>, Video.js, hls.js) already does what you want, host the MP4 and the .vtt on ImageKit and change nothing else. Cache-miss latency on a subtitle file blocks captions from appearing on first play, so putting the .vtt at the same edge as the video bytes is a real win even for a tiny file:
<video controls>
  <source src="https://ik.imagekit.io/<your-imagekit-id>/lesson.mp4" type="video/mp4" />
  <track
    kind="subtitles"
    src="https://ik.imagekit.io/<your-imagekit-id>/lesson-en.vtt"
    srclang="en"
    label="English"
    default
  />
</video>
Same markup as Option 1, ImageKit URLs instead of your own. Same upgrade also works under Video.js or hls.js by pointing their src and tracks: config at the same ImageKit URLs. The player SDK below is only necessary if you also want the built-in CC menu, AI transcription, or translated tracks.
Use the Video Player SDK
Install the SDK in a React 18+ project:
npm install @imagekit/video-playerThe ImageKit Video Player SDK is currently in beta. Test thoroughly before using it in production, and pin to a specific version rather than latest.
Upload each .vtt file to your ImageKit media library (or attach the bucket that already holds them), and pass a textTracks array on the source:
"use client";

import { IKVideoPlayer } from "@imagekit/video-player/react";
import "@imagekit/video-player/styles.css";

const ikOptions = {
  imagekitId: "<your-imagekit-id>",
};

const source = {
  src: "https://ik.imagekit.io/<your-imagekit-id>/lesson.mp4",
  textTracks: [
    {
      src: "https://ik.imagekit.io/<your-imagekit-id>/lesson-en.vtt",
      kind: "subtitles",
      srclang: "en",
      label: "English",
      default: true,
    },
    {
      src: "https://ik.imagekit.io/<your-imagekit-id>/lesson-es.vtt",
      kind: "subtitles",
      srclang: "es",
      label: "Spanish",
    },
    {
      src: "https://ik.imagekit.io/<your-imagekit-id>/lesson-en-cc.vtt",
      kind: "captions",
      srclang: "en",
      label: "English (CC)",
    },
  ],
};

export default function LessonPlayer() {
  return <IKVideoPlayer ikOptions={ikOptions} source={source} />;
}
Each track object accepts the same fields you already know from the <track> element: src, kind ('subtitles' or 'captions'), srclang, label, and default. The CC menu shows up in the control bar, the default track loads on mount, and viewers can switch tracks without any extra code. The companion subtitles-mp4-demo wires exactly this snippet into a single-page Next.js app with the three .vtt files hosted locally for zero-setup convenience.
AI-generated subtitles
If you'd rather skip the transcription step entirely, autoGenerate: true on a track hands the job to ImageKit's AI transcription - with optional word-level highlighting and automatic translations into other languages. The deep-dive on that path lives in How to add AI subtitles and chapters to videos on your Next.js site with ImageKit, including the highlightWords, maxChars, and translations options.
AI transcription is a paid extension: 2 extension units per minute of source video, billed once for the bundle of subtitles and chapters (not per feature). Each additional language translation costs 2 units per minute for that language's subtitles and chapters. See extension unit pricing for details.
You can also mix modes - one auto-generated track for quick coverage, one hand-authored WebVTT track for the primary language, all in the same textTracks array.
Which approach to use
- WebVTT via
<track>- you're building for the web and want the native CC UI without pulling in any library or SDK. - SRT + one-line ffmpeg conversion - your transcription tool exports SRT (nearly all of them do) and you want to ship WebVTT.
- Burned-in with ffmpeg - the video is going into a context that ignores tracks: muted social clips, hero backgrounds, third-party embeds you don't control.
- TTML/IMSC or SSA/ASS - an upstream pipeline is handing you one of these. Convert to WebVTT for the web; burn to pixels if you need to preserve rich styling.
- ImageKit Video Player SDK - you want the CC menu, multi-language switching, and the option to swap in AI-generated tracks later without changing the integration.
Conclusion
Subtitles have a small format surface and a large production surface. Whichever route you pick, the source of truth should be a .vtt or an .srt. The player is where the choices matter. The native <video> element and a <track> per language is enough for a static page. While a JavaScript player pays off when you want the CC menu to match your brand or you want AI-generated tracks.
For richer video experiences on the same ImageKit player, see How to add chapters to an MP4 video.
Sign up for a free ImageKit account and try subtitles on a video you already have.